
The last work on Chapter 29 was back in January 2024 - 16 months ago! The reason for the hiatus, is i wanted to get the panel riveted in position before gluing on the air vents.
There is actually a warning on Page 29-22:
.png)
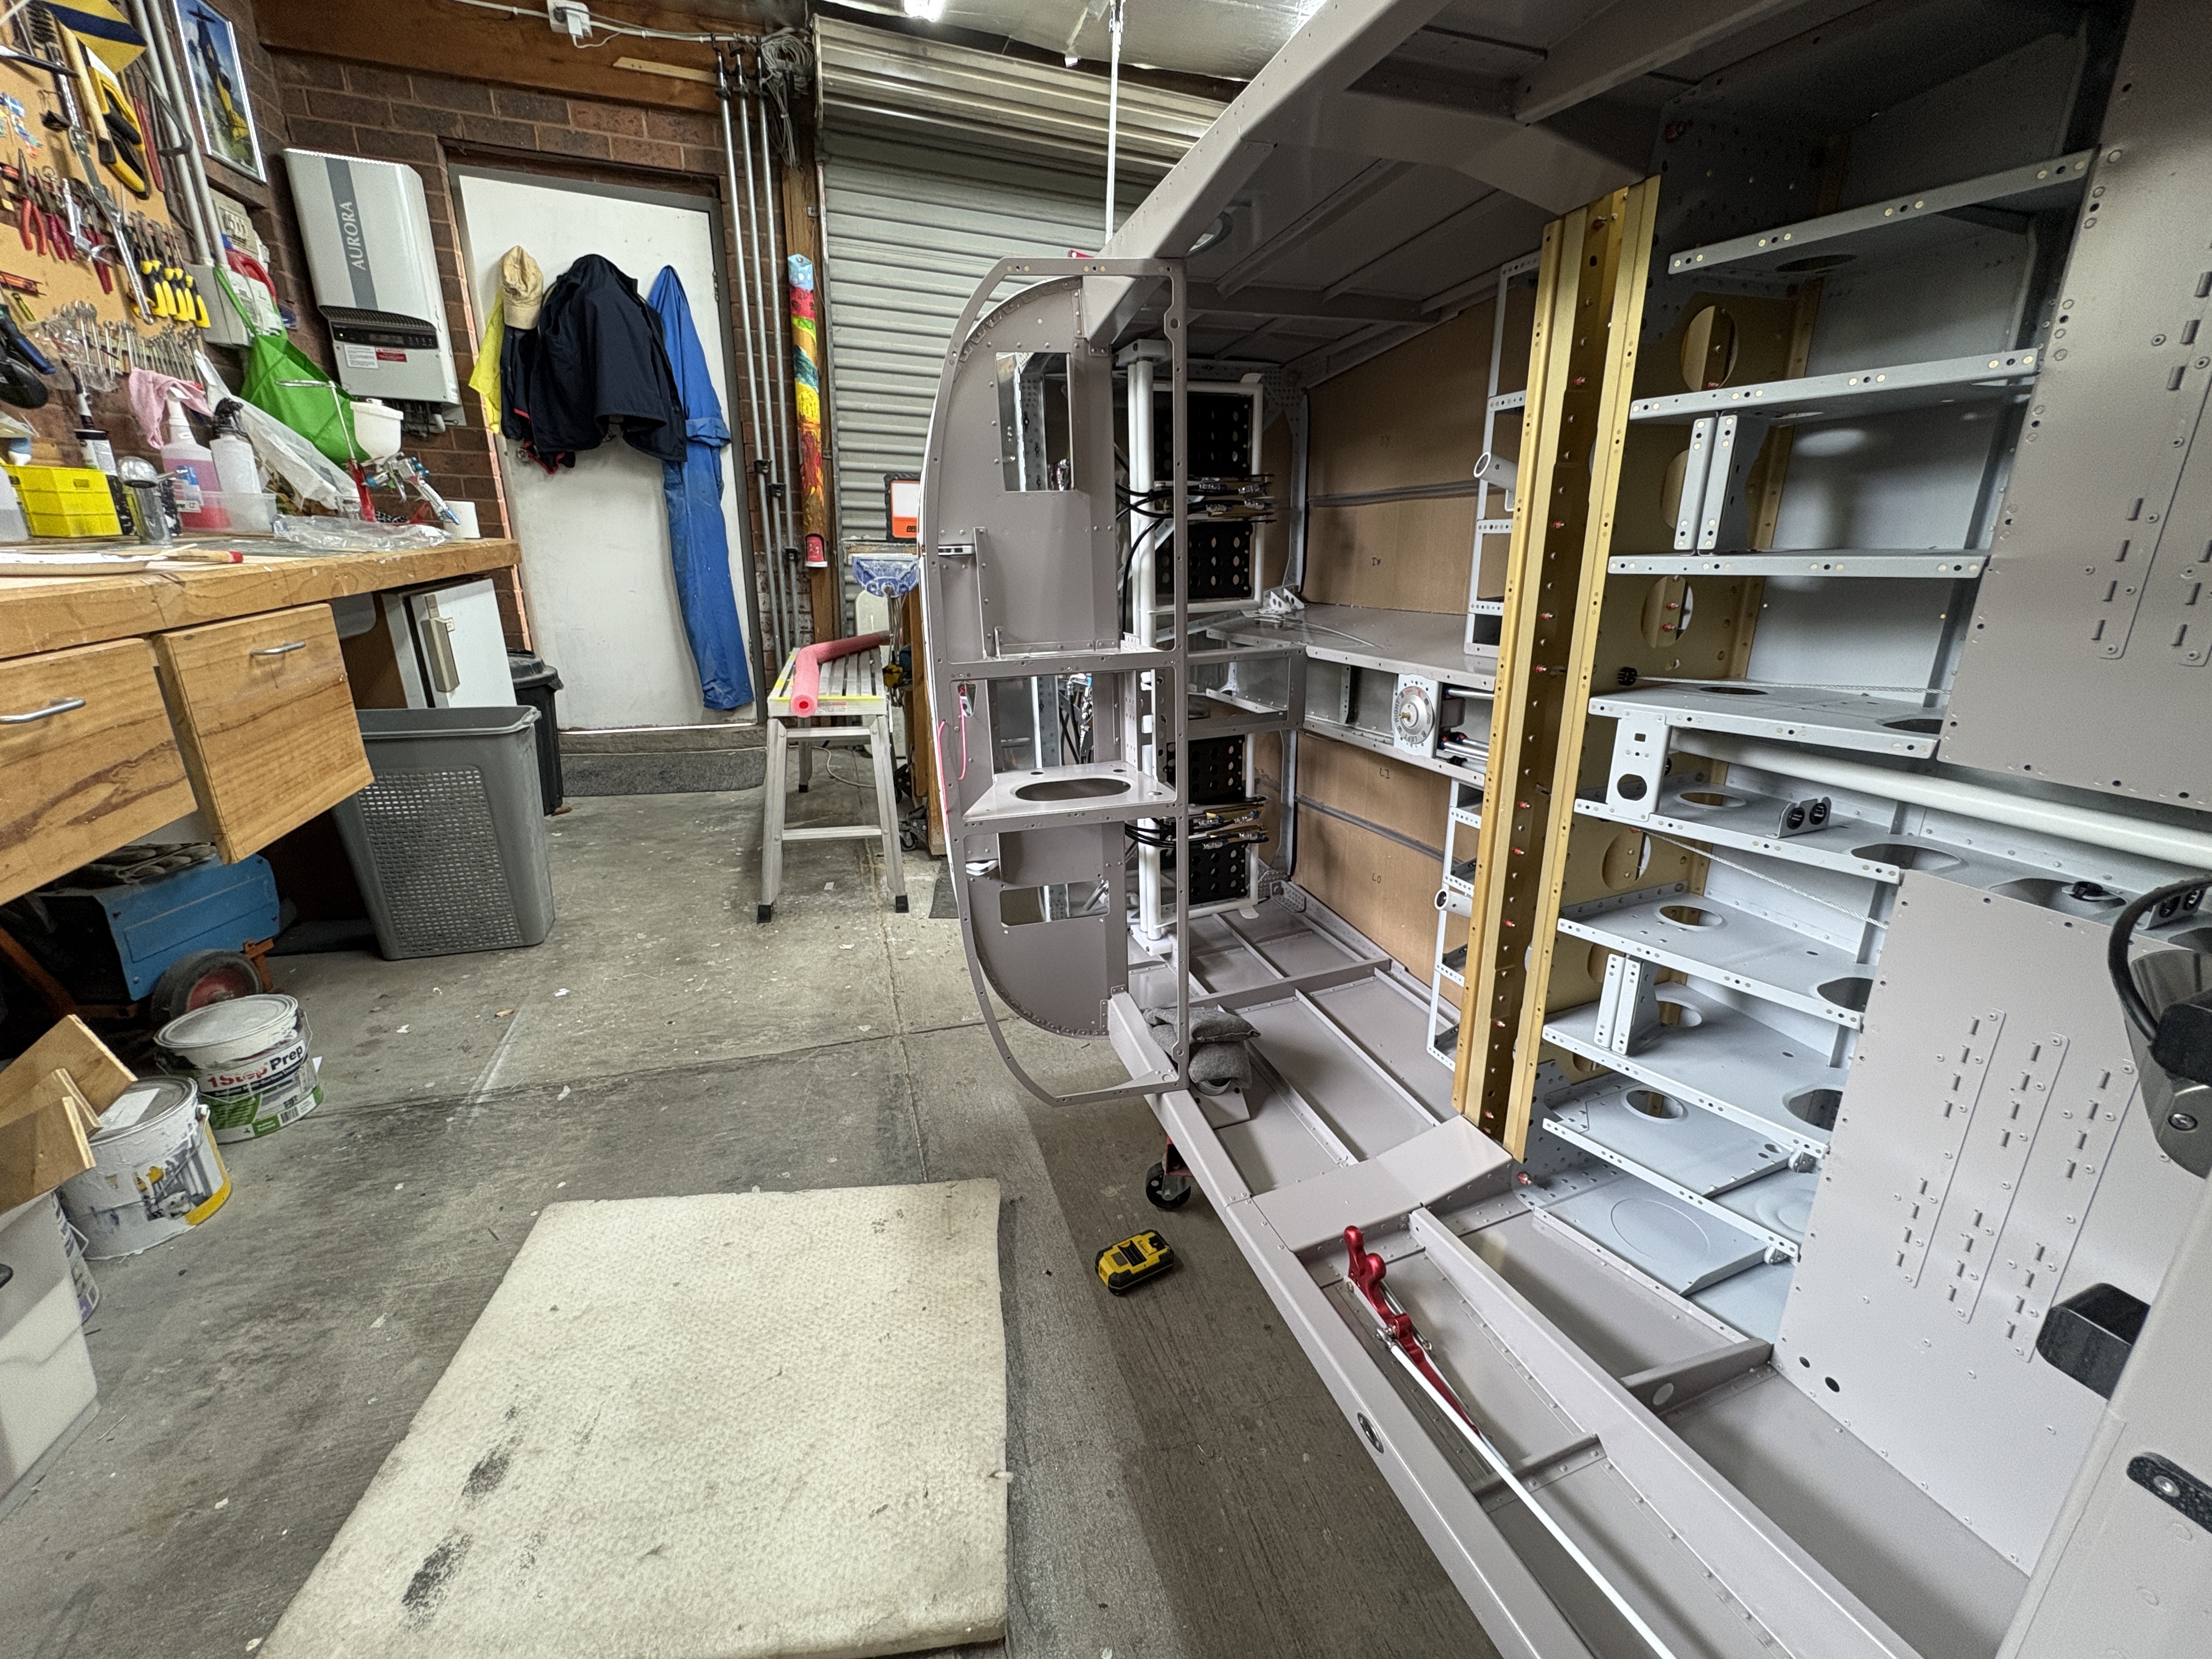
So, now section 35 is done, and i was at a bit of a loose end waiting for my engine to arrive, i thought it was time to crack on.
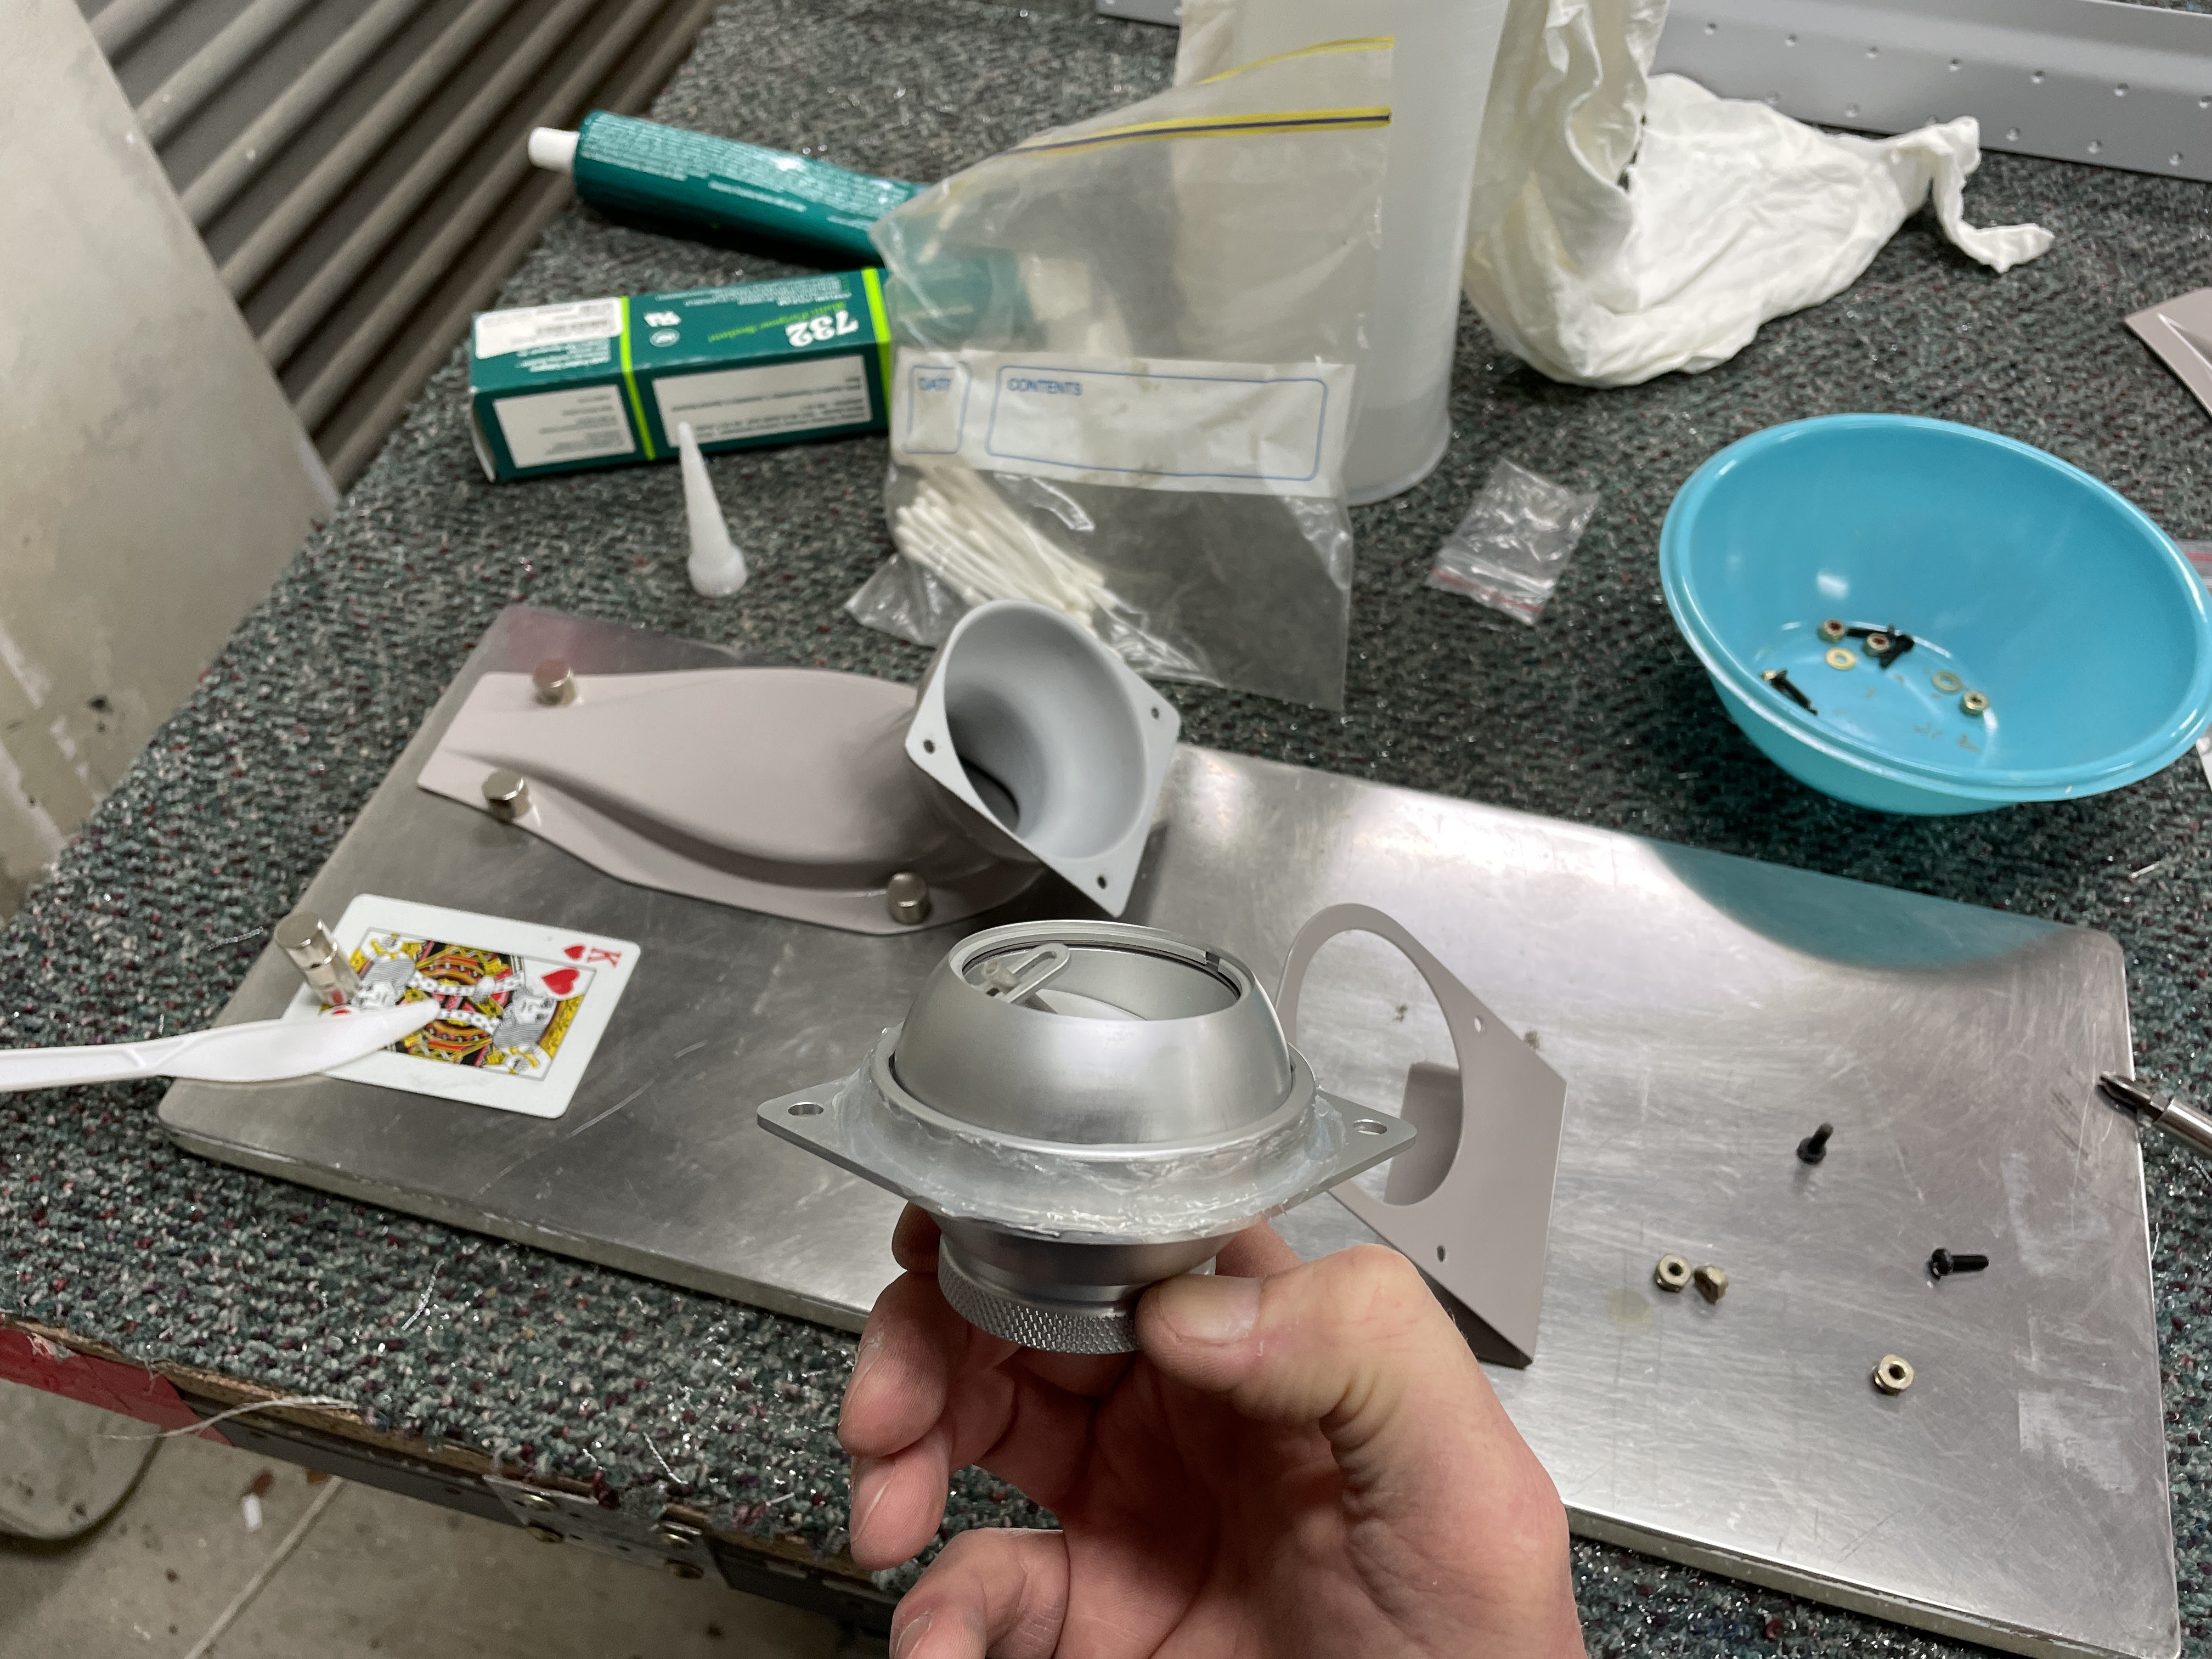
First up was to assemble the vents. I did this by using magnets and holding them flat on my backrivet plate. Clear silicone was used to seal them up, then they were bolted together. I used some nice oxide screws and washers instead of the ones called out for in the plans.


 |
| I had to make sure to keep these magnets seperated - they fly across the floor at great speed, smash into each other, and end up in 1000 bits. |

 |
| PPPPP - one of those P's is for Proseal. |
I was able to rotate the fuselage on its side, then the vents were held in place with magnets, gravity and some shot bags to dry.


 |
| Old Faithful has made a comeback! |


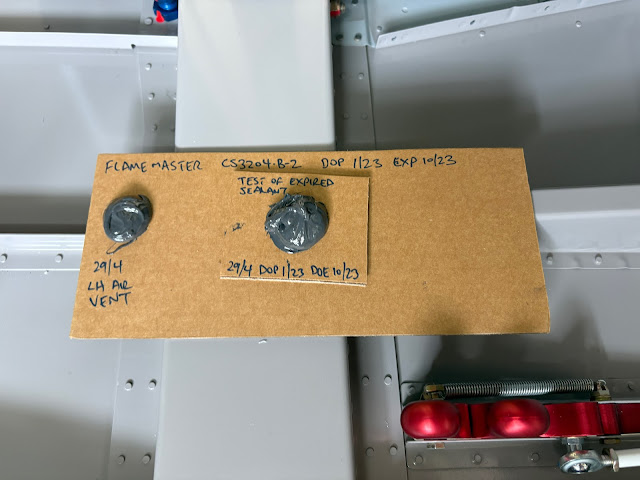
Since my sealant was out of date, i made up some test peices to keep a record of the batch used, and also as a coupon to make sure the sealant was cured.
I then did the same thing to the other side, a week or so later.

 |
| This was my original test coupon board! |
I then did the same thing to the other side, a week or so later.


While i had some extra sealant mixed and left over, I squeezed it into some of the little nooks and crannies around the fuselage sides, where there were little gaps which could let dust, water, or smoke oil in! These are a little hard to show in photos, but there were a few at the lower edges of the side skins, as well as where the overlaps of the side skins occured when joining the tailcone.


No comments:
Post a Comment