Search Build Log

Showing posts with label Fibreglass. Show all posts

18 Feb 2025

38-31: Canopy Fibreglass Fairing - Round 10 - Continuing on and finally completing the fairing!

The show must go on!

I learned early on in this build, where i encounter a stuff-up, it's best to go away, do some research and think about what the fix should be. From reading on the forums, a product called Weld-On 3 is commonly used to glue canopy cracks back together, so i ordered some of this. It is new year's eve, so I probably can't get my hands on it for a week or so anyway. 

So - time to crack on! 


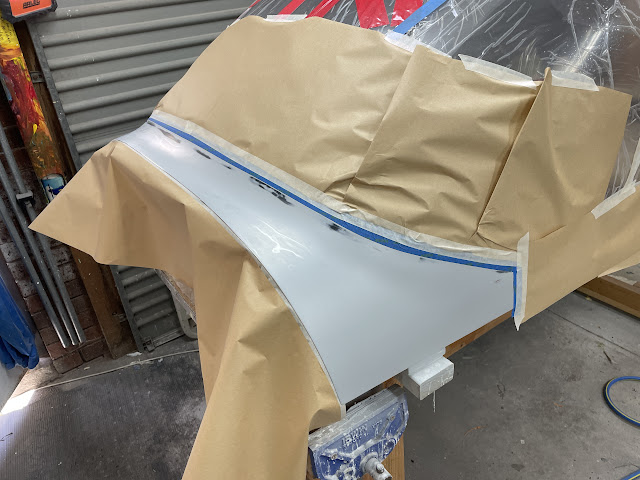
Since all the tape had been removed from the fairing, and the fairing needed at least one more coat of paint, i applied some 3M fine line tape along the fairing edge, with some electrical tape on top. THis should give a very crisp edge. Another coat of paint was sprayed on (this was the 5th coat) - i am really getting good as masking these days. 

Fine line tape added along the faiting edge.


Electical tape added over the top, and a 5th coat of paint sprayed on.

Not many pin holes left - it's looking pretty good. 

Spray Paint On / Sand it off

The 5th coat of primer was wet sanded using 400 grit. There seem to be a few pin holes still left, but there is no way i am hitting them with blade putty now! So a 6th coat of primer was sprayed on thickly. This was then wet sanded using 600 and 800 grit soft sanding sponges. All the pin holes are now gone, and the finish looks awesome. There are a few scratches where something got under the sponge, as well as a couple of areas where i've sanded some paint off ot the underlying surface. However, you have to make a decision at some point that you are finished - fibregalss work will go on forever otherwise. Plus, there couldn't be a 7th coat of primer without waiting a few weeks to get some more EkoPoxy from Stewart Systems in the states!

5th coat of primer sanded back wet using 400 grit.


She's got curves in all the right places.

There can't be a 7th coat of primer - because i ran out!

6th and Last coat of primer applied

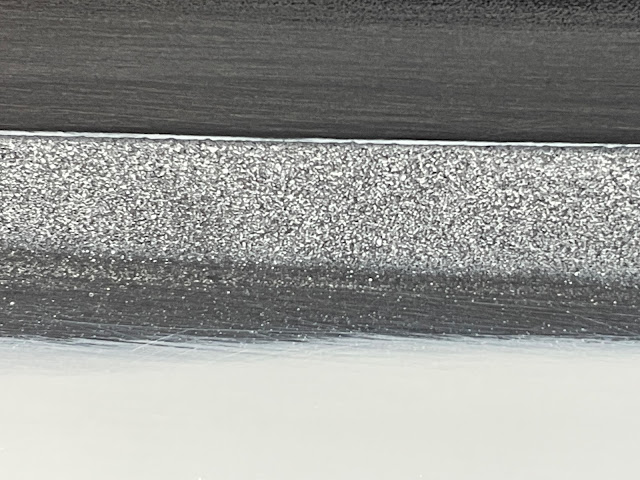
The orange peel is because i really put it on thick.


Oh the glory it feels good to be done

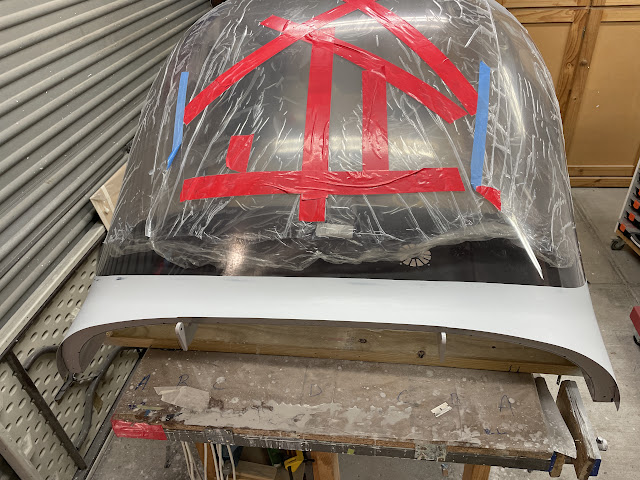
Here are some glrory shots!


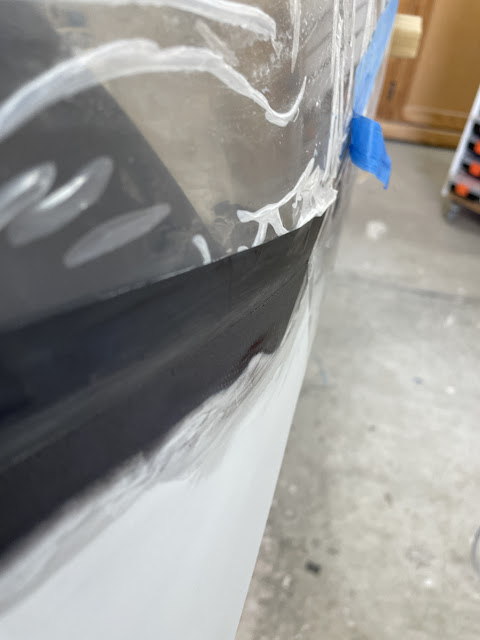
Here are some shots of what the fairing looks like from the inside - note that the canopy clips can be seen - thankfully these will be hidden by my glareshield cover, but for anyone following, consider painting these black (along with the canopy glass under them), before installation. 
I am very happy with the definition of this line.


Here you can see the canopy clip showing - i would paint it black along with teh canopy glass underneath next time.

Gotta have helpers!

The canopy was covered over using GladWrap held on with tape - the tape applied to the painted surfaces, not the canopy glass, as it may end up being on there a while. 

Moving on! 

14 Feb 2025

38-31: Canopy Fibreglass Fairing - Round 9 - Be Careful what you use on the Canopy Fairing

Heartbreak

Finding a canopy crack on Christmas Eve was the worst thing to happen to me in the whole building process. It was truly heartbreaking. 

The cracks look like they are internal to the canopy glass, and eminate from the surface of the countersink. I can't feel them on the surface of the canopy at all. they are very short (that is a #6 screw for reference). 


Seeking Assistance


Yep.

The Cuplrit

Here is a nice photo showing how i applied some blade putty in the corner of the fairing on the left hand side, in order to fill a low spot (as it was easier than mixing up micro and resin). 


I have used this product on a few fibreglass parts before and it works great - fills pinholes very well, dries fast and sands easily. However, if i had checked the MSDS i would have realised it contained Toulene! What a stupid thing to do. 


Testing that this was the cause

On the forum chat about this issue, one of the possible causes could have been tightening the screw too hard in that corner. So i decided to do some testing to see. 

I had a piece of spare canopy left over, with a countersunk hole already in the corner. So i tightened a screw and nut in that hole and applied some blade putty adjacent to the hole, at a similar distance to the location on the canopy. These were the results:

This was how it looked once the blade putty was applied. No initial reaction.

However, leaving it for a few hours, it looked like this.


This is on the screw head (countersink) side

This is on the inside.


These cracks seem very similar to what i am seeing on the corner of the canopy, so i think the conclusions of Scott McDaniels are correct - this is chemically induced crazing!! 

I am going to sit on this for a bit, and continue to work on the fairing to completion. I will then, once i've calmed down a bit, see if i can wick some Weld On 3 into the cracks... 

38-31: Canopy Fibreglass Fairing - Round 8 - Chipped Edge Repair / Christmas Eve Heartbreak

Reapplying Micro

To repair the chipped edges, i decided to add 2 more layers of tape, and used the tips of my fingers to sand the edge (including the chipped edges) back to the surface, right next to the tape, to give some tooth and thickness for the repair micro to adhere to. 

Some black micro was then mixed up and applied along the edge. Once applied, i removed the top layer of tape, so i ended up with micro which was 2 tape layers thick, but with only one piece of tape on the canopy. This was to make sure that no further chipping was going to occur when the tapes were removed, due to even tapes and bridging of micro. 

The edge was sanded back below the level of tape.

The edge was finger sanded back next to the tape.

The next (and hopefully last) round of black micro

The top tape was removed, leaving a thickness of micro equal to 2 tape thicknesses, but with only one bit of tape left on the canopy.


Sanding it back off again!

Once the micro was cured, i used 240 grit to gently sand the micro edge back down until it was level with the single bit of tape on the canopy. This left a layer of micro, equal to only 1 tape thickness. 

I then applied a second layer of tape, and sprayed a couple of thick coats of primer. This idea being here is that i can sand this primer down to the layer of the top tape, and i should be left with a single tape thickness of micro, with a single tape thickness of primer on top! 

Here you can see the primer seeping down into the pinholes in the micro along the edge.


Once the primer was dry, it was sanded back using 400 grit. 

After sanding back to 400 grit, you can see how many pinholes along the edge the primer was able to fill!

Removing the Tape 

Since the aim here was to repair the chips in the edge, i removed all the tape to check how the edge looked. It looked great...

Then, i found some canopy crazing adjacent to the first fastener.... On Christmas Eve too. Bloody hell.