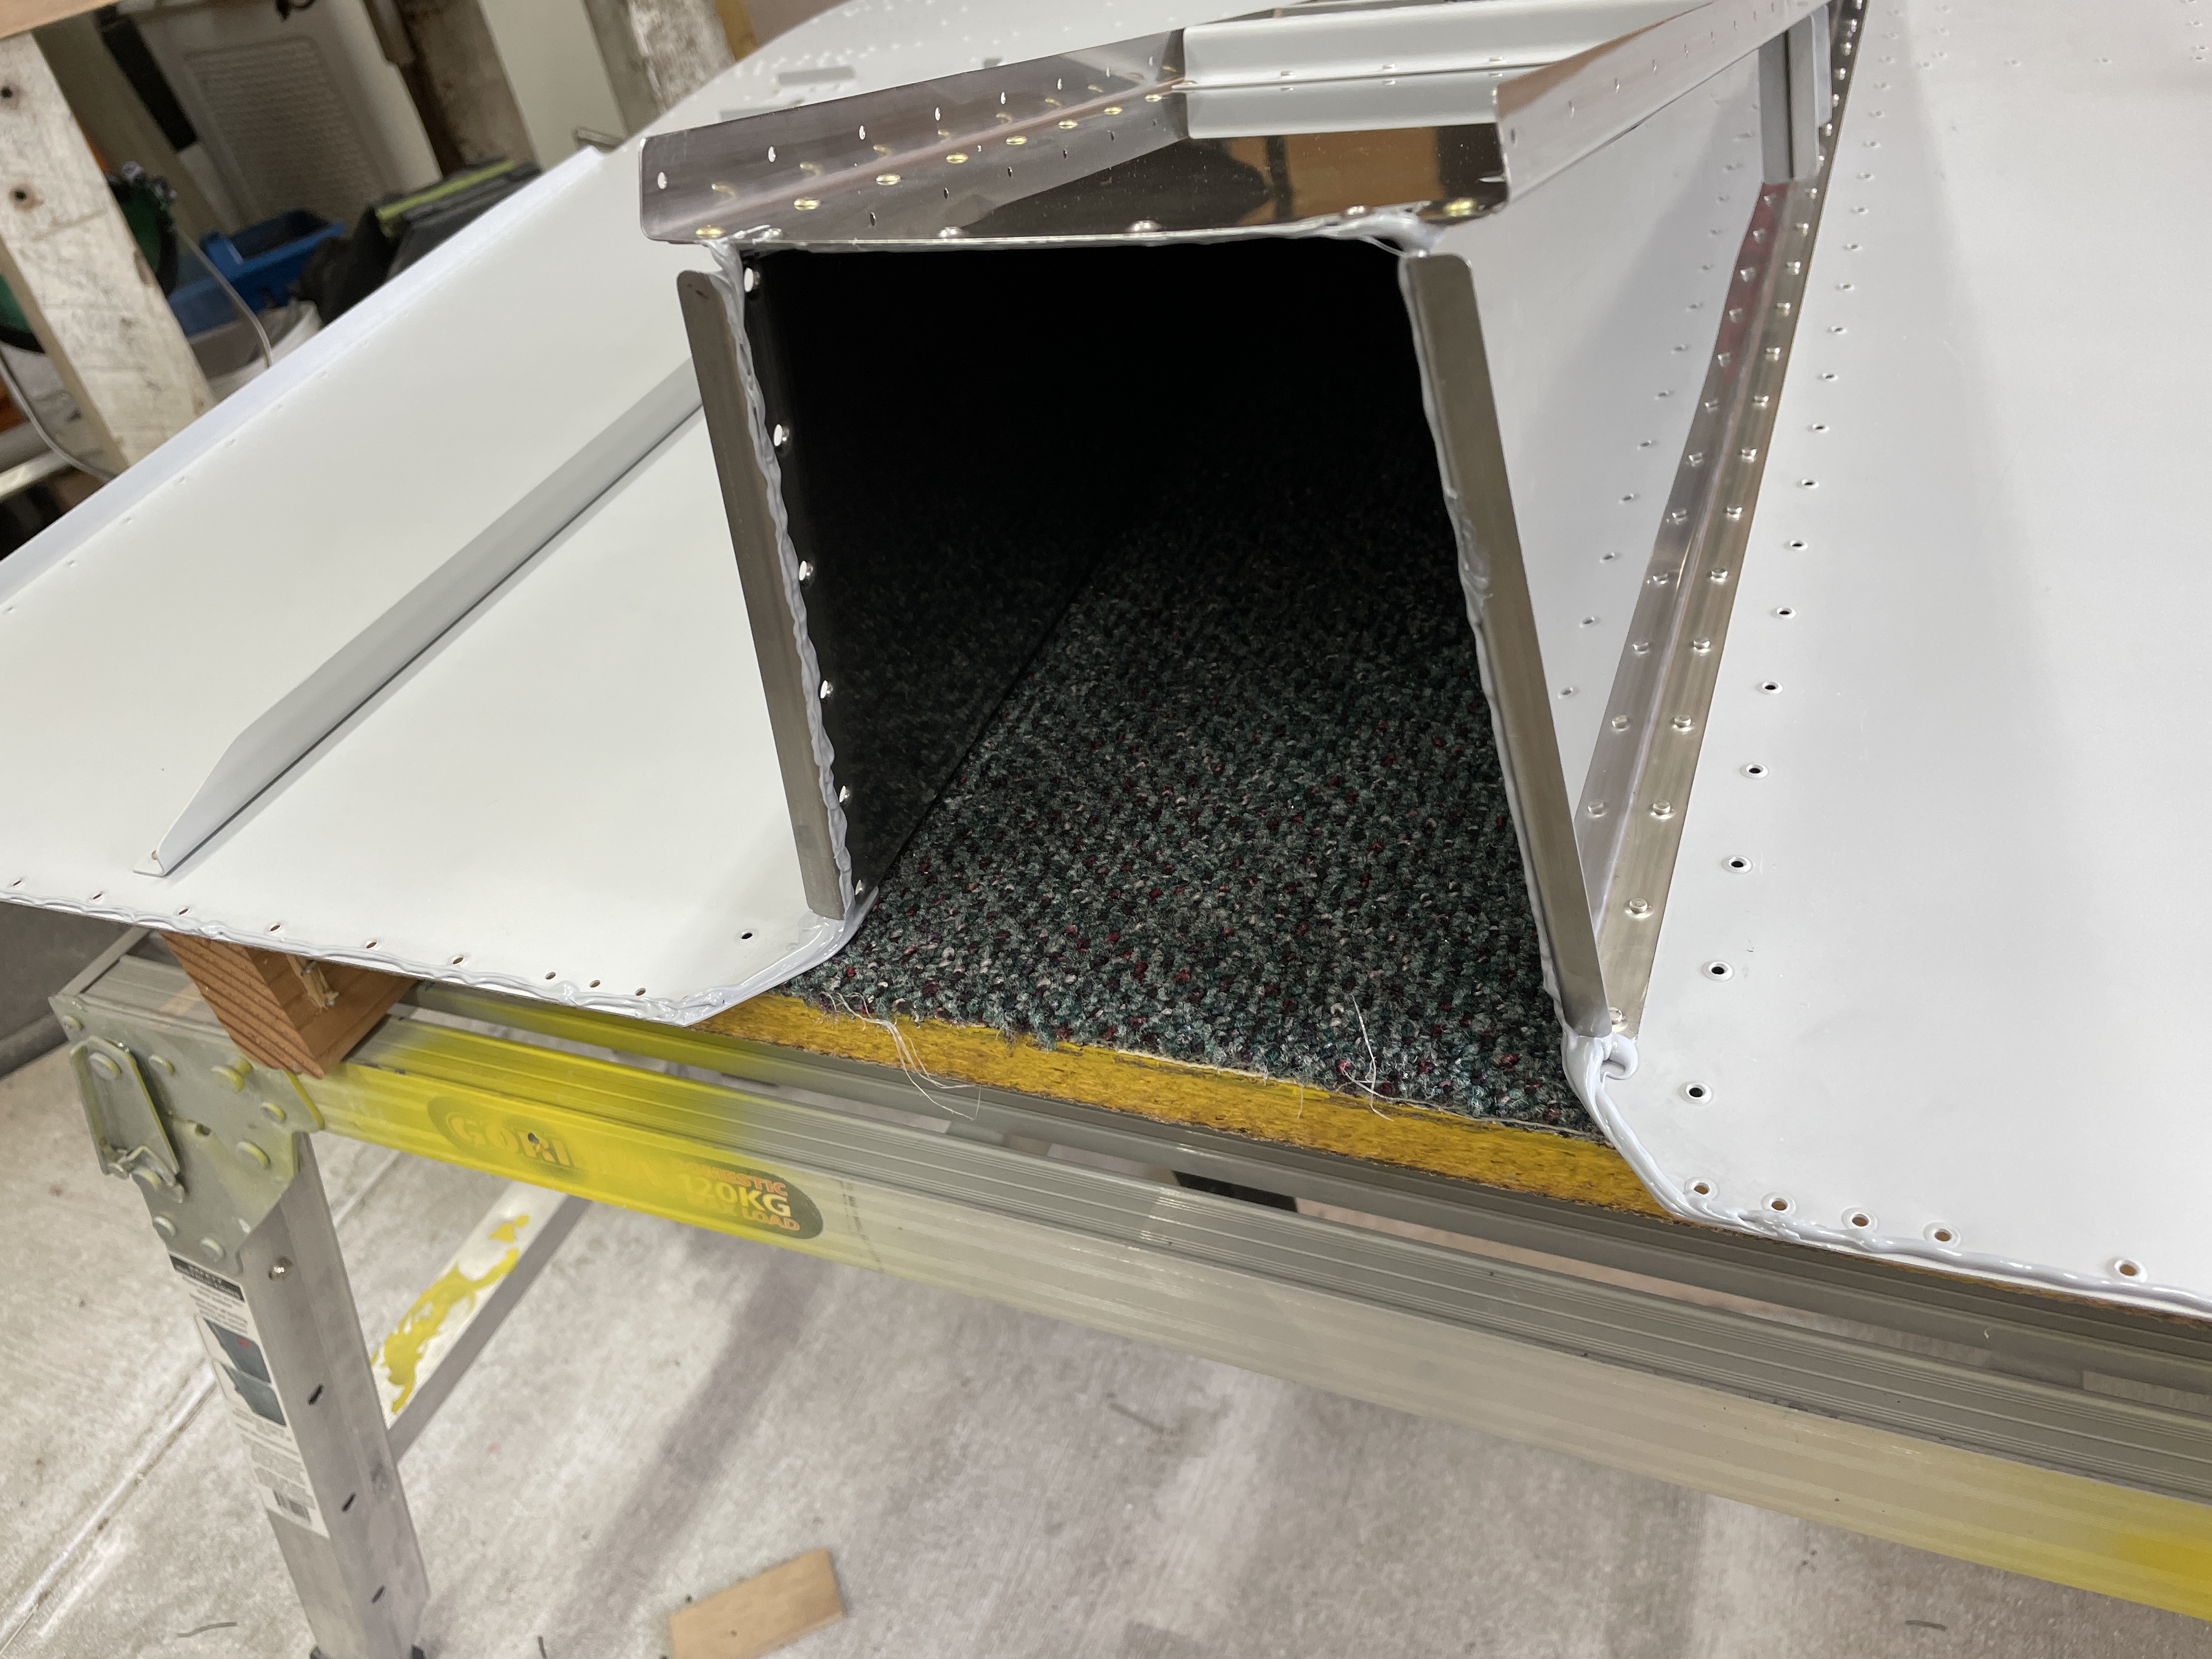
Next up was to attach the bottom skins to the previously completed firewall assembly, including using Firebarrier 2000+ on all the joints. The parts were joined together with clecos, and the sealant was left to cure before the riveting took place.
 |
| Sealant applied along any edges where gas could travel from the firewall into the cabin. |
 |
| The plans call out pull rivets on the sides of the curled flanges, but solid rivets on the top. I ended up using pulled rivets on the top as well - as i was on my own and could not rivet these by myself. |
 |
| Made sure to seal all the gaps up. |
 |
| The transition between the side and top curled flanges was a good leak point, so liberal sealant was used. I also covered the tails of the pulled rivets in case they leaked. |
 |
| I placed a fillet along the inside corner as some extra insurance. |
Next up, i riveted the cover bases to the lower skins and the skin stiffner. I stood the assembly up, placed rivets in all the holes and covered them with backrivet tape. I then laid the assembly down and back riveted these. I also riveted on the cowl attach bar, but realised it went over the bottom skins and that i had not primed in this area. So cleaned, scuffed and primed the skins where the bar will go.
 |
| Cover bases were backriveted to the bottom skins, |
 |
| Like an operating theatre! |
 |
| Bottom bar installed with primer in between the parts. |
OP62 - EXP119 Engine MOD
OP62 is the plans document which covers the installation of the EXP119 engine from Lycoming, and there are a couple of changes the plans request for Chapter 28. The first was the modification of the lower cowl attach plates. Being unsure at this stage if i will install this engine, i elected not to cut down these plates and riveted them on at their original size. I can always trim them later on with a Dremel.
The plates were primed with zinc chromate primer, then painted with the same black engine enamel as the exhaust hangers, for increased resistance to fuel and oils.
 |
| Nutplates were added later - i had to order more, as i used them on the tunnel sides (below) and ran out. |
The other change in Chapter 28, is the addition of some nutplates. These are added to the line of rivets which attach tunnel sides to the lower skins. I elected to complete these at this time, as if i decided to do it later it would be much more difficult. If i decide not to use the EXP-119 engine, i can just screw some pan head screws into these holes.
These were attached along with the tunnel side to bottom skin rivets. The plans call out -3.5 rivets, however these were too short. I set a whole line of them but didn't like the heads, so drilled them out and replaced them with -4 rivets. I used -4.5 rivets on the nutplates attach holes.
To add the nutplates, i used a nutplate of the correct size, screwed a -8 screw into it, and cut off the head of the screw with the dremel. I then used this as a nutplate jig to drill the nutplate attach holes.
The only issue with this plan was that i had dimpled the holes in this area. I would recommend anyone wanting to do this step, to plan ahead and not dimple the tunnel sides, nor the bottom skin at the nutplate locations called out in the OP62 plans. As it turned out, drilling to the screw hole size removed 95% of each dimple - i filed the rest down a little so the nutplates would sit flat.
 |
| I used the rubber tube trick to make sure the nutplate ears sat down flush. |
 |
| This is what the rivet looks like after a couple of hit to set the rivet. The tube is then removed, and the rivet set completed. |
 |
| The completed nutplate. |
The most forward nutplate pictured, needed to be installed using a gun and the bar, as i could not backrivet this like the rest (due to the weldment pictured).
 |
| Tunnel sides riveted including OP62 nutplates - do not dimple these holes in the tunnel sides and the bottom skin if you are going to install these nutplates. |
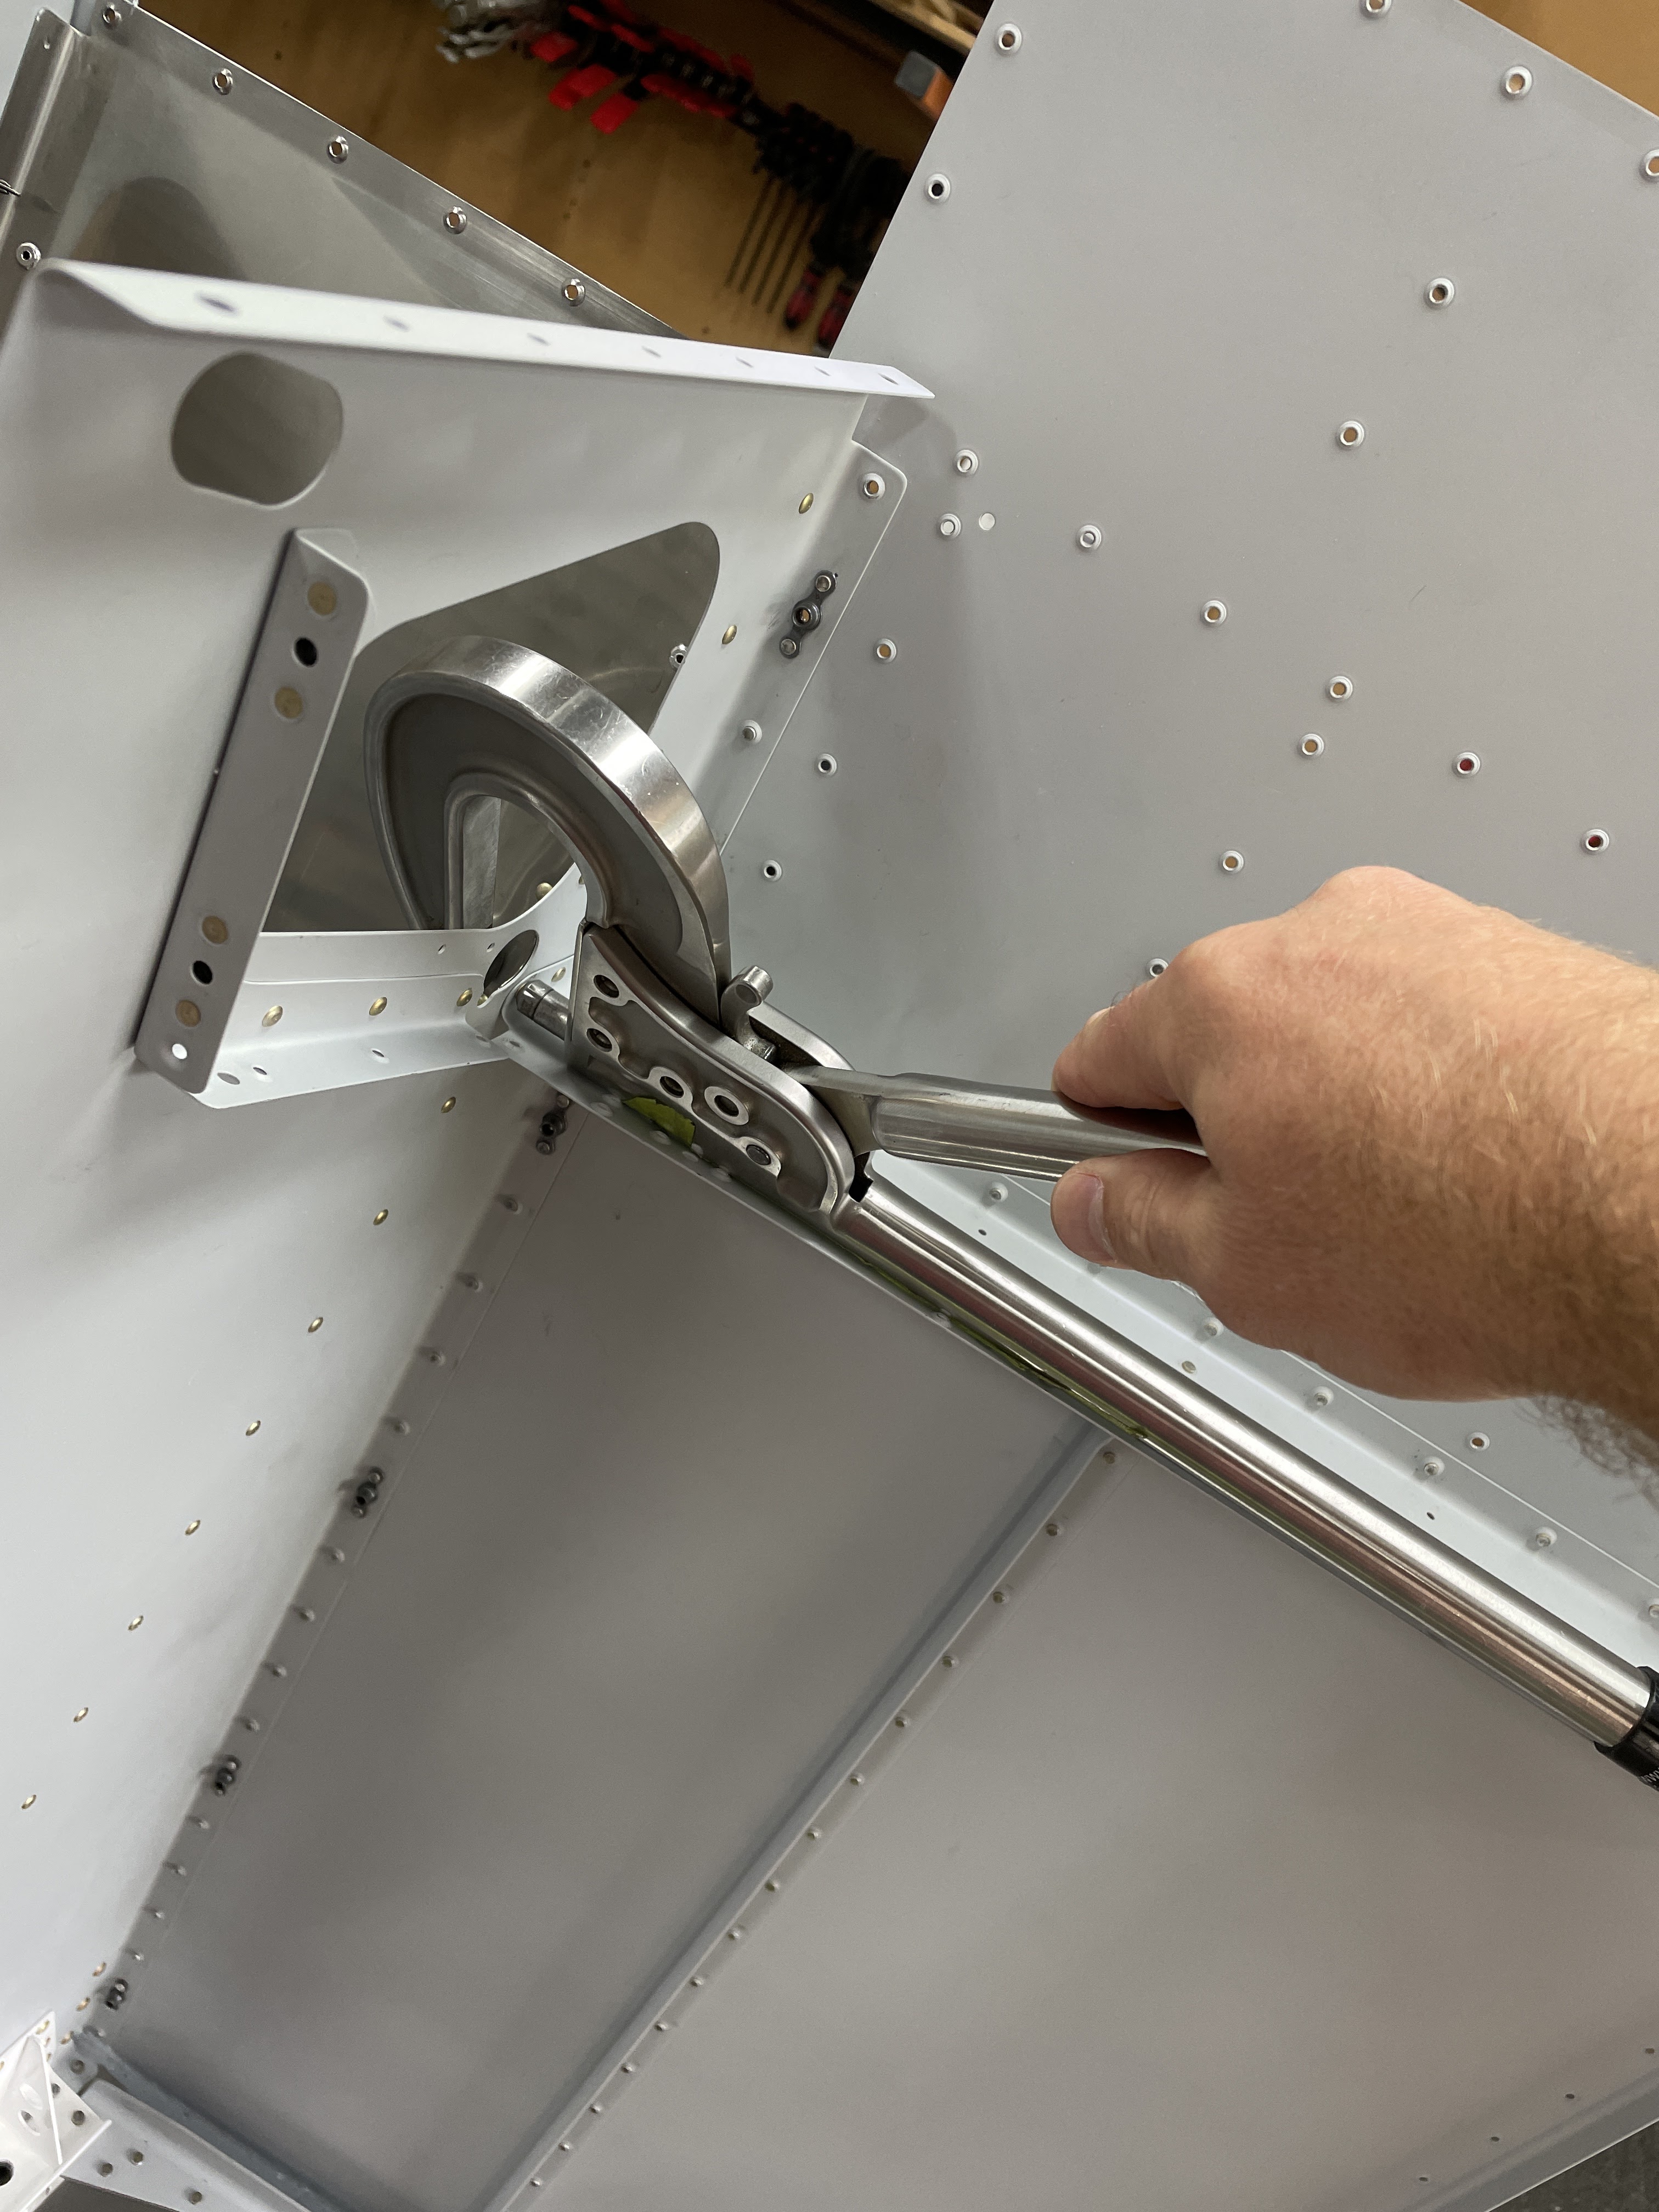
Tunnel Sides
Next, i completed the riveting of the tunnel sides to the stainless exhaust ramp. I initially tried to use the squeezer on these rivets, but due to the angles involved it just was not giving a good result. The yoke was dragging on the muffler ramp and marking it up. In the end i used a gun on the rivets and a bar on the muffler ramp size. Had to use the weird footed bar on the forward most rivet. For the aft most rivet (the one common to the cover bases) - the hand squeezer just fit.
Firewall Penetrations
The firewall penetrations were deburred and cleaned, then installed using Firebarrier 2000+
 |
| Turns out i don't have an 11/32 spanner for these nuts! (but did have a socket). |


No comments:
Post a Comment