Flap Hinge Brackets
The flap work started as always with some match drilling, fluting and edge deburring lots and lots of ribs.
 |
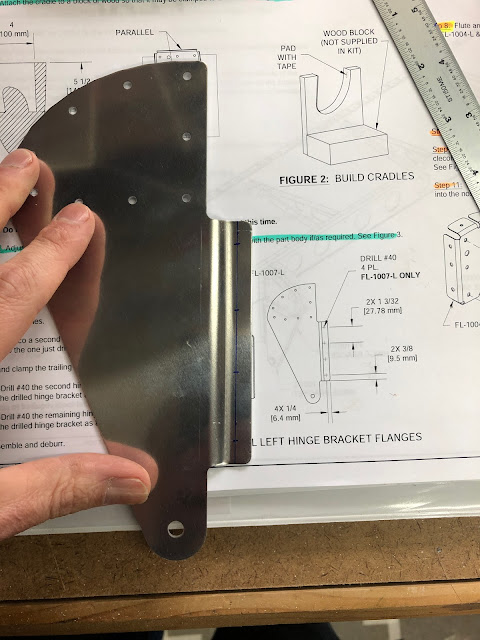
| Flap Hinge Brackets were bent so that they were parallel to the flanges. |
As an aside, i received 6 flap brackets in my kit - despite the plans inventory stating 4. I believe the RV10 flaps are longer and have 3 bracket assemblies per flap - so they must just make up bundles of 6 and send the same bundles to -10 and -14 customers.
Each rib needed a small tab cut off on the top side - i clamped my dremel with a thin cut-off disk in order to do this
 |
| Flap hinge flange holes were marked on the left brackets. |
 |
| Once the first left bracket was drilled, it was placed on top of another left bracket and match drilled. |
 |
| I used a 1/4" reamer to ensure that the bolt holes were aligned on both parts when match drilling. |
Don't mix up the parts
The 2 flaps are mirror images of each other, and i decided complete both flaps at the same time. In order not to mix up the parts, i laid out the parts for the left and right flaps in the correct order from inboard to outboard, and labelled each rib L1 - L8 with L1 being the most inboard rib. Where a nose rib had a doubler or a flap bracket, this was labelled with the rib number this attaches to. Eventually these numbers will be transferred to some little aluminium tabs, which i will keep on the parts with a cable tie for prep and priming.
 |
| Each nose rib needed a single flute only |
 |
| Then many hours of deburring each nose rib.... |
Flap Ribs
~ |
| The flap ribs were laid out and labelled in the same manner |
 |
| Example of flap numbering |
Each rib needed a small tab cut off on the top side - i clamped my dremel with a thin cut-off disk in order to do this
 |
| Then once again - many hours of deburring |
 |
| The spars were also deburred... |
 |
| ... and both flap structures were clecod together for the skin preparation next. |


No comments:
Post a Comment