Trailing Edge Preparation
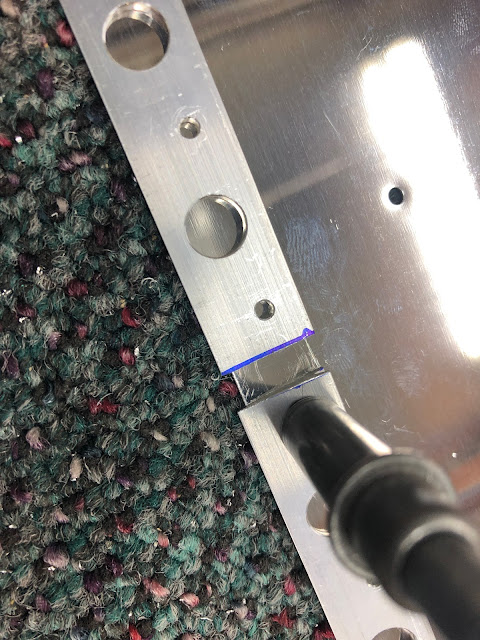
The flap is longer than a single piece of the trailing edge extrusion, so 3 pieces are used for the 2 flaps - the small piece is used on the outboard end of the flap. This entailed a bunch of steps which basically outlines how the pieces are cut - it ended up being a lot simpler than the plans described!
Basically, the inboard (longer) piece is trimmed to match the skin at one end, and trimmed to be 1/4" shorter at the other end. This measurement is then transferred to the smaller outboard piece and this is trimmed to fit tightly with the longer inboard piece. I cut it oversized and gently filed it to length.
 |
| Trailing edge pieces are trimmed to match the skin ends. |
 |
| The length of the longer inboard end is transferred to the shorter outboard end so they can be trimmed to fit tightly. |
 |
| The 2 pieces were filed to fit tightly and flush with each other. |
 |
| The end of the trailing edge after being trimmed to fit the skin |
In order to ensure that the trailing edges of the flaps stay straight for the riveting i decided to math drill the skins to a straight edge - similar to how i did it for the rudder, except instead of match drilling using the trailing edge wedge piece, i decided not to over complicate things and match drilled the aluminium square tube using the bottom skin. I used a 3/32" drill so as not to enlarge the holes to #40, and cleco'd each hole as i went from one end to the other.
The whole flap assembly was clecod together and the trailing edge was clecod to the straight tube. I was then able to match drill the trailing edges to the skins to #40, drilling perpendicular to the chord line of the trailing edge wedge, using the same guide tool (aka a hotel key) that i used on the rudder. I used a #40 reamer to complete this task.
Flap Hinge Brackets
At the start of this section, i marked and drilled 4 holes on only 1 of each flap hinge pair (to eventually double flush rivet the hinge pair assemblies together at their trailing edges).
At this point, the whole flap assembly is clecod together and we are able to match drill these 4 holes into the corresponding undrilled hinge side. The issue here is that due to all the clecos in the way, and due to the proximity of the lower hole to the skin, i was not able to easily drill these directly. The hardware was installed in the 1/4" hole, including the bronze flap bushing to ensure alignment of these holes.
In order to get these done, i pulled out (for the second time i think!) my 90 degree angle drill attachment. This only had a 3/32" drill attachment (no #40), so these were drilled to 3/32" and once removed from the flap assembly were drilled again with a #40 reamer.
Put it together then pull it all apart
At this point, i can pull the whole thing apart again in order for priming. I decided to do the same thing as i did for the wing. Each of the nose ribs needed to stay in the same location on the spar (and matched to it's doubler or hinge bracket etc) - and the inboard rib aft of the spar had been modified and also needed to go back in the same location. To do this a little tab was cable tied to each part with it's location (L1, L2 etc). Where a rib had a doubler etc, both the rib and the doubler got the same tab (both L2 etc). The inboard aft rib was labelled "LI" and "RI".
 |
| Here you can see the slight gap between the parts which needed a slight bit of adjustment. |
I was then able to countersink these parts for double-flush riveting. The plans call for making up a shim to allow a countersink cage to be used, but i elected to just use the 'suicide countersink' below as it was much quicker. I went slowly to almost the correct depth, checking with a rivet all the time, then finished with the deburring tool to final depth.
Countersinking trailing edge wedges
In order for the tailing edges to fit between the 2 dimpled skins, it needs to be countersunk on both sides. This was done the same way as the rudder, using a cleveland tool to ensure the face of the trailing edge was parallel to the drill press table. The modified #40 countersink tool from cleveland was also used.
 |
| This is the forward side of the countersink |
 |
| This is the aft side of the countersink - just knife edged. |
Other little details
- While the flap assemblies were together, i match drilled 2 holes from the nose skins into the nose ribs, and once it was all pulled apart, these were deburred.
- The plans called for breaking the edges of the leading edge (nose) skins so they sit flush on the top and bottom flap skins. I also elected to do this very lightly to the flap skins at their trailing edges so they sit flush on the trailing edge wedges.
- I did not dimple the parts at this stage - i find that it is much easier to prep the parts without any dimples and dimple once priming is done.


No comments:
Post a Comment