In order to fit the fuel tanks vertically on the wing cradle, i could only have one wing in the cradle at a time, as i needed access to both sides of the wing.
So while the other wing was one the bench, it was an ideal time to install the landing light lenses.
To start, i masked the wing to protect the inside of the lens, then placed it over the cut-out in the wing on the outside and traced a line 3/4" from the cut-out.
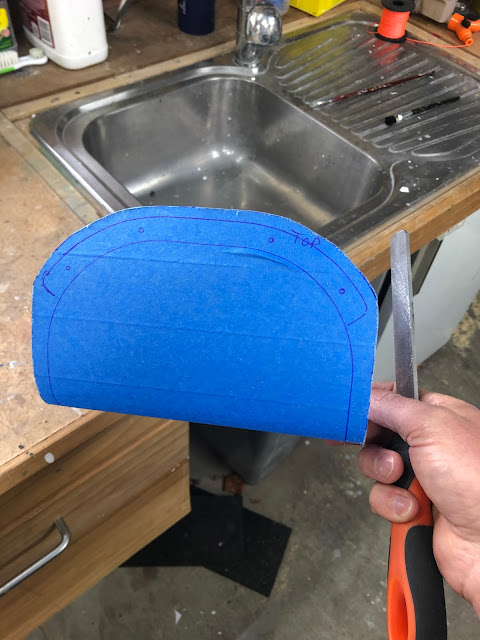
I then covered the outside of the lens with masking tape, and holding the lens up to the light traced the 3/4" line onto the masking tape.
To cut the lens i used my Dremel with a plastic cut off disk. This cuts through the lens very easily - it sort of melts the lens. The only thing to be careful of is it splatters little pieces of melted plastic everywhere, as well as tiny 'spider webs' of plastic. There were webs floating around everywhere. Lucky i was wearing a full face shield - probably should have been wearing a respirator.
 |
| Little pieces of plastic stuck to my face mask. |
I cleaned up these cuts with a file, then placed the lens back into the cut-out. The instructions state:
I found that if you placed the lens right up to the rib flange, there would not be enough space on the lens to mark a 1/4" gap. But i was able to place the lens over the top of the rib flanges, but push it right up against the edge of the dimples in the rib flanges - this gave enough edge distance.
This shows how the edge distance is not enough to fit the 1/4" margin, unless the lens was moved right up to the edge of the rib flange dimples.
I also found the method in the plans to pull the lens forward was not very good at getting the lens tight to the skin. A better method was to 'back tape' the pieces of tape attached to the lens, and pull the tape back, taping it onto the skin at the top and bottom.
I was then able to mark the lens cut-out on the tape as well as the screw holes. I removed the lens and marked the positions of the backing plates, then marked a cut line which was 1/4" at the top and bottom of the lens, and 3/8" on the sides. The plans called for 1/4" on the sides as well, but 3/8" seemed better.
This was then cut out to the new line and the edges files smooth and given a bevelled/rounded edge. I made sure to file off all the large cut marks. I then sanded with 240 grit so the edges were smooth.
The lens was then put back into the wing and pushed tightly up to the front as far as it would go. I used the double backed tape again to hold it tight. I was then able to match drill the lens using a #30 Plexi-drill bit, clecoing each hole as i went. These bits worked great - i practiced on the scrap offcuts to make sure i didn't stuff up the part.
These holes were updrilled to #27, the backs were deburred and then i countersunk the front for a #27 (#6 screw) dimple.
The matching holes on the wing skin were also updrilled to #27, then dimpled.
The backing plates were stuck onto the inside of the lenses using double-sided tape, the masking tape was removed from the lenses and i was able to install the lenses into the wings with no real issues. I can see why you need to stick the backing plates to the lens - with a landing light installed it would be impossible to hold them in place while screwing the lens in place.
 |
| This is just my shop torch! |
The lenses were then removed, placed back in the protective plastic bags they came in, and reinstalled for storage on the wing cradles until the wings are needed later on.
And that completed the leading edges!
Leading Edge Stats
The leading edges were started on the 27 July 2020 and finished on 15 Jun 2021 - 323 Days (10 Months / 19 Days).
Total rivets set in the leading edges: 1086.


No comments:
Post a Comment