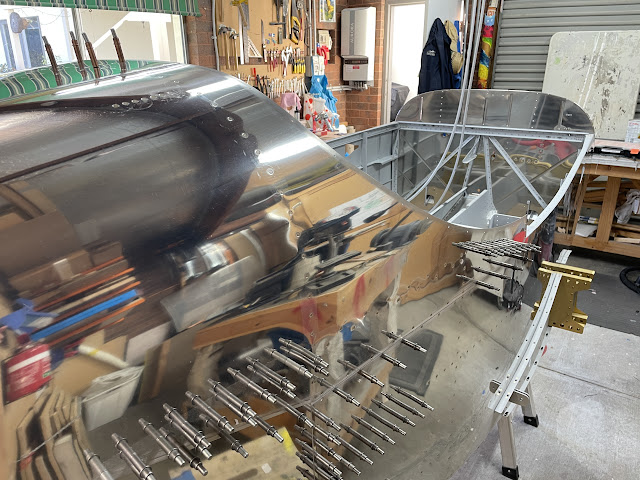
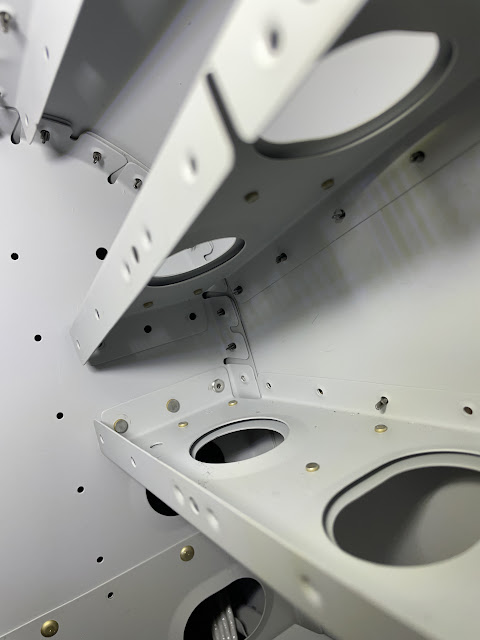
The tailcone riveting was a long and slow task - it took us 9.5 hours and involved 421 rivets. Mostly, because we wanted to take our time on each rivet and we made sure we thought about the best approach and access for each one. The rotisserie was a life saver - i don't know how someone would be able to effectively reach many of these rivets without being able to rotate the fuselage.
30-06: Top Bulkhead
The top bulkhead was riveted to the skins first, along with the seatbelt lug to skin rivets. These were done solo, by tilting the fuselage to 90 degrees and holding the large flat backrivet bar on the outside of the skins, and shooting from inside using the gun. The top rib was also riveted to the top bulkhead.
 |
| Access with the rotisserie was magic! |
 |
| These were backriveted by holding the backrivet set on the outside of the skin, and backriveting from the inside. Having the fuselage at 90 degrees made access easy. |
30-07: Top Side Skins to Bulkheads
The top side skins were done by rotating the fuselage to the 45 degree position, and holding the backrivet bar on the outside of the skins, then reaching in and shooting upward with the backrivet set and gun. The plans call for riveting in the centre of the skin, and moving up and down away from the centre to avoid pillowing of the skins.
The seatbelt lugs were backriveted to the skin, by rotating the fuselage so the seatbelt lugs were on the bottom, then leaning in with the gun and holding the bar on the outside. The rivet closest to the aft bulkhead had to be set with a mushroom set on the outside and the angled face of my tungsten bar on the inside, due to the slope of the skins (the backrivet set and gun would not fit).
For the rivets on the longerons, aft of the baggage bulkheads i found the best way was to rotate the fuselage so the longeron was down, and hold the backrivet bar underneath the fuselage, lean in and backrivet them that way (similar to the seatbelt lugs).
 |
| The fuse was rotated to the 45 degree position, and held in place by a pin on the engine stand. The tail was supported with foam, then held down with a ratchet strap. |
 |
| The seatbelt lugs were done with the lugs being riveted at the bottom of the fuselage, holding the backrivet set on the outside and leaning in with the gun. |
 |
| The rivet missing in this photo is the one which had to be set with the mushroom set on the outside and bar on the inside, due to the proximity and angle of the skin to the aft bulkhead making access for the gun and backrivet set impossible. |
 |
| The remaining skin to bulkhead rivets were done by holding the backrivet bar on the outside, and leaning in with the gun and backrivet set. |
 |
| There is no pillowing of the skins here - they came out very nice i think. |
30-08: Side skins to bulkheads & structure + Baggage Ribs to baggage bulkheads
The next steps i was also able to do solo. The rivets which were left out of the side skin structures (to allow you to cleco on the tailcone) were done by backriveting.
The fuselage was turned to the 90 degree position, then the baggage floor ribs were riveted to the aft bulkheads - these had to be done by placing the manufactured head of the rivets aft of the baggage bulkheads. There was no way to get the gun and cupped set on the forward side due to interference with the baggage ribs. The lower rivets were pull rivets.
The fuselage was then turned upright, and I was then able to rivet the side skins to the baggage bulkheads by holding the backrivet bar on the outside of the skins, and reaching in with the gun and backrivet set. I was able to reach the side skin rivets all the way down to the baggage ribs. To do the rivets along the bottom of the bulkheads, i will need dad's help.
 |
| The fuse was turned 90 degrees to rivet the baggage ribs to the aft baggage bulkheads. |
 |
| The shop heads had to be on the ribs, as there was no access for the gun adjacent to the baggage. As per plans, a pull rivet was used on the lower hole. |
 |
| The side structure was riveted to the aft bulkhead. |
 |
| When doing the side skin rivets along the aft baggage bulkheads, the tailcone and fuselage skins meet - i had to be very careful to keep the backrivet bar flat on the skins and not let it 'fall off' the skin edge. |
 |
| This would be bad! |
 |
| Backriveting the side skin rivets like this worked great! |
 |
| All side skin rivets are done as low as the baggage floor level - i could not reach any lower. I will need to do the lower rivets from the centre of the bottom skins outward, with Dad's help. |
30-08: Lower Baggage Floor Ribs to Bottom Skin
The rivets between the baggage floor ribs and the bottom skins were done by placing the fuselage into the 90 degree position. Dad was on the underside of the aeroplane using the swivel mushroom set, and i used the tungsten bucking bar on the inside. We riveted all the baggage ribs first, as far back as the lap joint with the baggage bulkheads. We then started in the centre of the lower skin, and riveted the lower skins to the baggage bulkheads moving from the centre outwards. We stopped at the curved portions as we were getting tired!
 |
| I was dead scared of dropping the tungsten bar - so stole a doona from inside. Shhhh! |
30-08: Riveting the lower curved skins
The final step was to rivet the curved portions. The plans cleverly call for leaving the rivets out of the F-01432B baggage rib on each side and they are designed in such a way as they flex in the middle, allowing you to get great access. In fact, the access was so good we were able to backrivet these using a long straight back rivet set. We angled the fuselage to 45 degrees, with the curved section we were riveting at the top. Dad held the backrivet bar on the outside and i used the long straight backrivet set on the inside.
We were even able to backrivet the F-01432 rib, as the bottom flange of this was not 90 degrees. There is one location called out to use a pull rivet due to access restrictions inside (circled in green). We also elected to use the same MK-319-BS rivets in 3 other locations, circled in red below. It was impossible to get the backrivet set into these spots due to adjacent structure. We couldn't even get a bucking bar in a couple of them. So we decided not to be hero's - and pull riveted them.
 |
| This worked great - i was easily able to access each rivet, some by flexing the F-01432 rib out of the way. This rib was then riveted last. |
 |
| This is the F-01432 rib - the green circle is where the plans call for a pull rivet - we used a pull rivet in the other 2 locations circled in red as well. |
 |
| Since the bottom flange of this rib was not 90 degrees, access with the long straight backrivet set was possible. |
 |
| We were also not able to get either a backrivet set, nor a bucking bar into this rivet - so it is also a pull rivet. |
And that finished the attachment of the tailcone to the forward fuselage - or as as we are now calling it - 'the fuse'! One last check comparing the horizontal stab mounting bolts against the forward longerons showed zero twist in the fuselage at all. What a great kit. Exciting times.
 |
| Cleco free since 2023! |
 |
| I think next time i have some proseal mixed up, i might squeegee some into the small gaps where these skin overlaps occur. There are also some small gaps in the fuselage corners i may seal up as well. |
 |
| Bang on! |
Since i am probably going to be using EFI, and my duplex fuel valve is still on order, i will skip the next Chapter 31 - Fuel System and move onto Chapter 32 - Baggage Floors.


No comments:
Post a Comment