The next part of Section 26 was to begin working on the baggage ribs. These will be riveted to the aft side of the aft bulkhead, which i have just finished riveting to the seat ribs.
I have been trying to break Section 26 into some logical chunks, rather than doing it all in one hit. That would be a lot of deburring and priming in one go - there's 22 ribs alone - and a lot of other small bots and bobs!
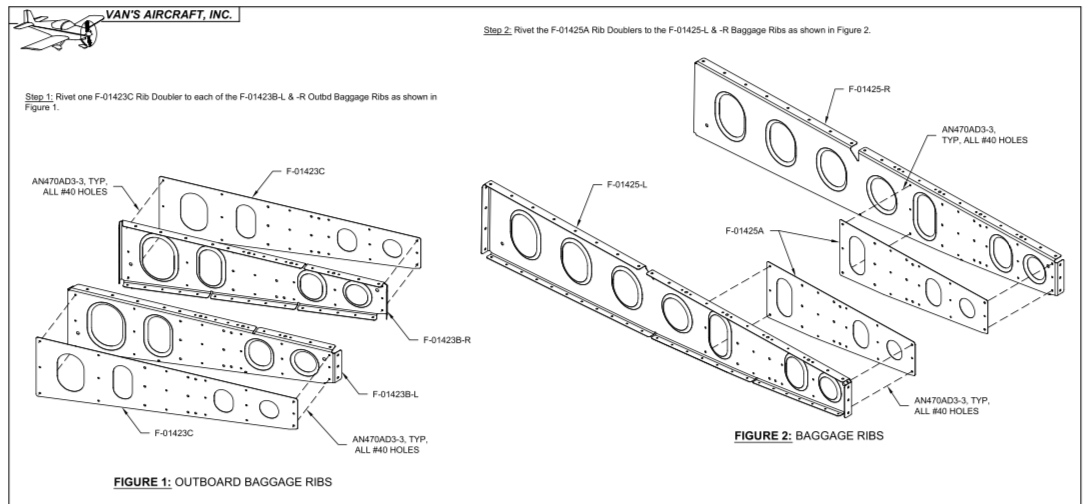
Section 26 is a little strange, in that right at the start of Page 26-02, you rivet some flat doublers to a couple of baggage ribs. I had skipped this page when i started the seat ribs and decided to do it along with all the other baggage ribs.
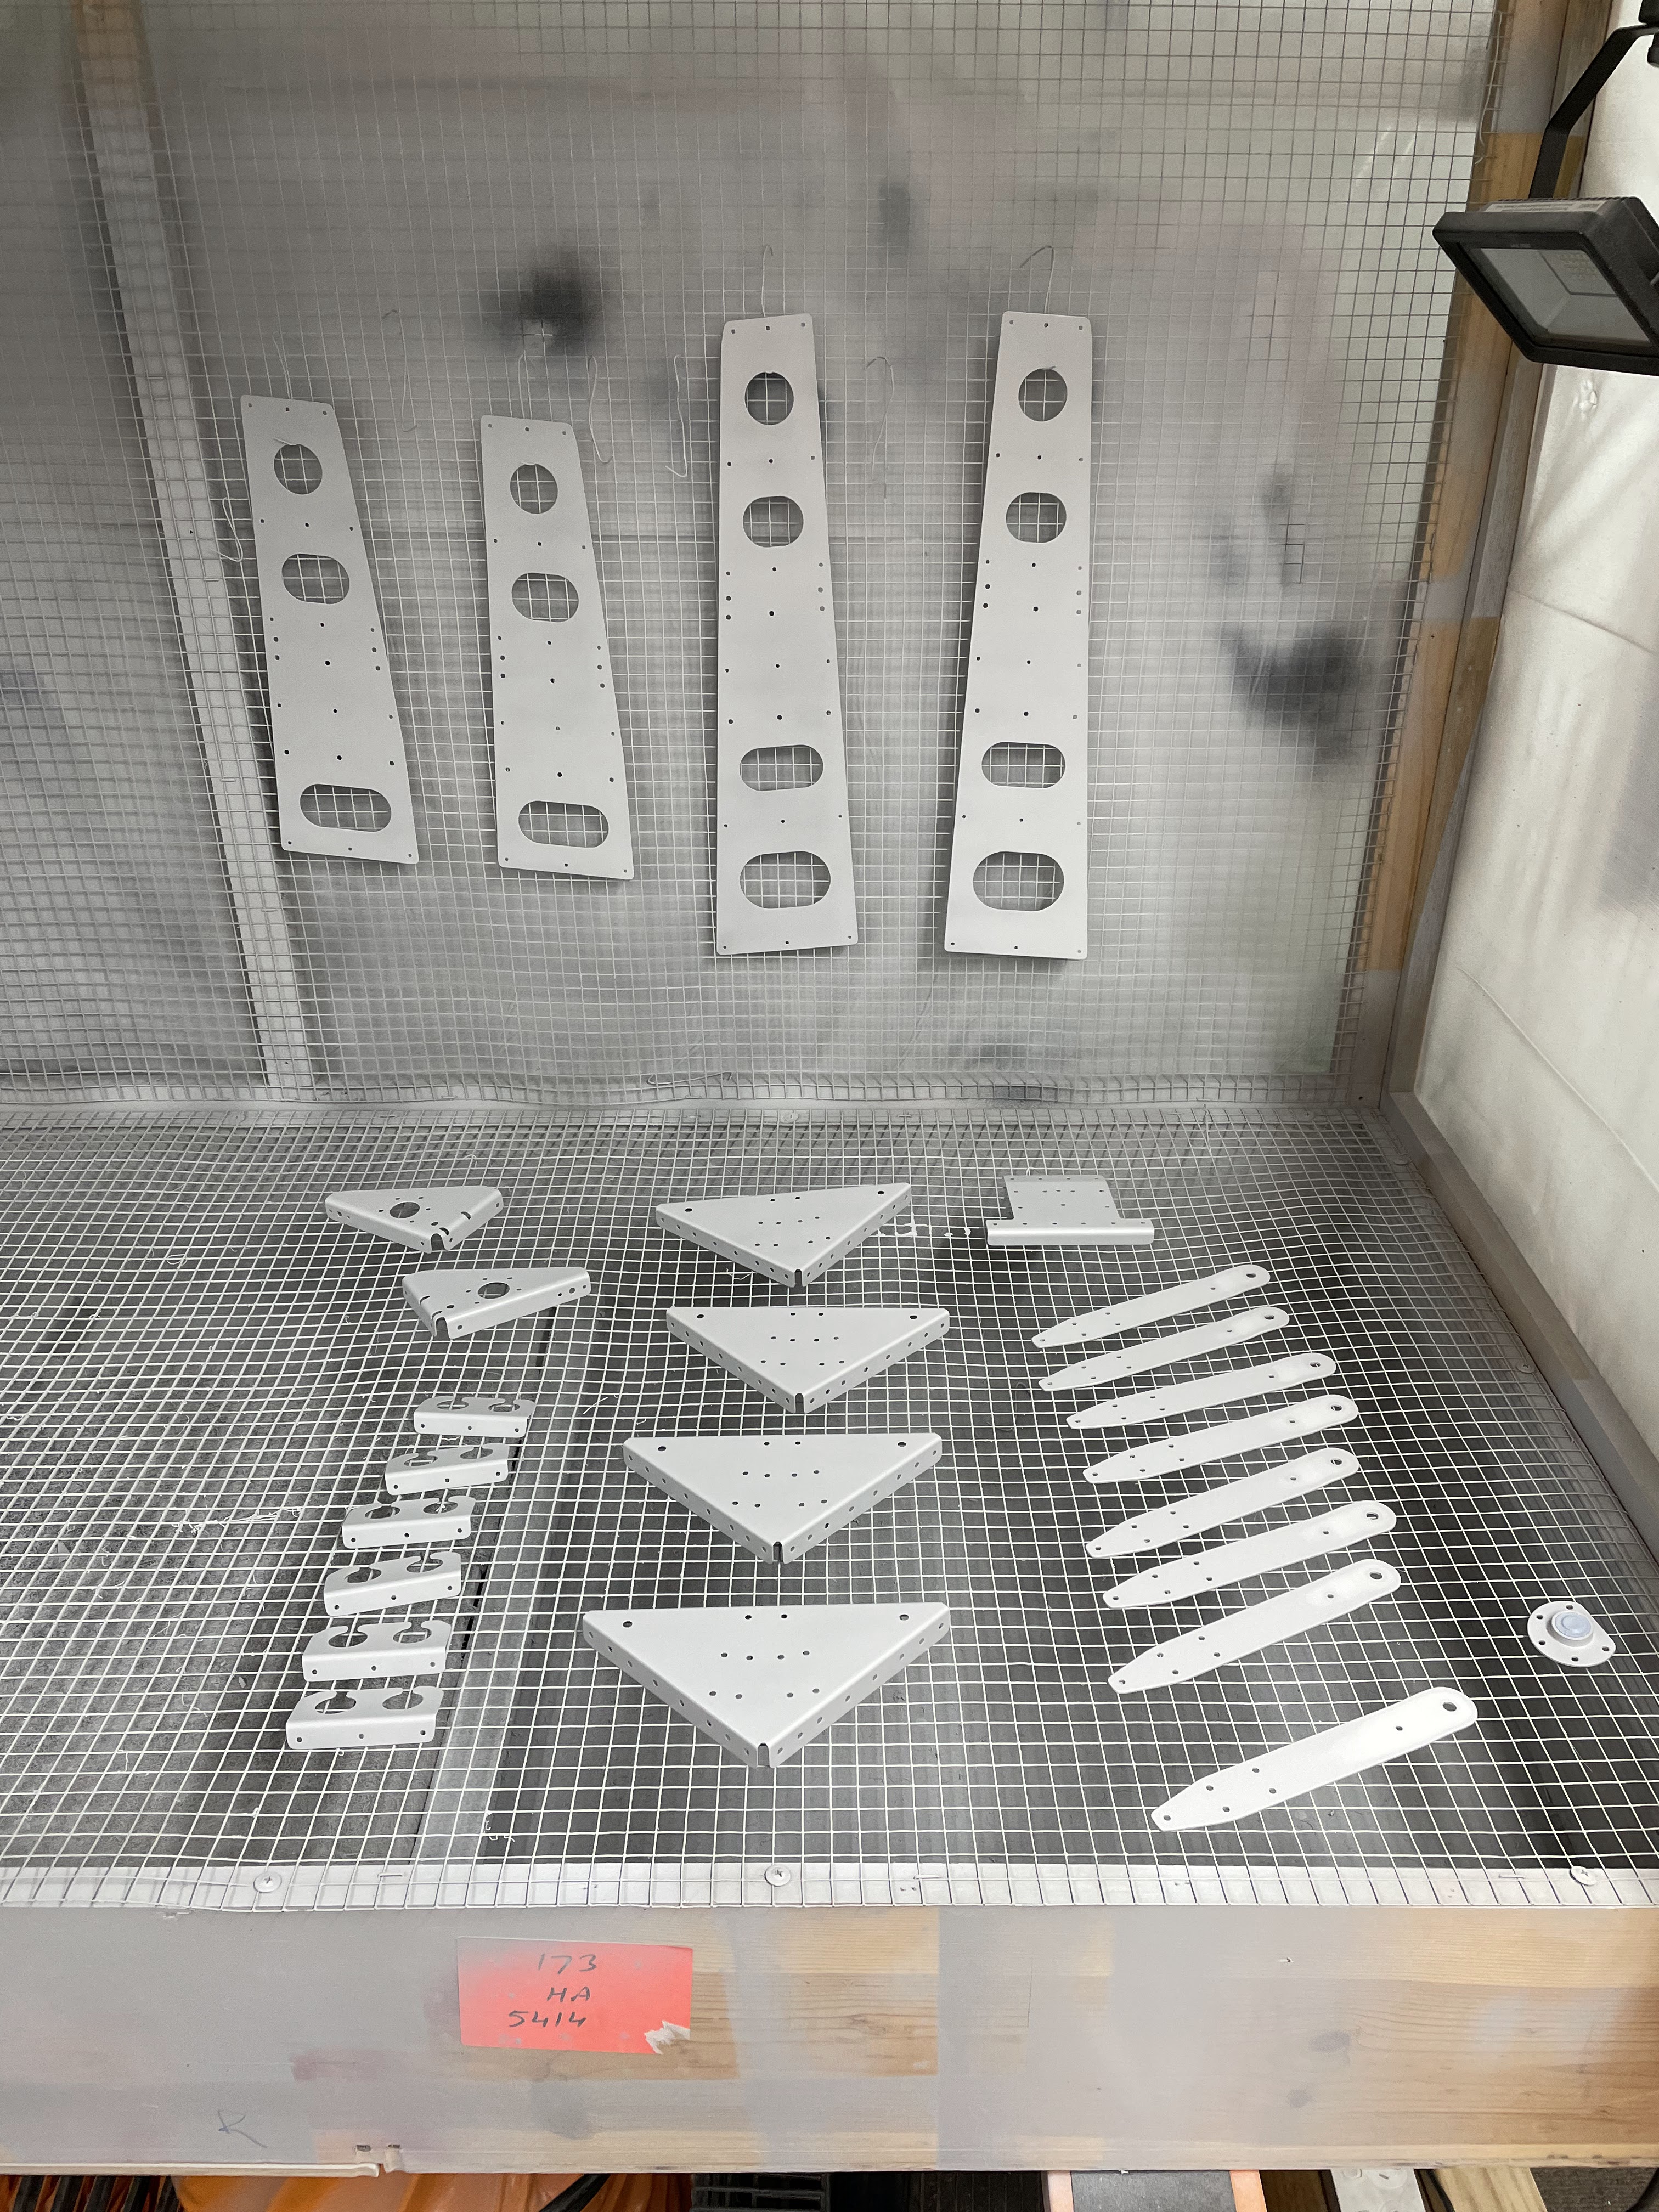
So next up was to deburr, prep and prime the baggage ribs called out on 26-02 (with the doublers), along with the baggage ribs called out on 26-08 (with the seatbelt attach lugs / doublers and wire routing channels).
 |
| As always, the process is to clean with EkoClean, then etch/scrub with Alumiprep (or Ekoetch) and a scotchbrite pad, then dry and prime. |
 |
| Ready for priming. |
 |
| The small parts ready to prime |
 |
| The PVC stick works really well for hanging the parts to dry. I spray them on one side only, one at a time in the booth, then pick them up using a section which has not been primed and hang on the stick. |
Once this was done, i began by going back to 26-02 and riveting the doublers to a couple of the baggage ribs. These were all done with the squeezer. I believe these ribs have doublers because the step weldments are attached between these ribs.
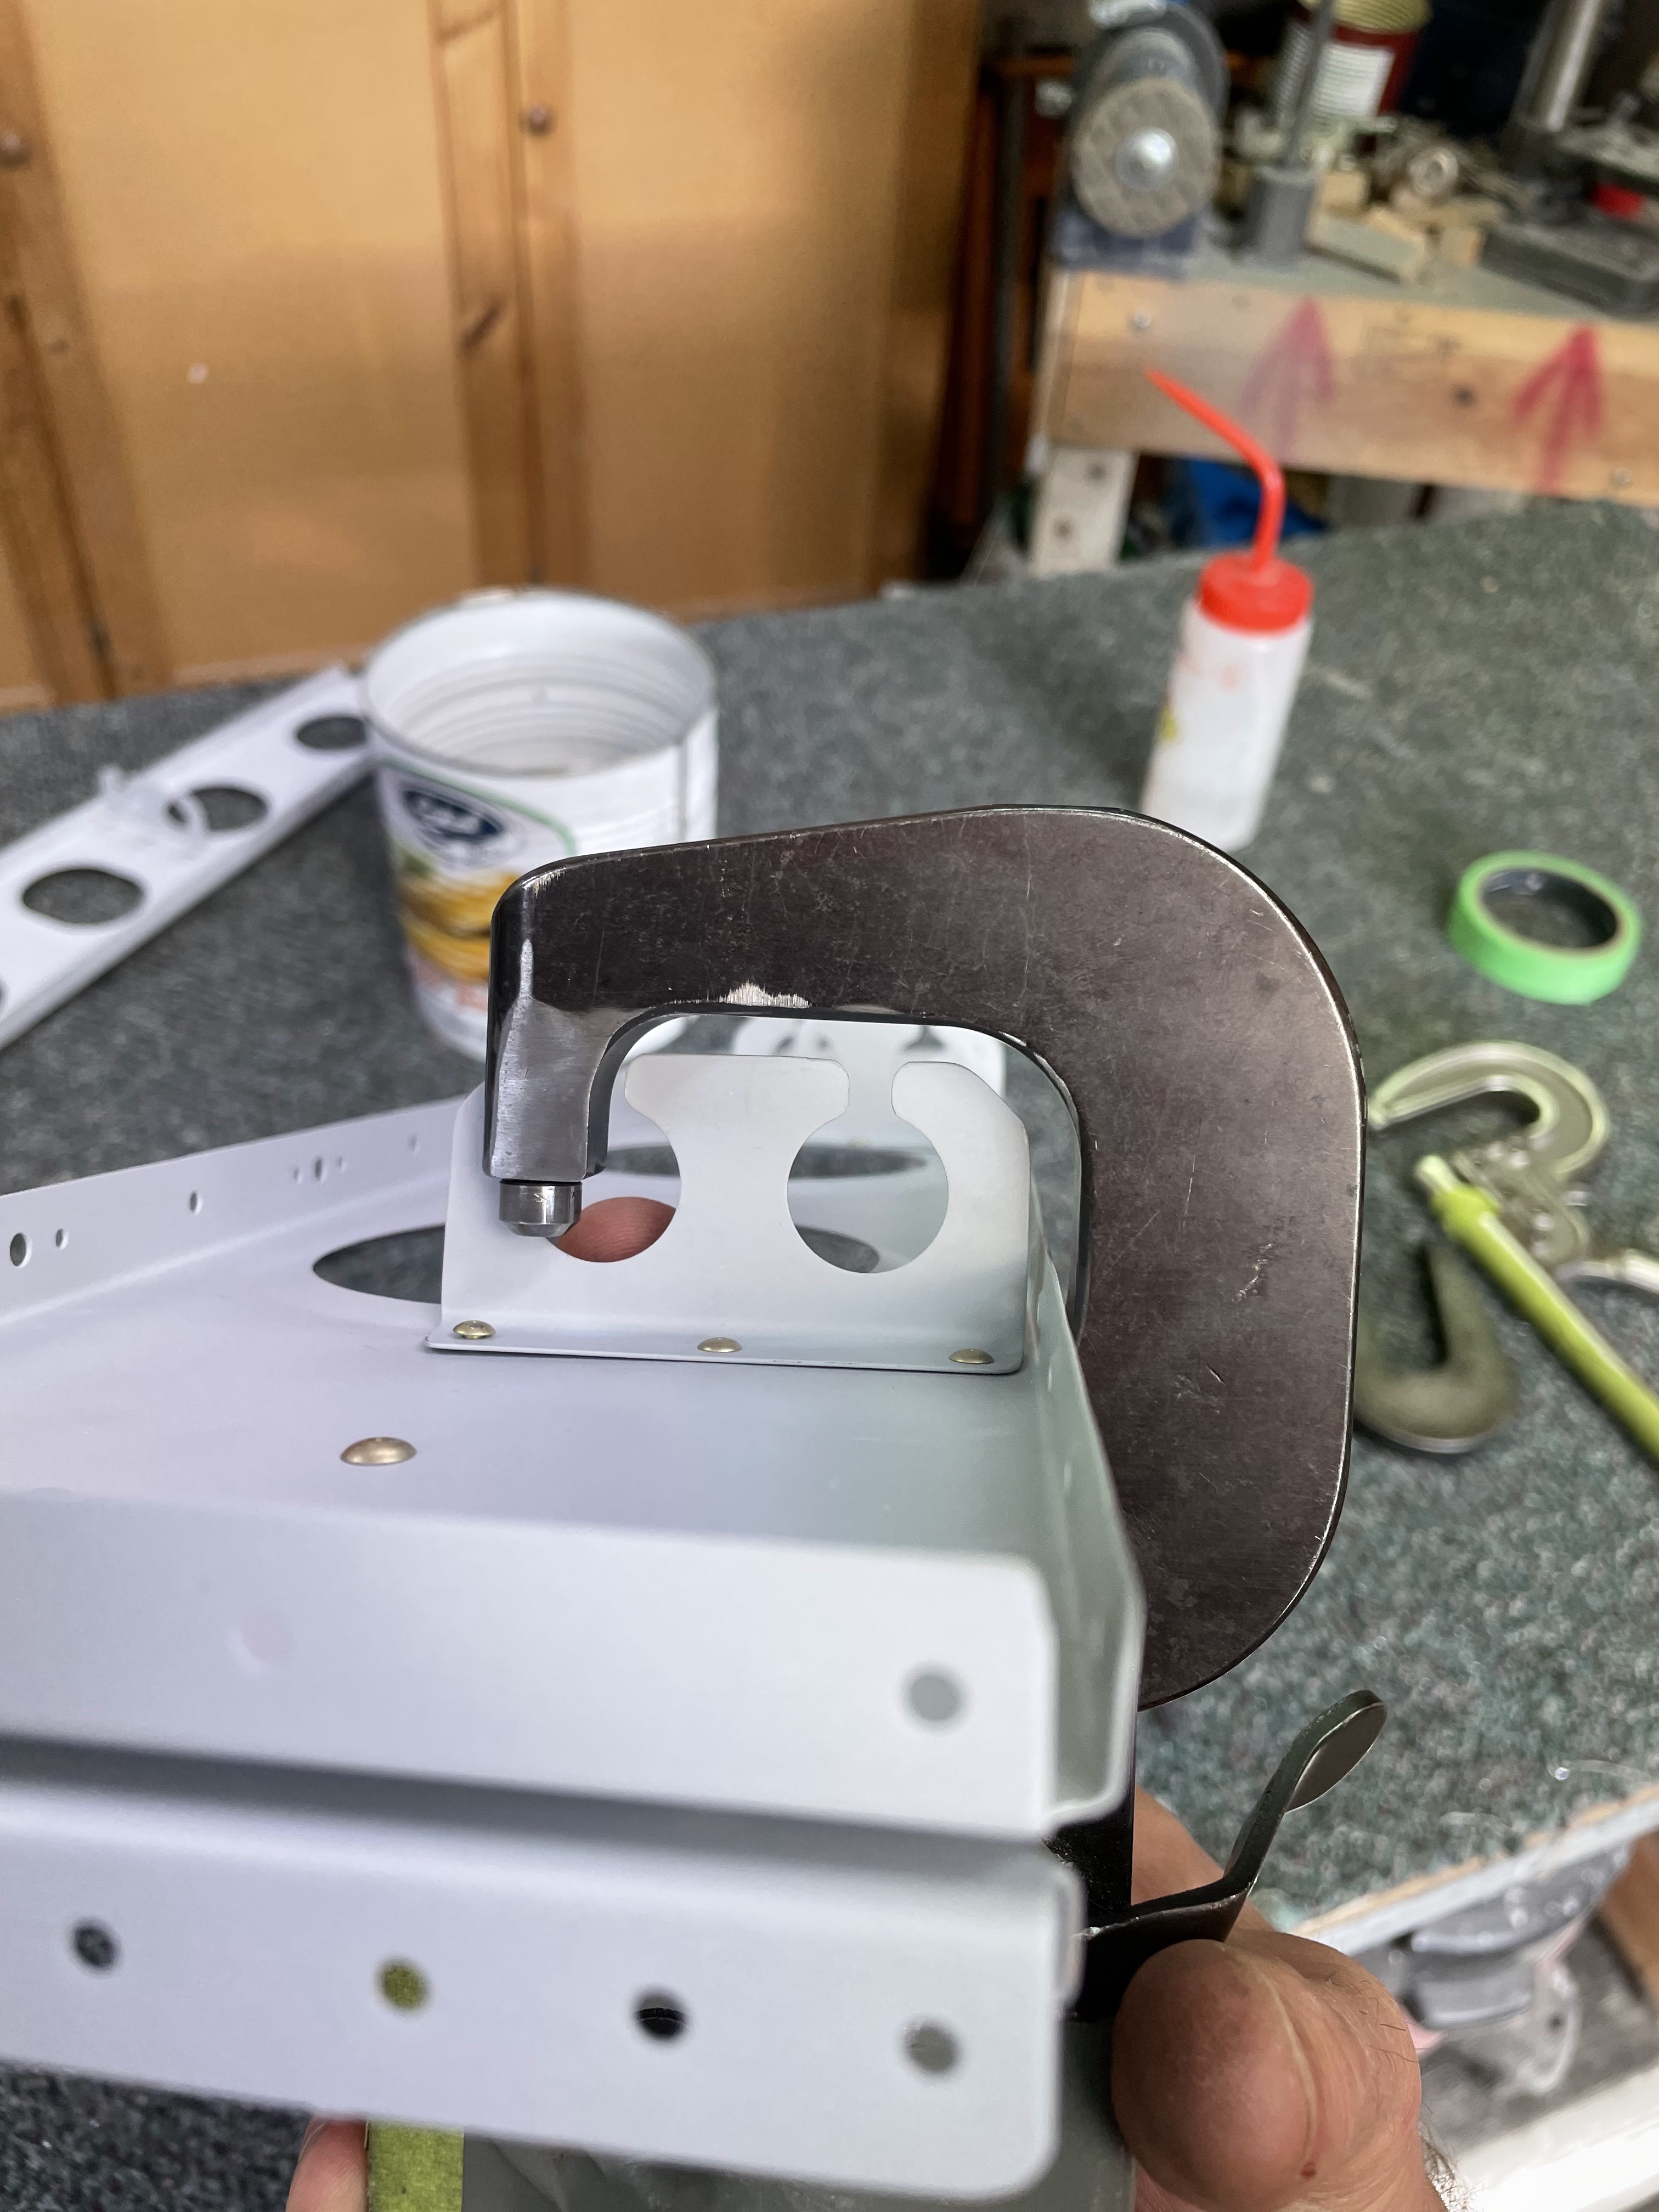
Next up was to rivet the seatbelt attach lugs and the associated doubler ribs together. Page 26-08 has the wiring routing angles attached to the centre ribs. However, with these wiring routing angles installed, i noticed that one of them is right over one of the bottom flange holes. Reading ahead to Page 26-16, the lower flanges of these ribs are dimpled, so i dimpled them before the wiring routing angles were installed. For the forward most routing angle, the top rivet could not be reached with my pneumatic squeezer - however, the hand squeezer reached ok, by extending the rivet set using some washers, in order to clear the flanges of the ribs.
 |
| Seatbelt attach lugs and doublers riveted to baggage ribs. |
 |
| These holes would not be able to be dimpled if the wiring routing angles are installed first. |
 |
| Page 26-16 has us dimpling the holes in the lower flanges in order to fit the bottom skin. |
 |
| My longeron yoke was not deep enough to reach the topmost rivet on the forward wire routing angle. |
 |
| The hand squeezer reached, however i needed to use some washers to extend the rivet set so i could clear the rob flange. |
This completes about half of the baggage ribs - there are still some more to go in the next batch. But there are other jobs before these are needed - the lower skin is next, then the seat rib assembly gets connected to the lower skin. Onwards!


No comments:
Post a Comment