The outboard bottom wing skins proceeded in a very similar same fashion as the inboard skins, namely:
- Rear spar rivets
- Down each rib, half way to the J Stiffner.
- Slide the J Stiffner in place. (and cleco in the pitot tube doubler at the same time)
- Cleco the wing skins completely down
- Remaining rivets down to the J Stiffner
- Along the J stiffner
- Down each rib to the main spar
- Along the main spar, then finally
- Aft to forward setting the double row of rivets were the skins and j-stiffners overlap.
All said and done, both skins went very well. There were 2 little snafu's - both occurred at the end of a the same longish day of riveting (2.5 hours and 157 rivets), and i learned a good lesson here. I should have stopped after the first error - bad decision to continue riveting that day. The lessons to stick on my head going forward:
- Firstly, that you can get into a mindset at the end of a session of wanting to 'just finish' - get-home-itis. In this case i really wanted to finish the J-stiffner before school pickup. This is bad place to be because it can make you slightly frantic and more likely to rush.
- Secondly, once you screw something up, don't rush to try and fix it. Sometimes a poorly thought out 'fix' creates a much bigger problem. Definitely don't keep riveting after a screw up - walk away!
- Finally, when using the gun in my non-dominant (left hand in my case), you need to push harder than you think.
So what went wrong? - basically nothing that bad, except for one small and one medium blemish in the lower skins, along the J-Stiffner, about the 3rd bay in from the end. In the first smaller blemish i was at the end of my arms reach and simply didn't push hard enough on the gun - and it wandered making a small dint. The second (medium) blemish happened when i was not happy with a rivet set, was rushing to get the job done, put the bar on the rivet to give it a short additional burst and pulled the trigger - except i was on the wrong rivet (sad face). I was rushing and not taking my time to check i had the bar in the correct place. Idiot! In both cases i was able to work the dents out somewhat with a spoon and some lube from the inside - and these will be covered by filler and paint and are on the bottom of the wing. But bloody annoying anyway, and some good lessons learned. Thankfully just cosmetic - no major creases or sharp edges.
Here is a small video showing the medium sized dint in the left hand lower skin - it's not that bad but very annoying! Should be able to be filled and painted, and will never be seen (it's on the bottom outboard of the left hand wing skin). The right hand one is perfect! (Little miss wanted to come in but there was scary swarf on the floor!)
Here is the almost finished product - only the inspection panel nutplates to go!
Inspection Panel Nutplates
The last step in finishing the bottom skins is the nutplates to hold on the lower wing access panels. The plans call for K1100-08D - aka a nutplate with a large countersink to take the big #8 screw dimple, which also has the rivet attach holes dimpled - i needed 48 of them to complete the wings. Unfortunately, i checked my inventory and i only had 12 left! Weird - i did a rough count of the number of nutplates needed in the plans and worked out i needed 98 - weirdly I only ever received 80! Checking a local supplier some additional nutplates were $2.50 each! Luckily, i had a bunch of K1100-08 nutplates and i was able to dimple the rivet attach holes for these to get me out of trouble.
 |
| Here i worked out i should have been sent 98 nutplates - and only had about 12 left... |
 |
| ... but i was only sent 80! |
 |
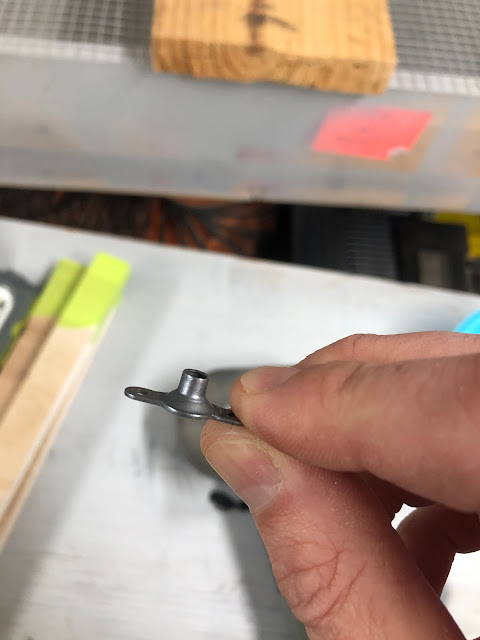
| These are the K1100-08 (non dimpled nutplates) |
 |
| and the same nutplate after dimpling the rivet attach holes. I used the pneumatic squeezer, some older, modified non-cleveland dies (modified to muss the countersunk portion in the centre) |
 |
| As always, checking each rivet. |
A note for future builders - these nutplates were a bit of a pain to rivet. Very awkward to get the squeezer onto them - i ended up with a very sore back. In hindsight, i see no reason why these couldn't be riveted to the skins before they were clecod on. They would hardly get in the way at all when riveting in my opinion. Nevertheless - the bottom skins are now DONE!
Next up, i will re-install the aileron pushrods, check the rigging etc, and then i can install all the access panels including hooking up the electric trim. And move onto the wingtips before the fuselage gets here.


No comments:
Post a Comment