The RV14 comes with a neat little platform which attaches to the bottom skin and bottom J-Stiffner short at the first inspection panel location on the left hand wing. I believe it is designed for the Dynon ADAHRS unit to slide into, and be retained in place by the integral clip.
.png) |
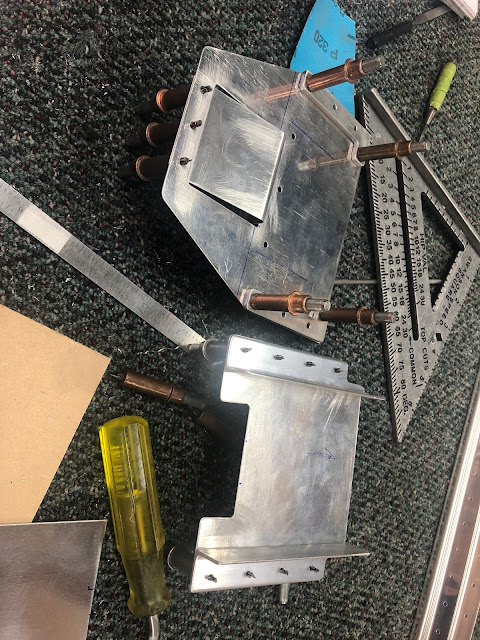
| The wing bracket is made of is the parts above. The top plates W-00012C are fluted to give some resistance and stop the installed bracket wobbling around. |
.png) |
| This is how the bracket is installed into the wing. The Magnetometer bracket clicks into this assembly. |
The parts for the bracket were prepared and 20-03, Step 9 ask us to flute the top plates to give some sort of clamping action to the installed Dynon ADAHRS unit. I don't think i will be using this unit, however, this seems like a great little place to install a magnetometer. The wing kit comes with the pieces to build the bracket attached to the wing, however, no other parts.
Van's sells a kit for mounting the Garmin GMU22 Magnetometer for the princely sum of $15 USD, and an image of this can be seen below. However, this would need some modification to be able to mount a GMU11 Magnetometer.. so i thought i would build one.
I started out by cutting the bottom plate out of some 0.025" sheet i had left over from the Archer NAV antenna build. This was fitted so it pushed nicely against each side with no slop, and against the front side of the bracket and the back clip of the bracket. The sheet i used is a bit thinner than the Van's GMU22 bracket, but it came out very stiff once i riveted it together as a box (see below).
 |
| Initial trim to fit the inside of the 'side rails' |
Next up i cut some 0.63 x 3/4 x 3/4 angle which i ordered with the wings (just in case). These were also cut and filed to fit snugly inside the 'side rails'. These will be double flush riveted to the bottom plate to provide a thicker 'foot' on each side to slide the mount into the bracket, so appropriate #40 holes were marked and drilled.
 |
| Everything was cut oversize, and carefully filed to match the bottom plate (which fit nice and snug) |
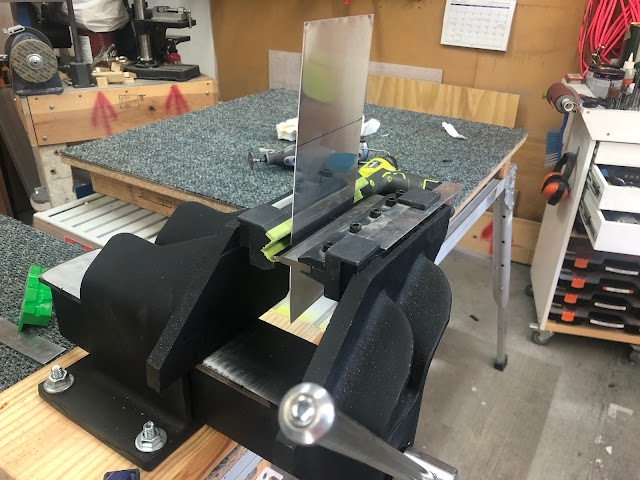
Once these were complete, i cut the top plate oversize and after a few failed attempts, managed to use my vice bending brake to bend it to shape. I didn't have a vice to match this brake, so a new tool was in order (shame!). The angle pieces were trimmed to fit nicely and was match drilled #40 to the angles, then updrilled to #30. The top plate was drilled such that the top surface was parallel to the bottom plate. I gently broke the edges of the horizontal part of the top of the bracket to give it a bit more stiffness.
 |
| This took a fair bit of trial and error to get it to the right width. |
 |
| Once the holes were drilled, it was filed along the bottom to clear any interference with the bottom plate. |
 |
| The #40 holes were updrilled to #30, as i didn't have any AN470-AD3 rivets, only AD4's. I briefly considered using some pull rivets, until i realised they had a steel stem! (that won't be a good idea) |
 |
| The bottom plate and top angle were countersunk on both sides, for double flush riveting. |
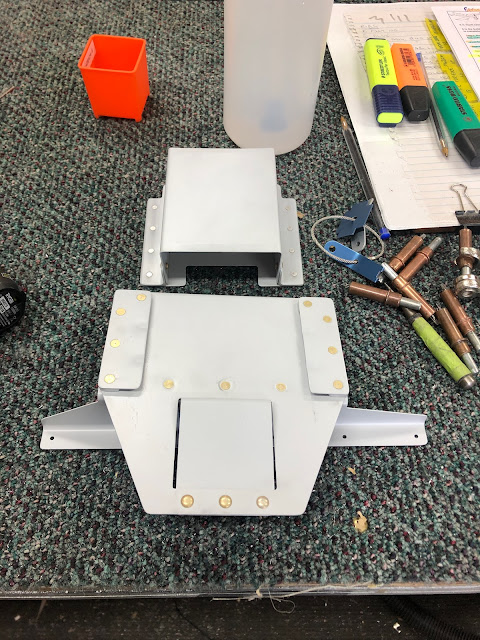
The parts were then cleaned, etched and primed, and i was able to rivet it all together. The top plate was riveted to the angles first, using the squeezer to set some AN470-AD4 rivets. Then the bottom plate and angles were double flush riveted using AN426-AD3 rivets, a by backriveting on my backriveting plate.
Altogether i think it came out very nicely. It has no slop in the wing mounting bracket, yet slides in fairly easily. I gently fluted the top plates of the wing mounting bracket once this was put together, and it fits great. No side to side or up and down motion at all.
Despite the use of 0.025" sheet - the box shape is very very sturdy. I can now mount the GMU11 directly to the assembly with non-ferrous screws and nuts (eventually).
 |
| Very satisfying. It's cool that i built this myself with no plans. |
.png)
.png)


No comments:
Post a Comment