
Next up was to clean, etch and prime the aileron rib and doublers:


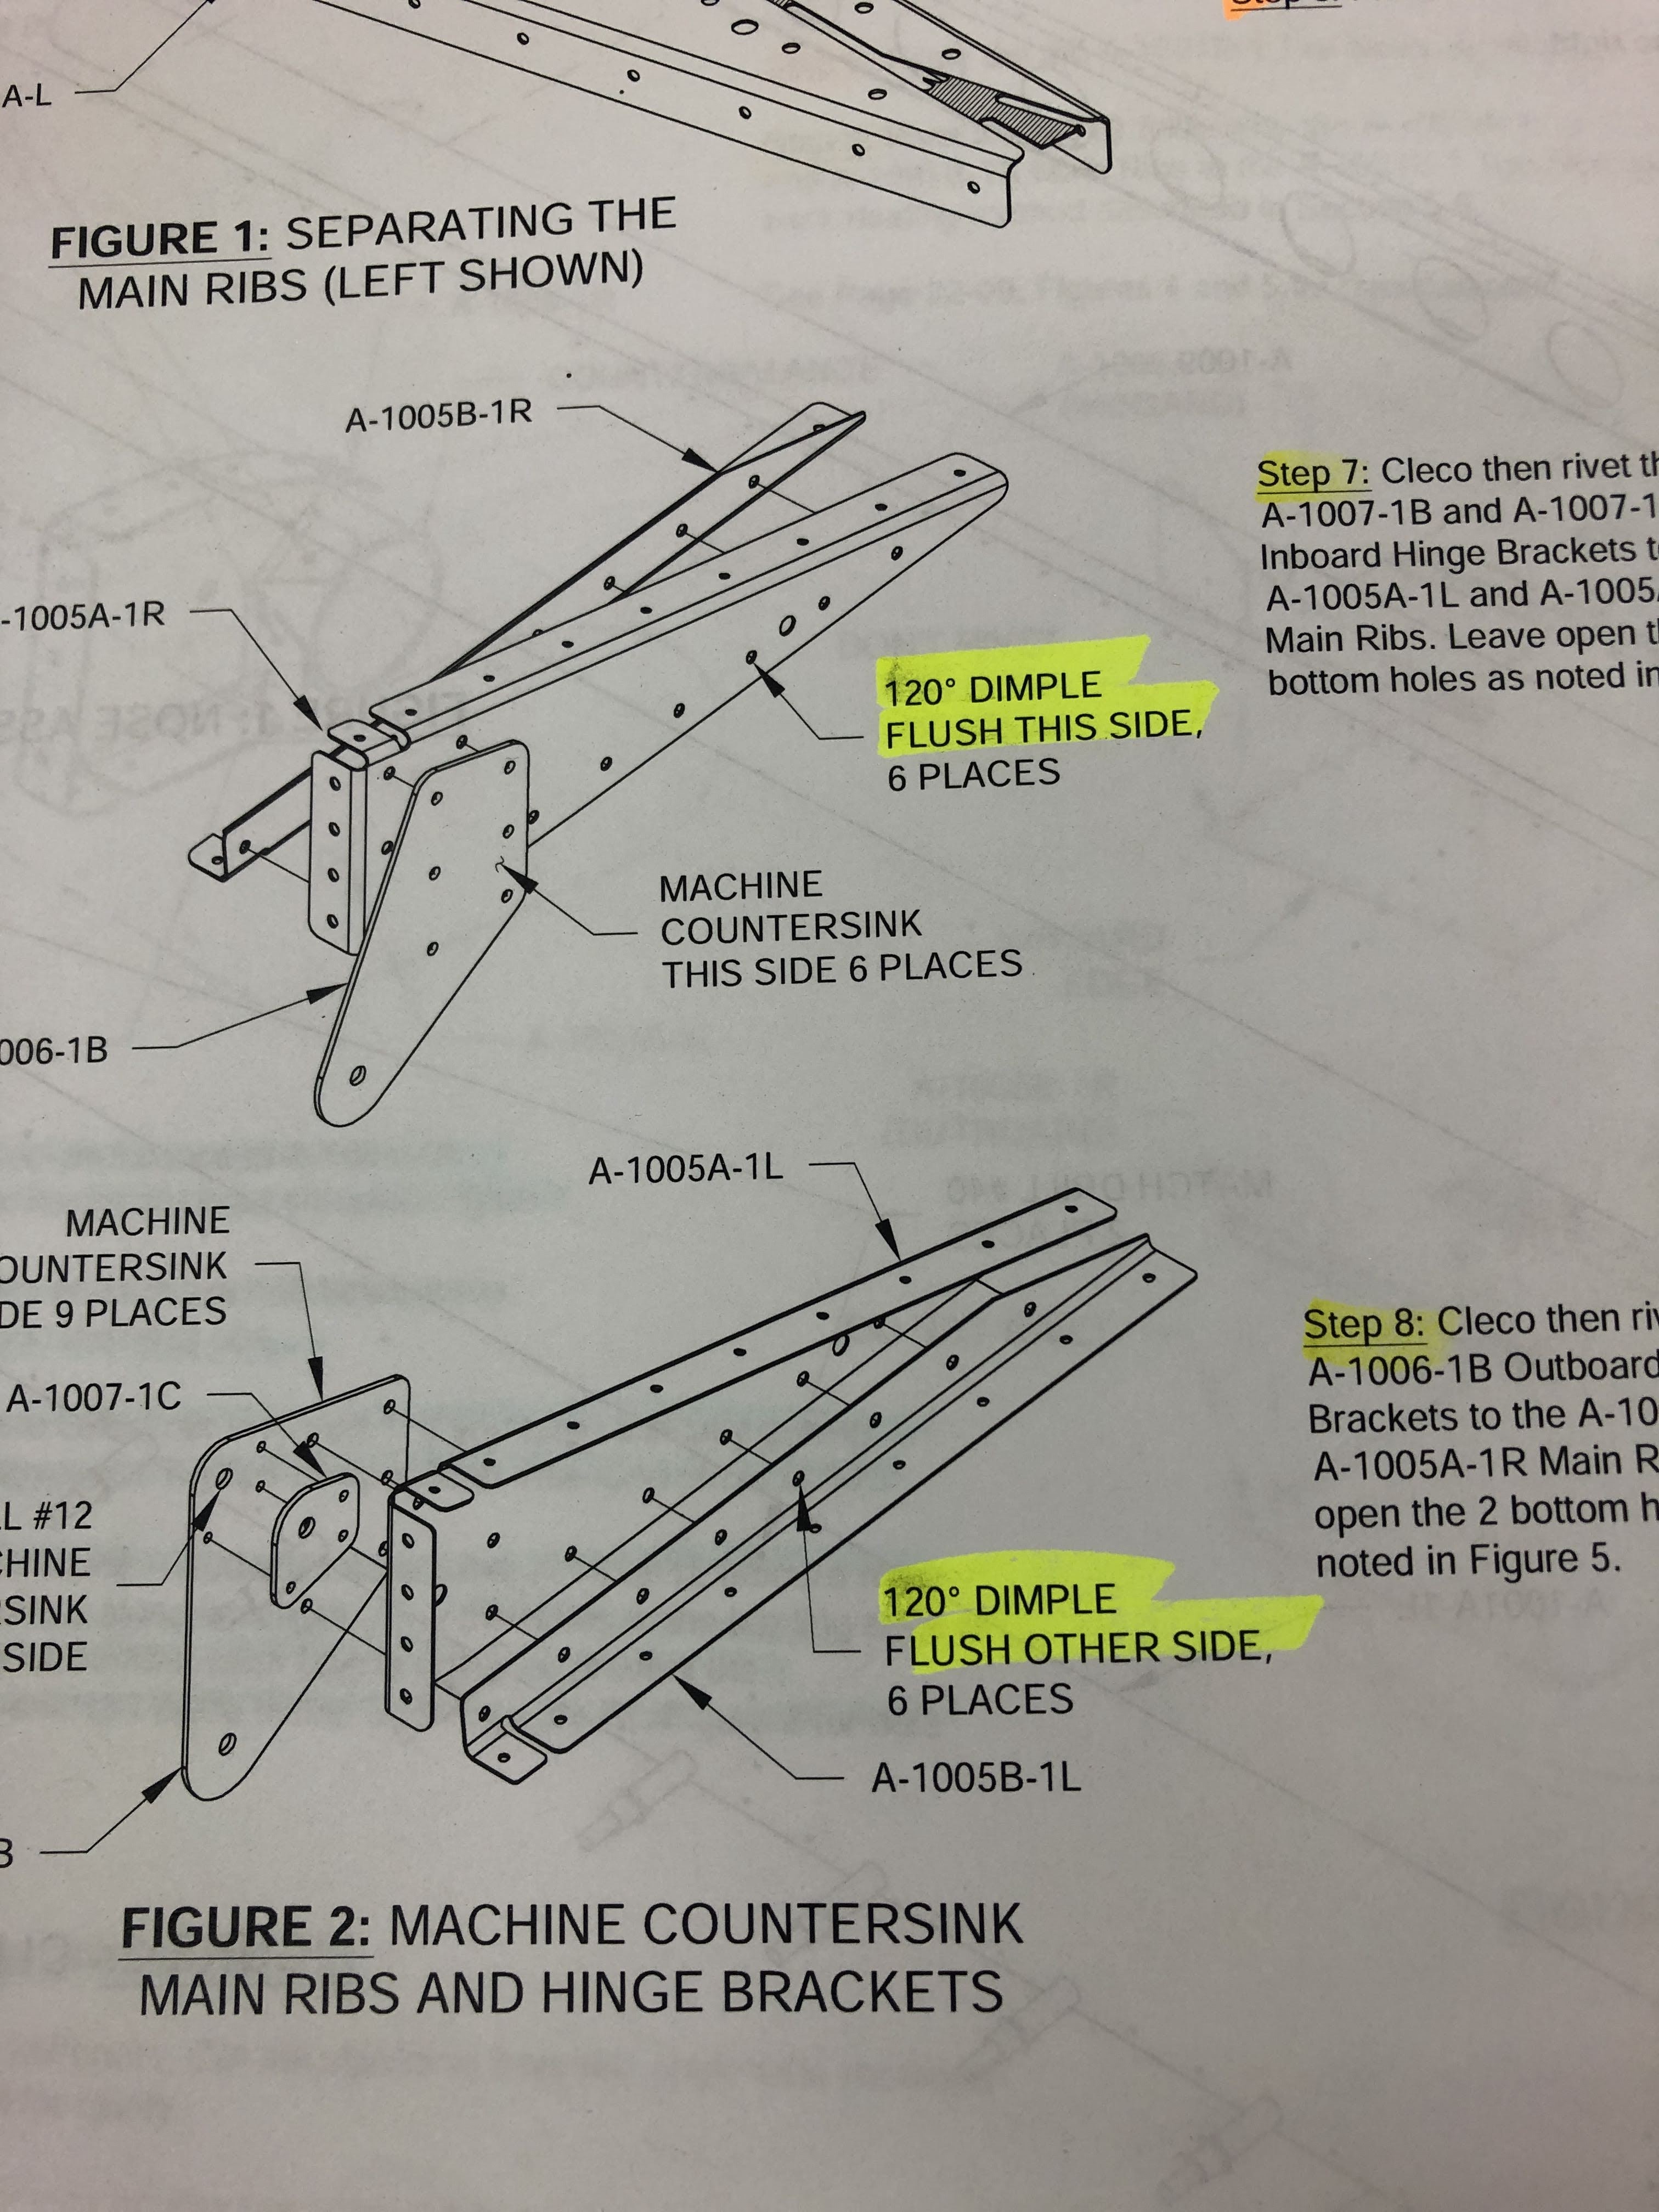
Once primed, I was able to dimple the rib flange holes. There were some #30 holes on the webs of the end ribs, where the top end rib attaches to the bottom end rib, using pop rivets. The instructions ask you to dimple the 0.098" holes - this is a #40 hole, so presumably this refers to the holes on the rib flanges. There is no reference to dimpling the #30 holes in the webs in the text, except a note to dimple them to 120 degrees on the main image. In any case, i don't have a 120 degree die, so i dimpled them using the 100 degree die. The end 2 holes don't get dimpled, because that is where the doubler is, and this is countersunk.

 |
| Dimpled using a 100 degree die. The end 2 don't get dimpled, becasue they are where the doubler is, and this is countersunk. |
After laying out all the parts for both flaps, to make sure i didn't stuff anything up (that will come later), i riveted all teh doublers to to the ribs. I was able to set all the rivets using the pneumatic squeezer.
 |
| All the parts laid out for left and right flaps. |


 |
| I placed the screw in place to ensure the parts remained aligned. |


Stiffners!


No comments:
Post a Comment