Wing Cradle Modification
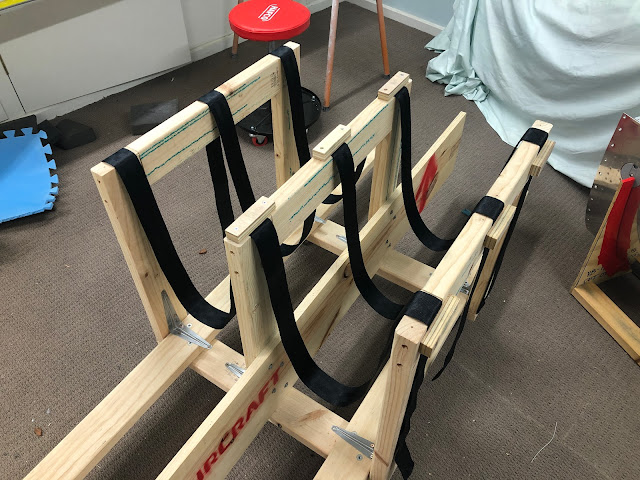
In order to hold the wing in the wing cradle once the leading edges were installed, i had to modify the cradle with a sling arrangement such that the wing would be safely held with the leading edges in place.
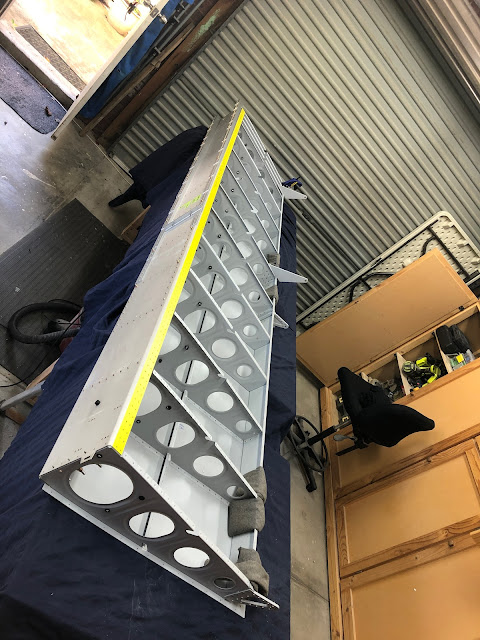
The wings were removed from the cradle - one put on saw horses temporarily, and the other placed on the bench. The one on the bench was placed so i could cleco on the leading edge for riveting. I used shot bags to make sure it didn't fall off the bench, but most of the weight is aft of the spar anyway.
The wooden "cross bars" that were at the outboard end of the cradle were removed, and i installed some metal shelf brackets to help brace the vertical 'legs' of the cradle, and stop them leaning inward with the weight of the wing. This was probably overkill, but i had the brackets in the cupboard so i figured it wouldn't hurt.
I used some solid 3/4" plywood to make 9 'clamps'.
I purchased some 'seat belt' type strapping which was good for 2,200 kgs - should just be enough :)
I measured the leading edges, and cut & clamped the strap so that once the wing was placed in the cradle with the leading edges installed, the spar would be relatively level, and i would have access to set the leading edge skin to spar rivets.
Riveting on the Leading Edges
The first leading edge was clecod on, and the the fit against the top skin was checked. I made sure there was about a 1/32"-ish gap the whole way along the leading edge skin - basically so i could just see a sliver of green primer on the spar flanges through the gap. These will be filled with paint eventually, i think. I also made sure that the tie down rings screwed in without interfering with the skins.
 |
| I had to lay on the ground with a torch, to check the fit of the leading edge skin against the top wing skin. |
All ribs except the most onboard one was installed with pull-rivets (of a couple of different lengths). I made sure to use a piece of cardboard on the skins in case the rivet puller bumped into the skin when the tail snapped off (as happened on the rudder skins). I used a small piece of rudder trailing edge as a wedge to allow the rivet puller to fit (where this was necessary).
 |
| Here you can see the little wedge in action |
 |
| This makes me happy |
The inboard most rib was installed with AN470 rivets - i used the offset rivet set on these at quite a high pressure of 60 psi.
 |
| Bucking bar bruises |
Once the ribs were riveted to the spar, the wing was placed in the cradle. I was able to use the squeezer to set all the flush rivets along the bottom flange of the spar, but was not able to reach the top skin rivets by myself. My mate Kingers helped me on this one - i ran the gun and he was on the bar. We used a couple pieces of thin ply as a shim to make sure the bar stayed normal to the spar flange and all these rivets went without having to drill one out.
 |
| The setup on the cradle was perfect - very easy access to the top skin rivets. For the second wing, we just swapped the wings over and put one wing back on the workbench. It will stay there anyway, in preparation to install the fuel tanks. |
 |
| Access using the squeezer to the bottom flange of the spar was easy using this arrangement. I am very happy with this cradle - it has worked out great. |
 |
| Right Wing - CLECO Free since 2021! |
Next up is the landing light lenses, priming the outside of the fuel tanks and then installing them on the wing.


Diesel tank leak fix Nova Scotia
ReplyDeleteAir dryer not building pressure repair Alberta