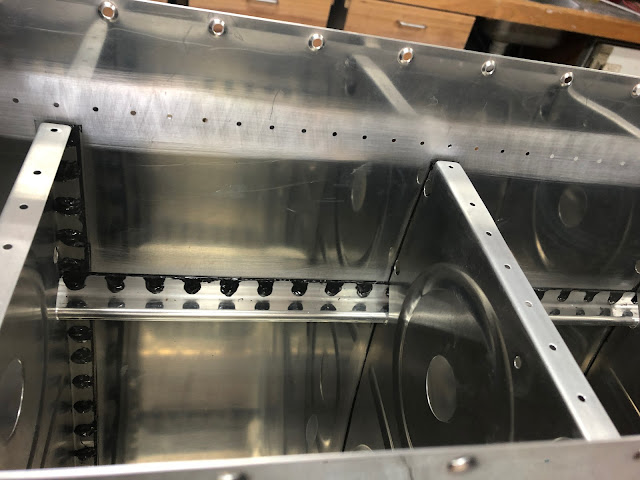
The J stiffners were installed in a similar manner to the rest of the ribs. I used the syringe to put a long length of sealant along each one and around each rivet hole, then spread this out with a tongue depressor.
I then slid the stiffner carefully in though the gaps in the ribs, trying to keep it off the fuel tank skin. This was easily achievable, however on the first one a small amount of sealant was lost at the root end, where the stiffner was just touching a raised screw hole dimple, which scraped a little sealant off as i went along.
I only masked the aft side of the tank skin adjacent to the stiffner - the forward side (aka behind the J part) was left unmasked. I relied on the squeeze out of the sealant from under the stiffner flange here to ensure a good seal. On inspection with a mirror afterward, there should be no leaks (HOPEFULLY!)
 |
A J stiffner ready to be slid into place in the tank. A generous amount of sealant was used on the forward side, so make sure there was a good squeeze out along the length of the stiffner.
|
 |
| A shot taken after the rivets had been set and and some cleanup completed. Once each rivet was inspected i covered each shop head in sealant. |
 |
This shows the typical squeeze out along the forward side of the stiffner.
|
 |
One drilled out rivet today looked like a small shoe.
|
 |
Here is what the stiffner looks like after each shop head had been covered.
|
Idiot
So i was inspecting all my work, leaning carefully over a tank with a torch; working my way along checking every millimetre of each and every flange. The trouble is, i had moved the tank right up against a wall under a shelf (as you can see in the pic below).
As i went to stand up at the end of the tank, i touched my head on the shelf above. I over reacted and literally headbutted the aft edge of one of the tank skins. Idiot.
Some more DNA on the aeroplane.
Tank Attach Brackets
The tank attach brackets were done in a similar manner to the ribs, however some sealant was applied to the flange of the small 1/2 leading edge rib, and spread thin with the tongue depressor. This flange will seal against the web of the tank attach bracket.
I also placed a bead of sealant just forward of the line of rivet holes, hoping the bracket would form a squeegee and make a nice fillet forward of the bracket where it would be inaccessible later on.
I also placed a lot of sealant in the forward corners where the tank attach bracket meets the small forward rib and i understand this is a common leak point.
 |
Here you can see the flange of the small #1 forward rib is covered in sealant, and a big glob is placed in the corner where it meets the skin and the tank attach bracket.
|
 |
A line of sealant was run forward of the rivet line to form a fillet where the brackets meets the skin (and where it would be inaccessible later)
|
 |
| The tank attach bracket flanges covered in sealant |
The bracket was then lowered into position and riveted. Once riveted it was cleaned up, and sealant placed on each shop head.
 |
After riveting and before a little clean up and rivet inspection.
|
 |
After a little clean and ready to have shop heads covered.
|
The tank was then flipped upside down, and i made sure the outside of the tank had a nice fillet in the corners where the small forward rib / skin / tank attach bracket met.
 |
This is on the outside, where the lower forward rib meets the tank attach bracket and skin. I made sure there was plenty of sealant in this corner but still enough room to buck the AD4 rivets later (where the clecos are)
|
 |
This is what the inside forward corner looks like, underneath the tank attach bracket. This is the skin on the right, the tank attach bracket on the top and the small 1/2 rib #1 on the left. I tried my best to make a neat fillet, bit it's more important it doesn't leak than be neat.
|
 |
| This was the squeeze-out from the small 1/2 forward rib and the tank attach bracket. This was my first attempt, and i added a fair bit of sealant to the flange of the 1/2 forward rib (you can't add sealant under here easily later). In this case i could have used a bit more, but there is squeeze out along the entire length so i am happy there won't be any leaks. |
Fuel Vent Lines
With a lot of help and advice from my TC, i worked out how to make a good flare and installed the tank vent lines.
 |
This is the 1/4 line after deburring...
|
 |
..and before deburring. The bur was massive and i needed a craft knife to cut it out of the inside of the tube.
|


No comments:
Post a Comment