I decided that i would make up a test piece and rivet it together as if it were a component in the fuel tanks - following the exact same preparation and assembly procedure. Better the devil you know!
The test piece consisted of a piece of 0.032" scrap material (same thickness as the tank skins) and 2 x 12" long left over pieces of J-stiffner. I prepared them in the same manner as the tanks, namely scuffing where the proseal would go, cleaning then dimpling.
 |
| Test piece components ready for scuffing. |
Getting Ready
First up, i worked our how many rivets i would be needing and soaked them in some acetone to get any oils etc off.
Before riveting begins, these are poured through a chux cloth and left to dry. The acetone is saved into another jar, and this is used to dip rags in for cleaning as i go along - i find it easier to just dip a rag than squirt the acetone out of the bottle. The less things you touch the better! Next time i will place these, on the rag, back into the original glass jar (they got knocked everywhere just sitting on the chux like this).
Next i cut up a bunch of white cotton rags into 3-4" squares using a rotary tool. I ended up using at least 20 of these in this little project.
Next i cleaned the parts with acetone, then got a new rag and cleaned it again making sure the rag had no further black marks on it.
After this was done and had evaporated, i placed some masking tape down on the parts to try and keep things clean (see note on distance at the end)
 |
| This tape is way too close to the parts - it needs to be about 1/4" away. |
Next, i placed some tape on the top if a 60ml syringe (you'll see how it gets covered shortly).
Once these are mixed together completely, so that everything is an even color and there are no streaks, i used the metal scraper to get it off the plate and put it in the end of a syringe.
 |
| This is why the tape was needed! |
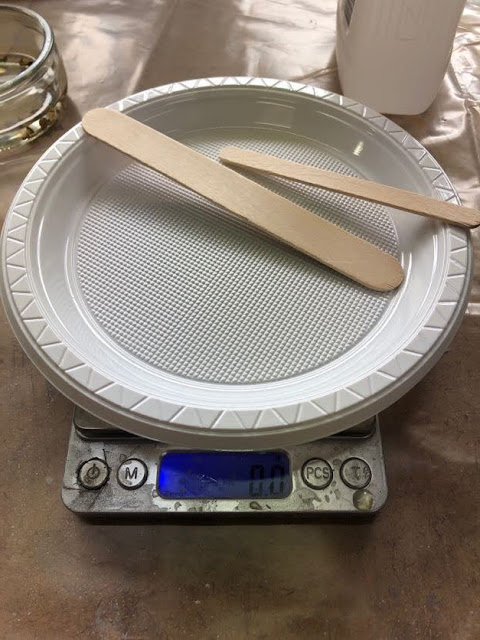
I mixed 44 grams of sealant for this test (a complete guess) and it filled the syringe a bit over half way. So i am guessing a syringe could take approx 80 grams of mixed sealant (call it 70 grams of Part A).
 |
 |
| All this mess was just to get it mixed and into the syringe! |
Actually putting something together
I elected to attach one stiffner by back riveting, and the other by using the gun and the bar.
It is worth noting, that for this test and also for the tanks themselves, i will not be putting any sealant in the dimples. I have not used the "fuel tank dies" some people use, and i don't like the idea of ending up with rivets that are not flush with the surface due to the thickness of proseal under the heads. If the fuel has gotten all the way to the rivet head and the tiny smear of sealant under the head is all that is stopping the leak, then i haven't done a very good job inside the tank!
To apply the sealant to the parts, i used the syringe to lay a bead down on the flange. The bead needed to be a bit thicker in between the holes and a bit thinner when i did the little circles around the holes. I did this by changing the angle of the syringe end hole to the part. In these syringes the hole at the end is at a 45 degree angle, so the more vertical the syringe the bigger the bead, and the more the 45 degree end is parallel to the part, the thinner the bead.
Once the sealant is applied above, i used a tongue depressor to smear it into an even layer along the flange (but didn't get a photo of this).
I also added a small bead along the curved portion of the J-Stiffner - which i will need to do on the real tank, since you can't get behind the stiffner to lay this bead down after the stiffner is riveted.
 |
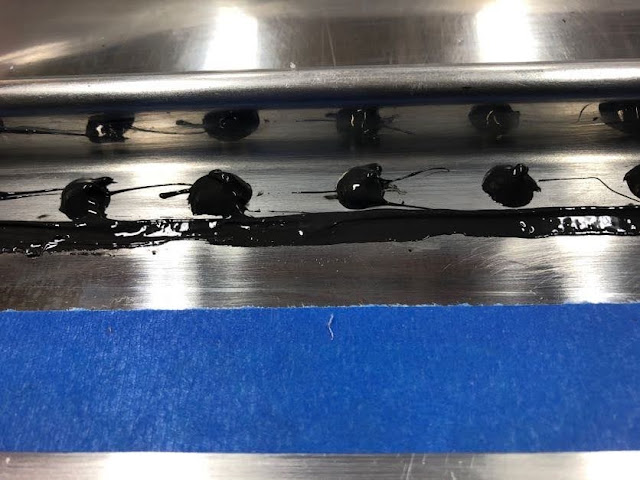
| This shows the small amount of squeeze out from under the flange and also how the rivets end up with sealant on their heads. |
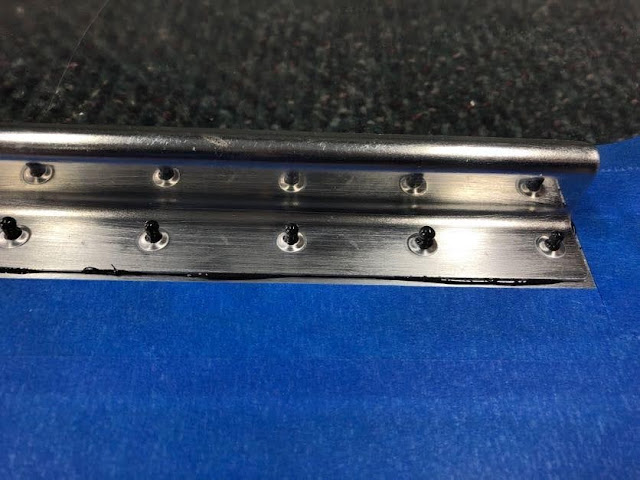
I wiped a bit of sealant off the rivet heads, then back riveted them. The set definitely had a tendency to slide around, so i need to really focus on making sure it doesn't move. Here are some close ups of the set rivets.
 |
| These were the first few which moved around a bit. You can see how the riveting causes more squeeze out - also around the rivet shank itself. |
Before moving onto the ones riveted with the gun and the bar, i went ahead and covered the shop heads with sealant. The syringe is really good for this, as the end of the syringe fits over the shop head / dimple. You just place the syringe over and give a little squeeze lifting the syringe up as you go. A little twist to stop the sealant making strings and you are done.
In addition i also laid a bit bead along the flange to skin transition - the squeeze out was not enough and not even. This is where i think placing the tape a bit further away is beneficial (about 1/4" would be good). This would allow room to make a good fillet on the flange. As it stands with the tape at the distance above, when you remove the tape it lifts the edge of the sealant up, which needs to be tooled back down. It would be better if the tape was further away (see lessons learned below).
 |
| The uneven edge to the fillet was because i had to tool it a bit once the tape was removed (due to the tape being too close and lifting the sealant up when it was removed). |
Next i followed the same process for the other stiffner, however used a gun and bar for these. The only difference here is that the parts are clecod in position. When the cleco is removed to put the rivet in, it pulls some sealant out of the hole with it.
 |
| Stiffner clecod in place with the black goo. |
I did a test with the sealant "covered" clecos; for all of them when they were removed, they were wiped with a rag on the end whilst in the extended position. Half were then placed in acetone and the other half just left on the bench. They both look exactly the same now - the acetone had no appreciable effect. Hence, i will just wipe the clecos when they are removed, then chuck them into a tin and use them again. A little bit of sealant on them doesn't hurt.
However, the little bit of sealant in the dimple is a concern. I decided to remove it by turning a rag on the end of the deburring tool. This worked really nicely.
The rivet was then placed in the hole, the tail wiped and i hit it with a mushroom set and my mini-tungsten bar. Here are some close ups of those rivets.
These rivets also had the shop heads covered and a fillet placed down. I did not have to place a fillet on the curved side - the bead on the edge works really well for making a good sized fillet.
Cleanup / Sealant Quantity Used
Masking tape was removed and clean-up was then done on all the tools, and any stray little bits of sealant on the parts (as well as on the outside - some does seep up around the rivet head and onto the skin / mushroom set).
You go through a lot of rags and gloves in this caper!
Lastly, i estimate there was perhaps 5 grams of sealant not used. I made up a plastic covered piece of cardboard, and i will use this to save a little bit of the sealant from each and every batch. I can then be 100% sure that each batch was mixed and cured correctly. I have kept the syringe to see if i can pop the sealant plug out of it and use it again.
Lessons Learned
This was a great learning experience and is the reason why i am building an aeroplane - no, not to use tank sealant, but to learn new tasks and techniques for myself. I am a big believer in doing as much as i can, hands-on myself - because that is how you expand your knowledge base. These skills (patience mostly!) can be used in many other projects.
Specific lessons on the tank sealant use i need to remember for the tanks:
- Tape up the rivet gun to help keep it clean.
- The plastic plate was not great for mixing on due to the texture on the bottom and how flimsy it was. I will try the plate again and if it doesn't work well use a plastic bowl or even a piece of scrap aluminium might be better.
- Next time, tare out the metal scraper and use this to get the product out of the can - and mix with this as well. Round the corners of the scraper.
- When i pour out the rivets to dry, place the chux and the rivets back in the shallow bowl - the rivets get knocked everywhere just sitting on the chux on the bench.
- The acetone in the little bowl was much more useful than the squeezy bottle. You can just grab a rag, dip it in, clean with it then throw straight into the bin.
- The bead laid down on the parts, needs to be thicker between the holes to ensure an even squeeze out around the part.
- The thick bead laid down in the J-Stiffner curve was excellent for creating the fillet - definitely do that on the real one.
- A rag worked really well for removing the sealant off the cleco when it was removed, then placed on the end of the deburr tool to remove the sealant out of the dimple. Then insert the rivet and use the same rag to clean the shop end of the rivet.
- The tape is a good idea, but it needs to be at least 1/4" (5mm) away from the part. It is really just to help stop the goo going everywhere, not to get a nice edge. As you pull the tape it lifts the edge of the proseal, which then has to be tooled (negating the purpose of the tape).
- Aim to feather the fillet out by the time it gets to the tape (placed further away). That should work really well and be neat.
- The tape is handy for wiping the end of the syringe on after you have done the shop heads - definitely do the shop heads before doing the fillets.
An update on the best way with the sealant: I used a thick tongue depressor to get it out of the can - this is because the steel putty knife was hard to balance on the plate when tareing out the weight. Now i use the tongue depressor to get it out and for a little initial mix, then finish the mix with the putty knife and use this to put the goo into the syringe.
I can confirm that after about 2 days, the proseal is not completely cured, however is in a rubbery state and just leaves a fingerprint impression. At this point, what was left pops right out of the syringe!
That works out to be 1.33 grams of Part A per inch of stiffner or flange, which includes the rivet heads and the fillets. Each stiffner is about 9" long, so i will need 12 grams per stiffner. Assuming a syringe can take 70-80 grams of Part A, i think i will work on 72g of Part A, to complete 6 stiffners at a time.
That's a starting point anyway! Let's see how that maths works out as i progress!
My first proper use of proseal is done and dusted - i think i am ready to start these tanks!


No comments:
Post a Comment