The Wing Side
The wing side consists of the larger P4 hinge riveted to the wing top and bottom skins, using the cut off flange of the wingtip as a spacer. Since the wing skins are dimpled, the spacer flange strip needed to be countersunk to accept the dimples. The hinge needed no further work since the spacer flange strip is countersunk.
The countersinking of the spacer flange strips was done using a Permagrit 100 degree countersink in the drill press - to control the depth. The spacer strips were also primed - this wasn't really required but i did it anyway.
 |
| A test coupon was used to check the depth of the countersinks |
 |
| I attempted to use the tool in my drill, but it was way to hard to control the depth and took too long. |
At the very forward part of the wing, there were 3 rivet holes where there is no hinge. These were dimpled and i installed a -3 rivet in the hole to fill it up.
Hinge Pin Termination / Trailing Rib Prep
The wingtip side took a little longer. First up, i made up the hinge pin terminations - this is how the hinge pins will be held in position so they do not slide out. This was made up by bending each pin to a 90 degree angle at the end, such that a piece of P4 hinge (one eyelet in width) could be slid on. They were bent to be deliberately too long at the start. The pin was bent over slightly on the end so the piece of hinge could not slide off - it will stay permanently on the end of the pin. I then aligned these 2 pieces and match drilled them to the trailing ribs. I then adjusted the length of the hinge pins to the holes in the tabs aligned with the holes in the rib, when the pin was bottomed out in the hinges. The pins were labelled for their position using heat shrink tubing. The tabs be held with a #6 panhead screw into a nutplate. Hard to describe but easier to see how it came out:
 |
| The ends of the pins were bent over to stop the little tab falling off. |
The trailing ribs were then primed, and riveted together with the bent hinge pieces and the angle brackets. I did not prime the flanges where the rib will be bonded to the wingtip. I also dimpled the rib web and a couple of nutplates and installed these to take the caphead screws.
At this time, i also relieved the flange at the front of the wingtip to go around the 3 rivets which i had installed to fill the holes which came pre-drilled but were not used to rivet on a hinge.


The Wingtip Side
Installing the hinges on the wingtip side meant i needed to countersink the wingtips for -3 rivets. I decided not to use the normal AD3 rivets (normal temper with the dimple), but elected to go for soft temper rivets - these are still AN426 rivets but instead of AD3, then are A3. The -4 length was very expensive for some reason, so i ordered -5 length (AN426A3-5 or MS20426A3-5). Had to order a minimum of 1/2 lb - so i have a couple of thousand if anyone wants any! I had planned to cut them down, but it turned out the -5 length made a nice shop head (being a softer rivet they set like butter with the squeezer).
To do the countersinking, i was not able to use the drill press and using the Permagrit tool in the hand drill would have taken forever. So i clecod the hinges in position to act as a guide for the pilot, and used a countersink cage with a normal countersunk cutter. I countersunk a little deep so i could fill the rivet heads with epoxy and micro filler later.
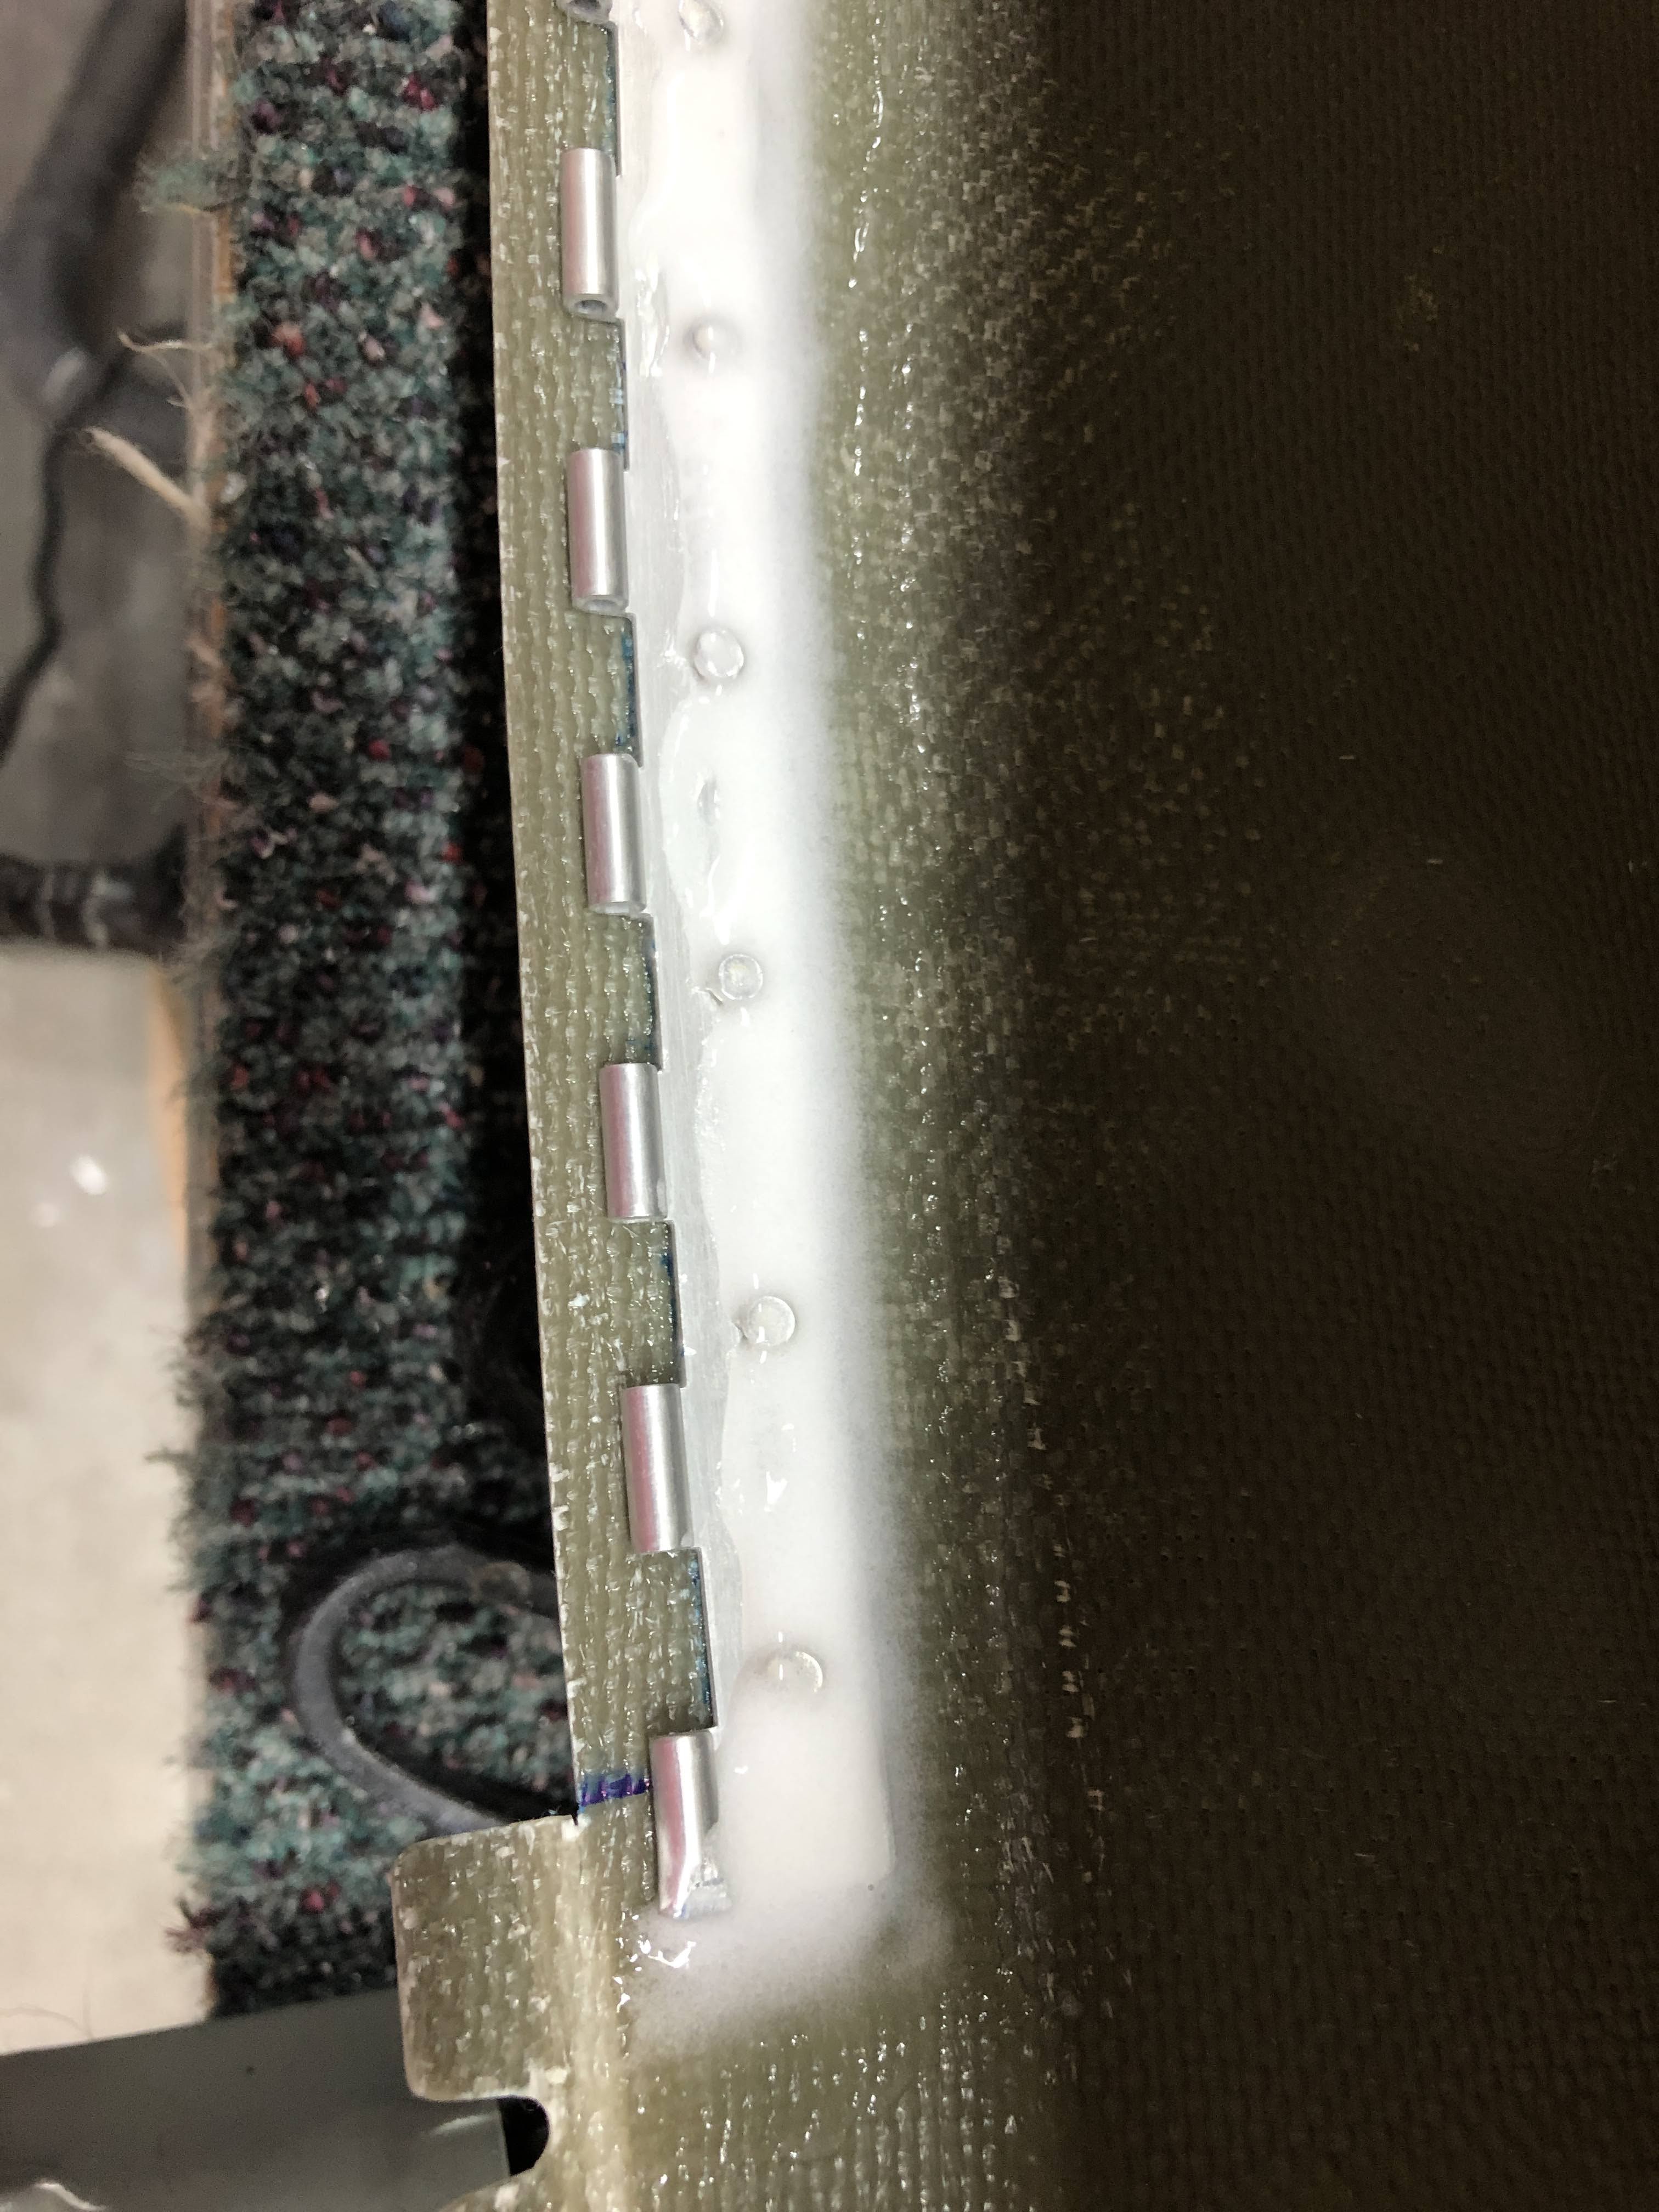
To actually install the smaller P3 hinges into the wingtip, the insides of the wingtips were scuffed heavily and cleaned with acetone. The hinges were scuffed with 60 grit sandpaper and also cleaned. I used gloves at all times from here on in. A slurry of epoxy and flox (flocked cotton) was made up and a very thin smear was applied to the hinges. The slurry would slowly move then held vertically. The hinges were clecod on and then I used the rivet squeezer / soft rivets to attach the hinge. I applied the flox slurry over the outboard side of the hinges to further hold them in place. I made sure to keep the flox slurry away from the hinge eyelets.
 |
| A thin slurry of epoxy / flox applied to the hinge |
 |
| During riveting - had to be careful not to crush any eyelets with the squeezer. |
 |
| Soft rivets set. The countersinks are deliberately a little too deep. |
 |
| Extra slurry was applied at the edge of the hinge |
Some slurry was placed on the trailing rib also and this was riveted in place. The angle bracket was not riveted, but was just glued in place with the epoxy slurry. This was because it would have been impossible to get to it with the squeezer - it had a couple of holes in it from where it was clecod on, and these ended up being filled with epoxy so I'm confident it won't go anywhere.
 |
| A bit messy, but the extra epoxy / flox should hold the angle bracket in place. I would not have been able to get in here with a squeezer, and didn't want to use a gun on the outside of the fibreglass surface. |
The wingtip was then placed on the wing, using the hinge pins, to cure (just in case there was any misalignment or mis-shape when laying on the bench, i didn't want this to set permanently when the epoxy went off).
How did it come out?
Bloody great! I am very happy.
 |
| Look Ma - no screws! |
At this point the wingtips are structurally attached. They would be good to fly like this - however i reckon i can tidy up the fit a little using some micro. The trailing edges also need some trimming and alignment with the ailerons. Next post!


No comments:
Post a Comment