As mentioned in a previous post i used a bench jig to set the long and short pushrods to the plans dimensioned length(s).
The next step was to install them into the aeroplane and check the rigging.
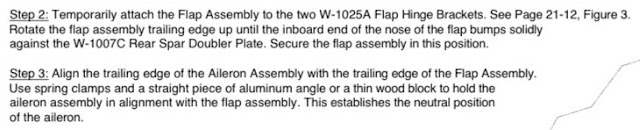
There was an amendment to the plans in 2020. The old method (plans revision 0 from 2013) involved using a supplied aluminium jig on the end of the aileron to set the neutral position.
Plans revision 2 from 2020, changes the method to match that of the RV10 - basically, the new process is:
Install the flap and make sure it is hard up against the spar (in the cruise, reflex position). With the wings vertical nose down in the cradle, the flap does this naturally)
Align the aileron with the flap and clamp in position - i used a 3D printed jig to do this.
Set the aileron bellcrank in it's neutral position using a supplied jig.
This is the 3D Jig which i designed and my dad printed for me. He did one per wing.
This holds the aileron perfectly aligned with the flaps.
I noticed that with both my wings, with the flaps hard up against the spar there was a very small misalignment in chord between the flaps and the ailerons. Basically, if looking at the flaps from underneath the wing, the trailing edge of the flap was about 1/32" forward of the aileron trailing edge. The only way to align these was to move the flaps about a credit card thickness off the spar. This allowed for perfect alignment. I used a hotel card under each flap forward nose skin to hold the flaps in this position, and did my aileron alignment in this position. (For final setup, i will set the flap motor to stop the flaps in this position just shy of the spar).
Once you have this setup, the correct rigging is achieved when the small steel pushrod is adjusted to fit (i.e. you adjust it to fit between the aileron held in the neutral position with the flaps, and the aileron bellcrank held in the neutral position by the jig).
The long aluminium pushrod is adjusted so that the forward torque arm is 2 17/32" from the fuel tank end rib skin and the centre of the bolt hole in the arm.
To check this rigging, the pushrods had to firstly be installed. When installing these, i used the supplied hardware callouts, however in some cases added a thin washer, or used a combination of thick and thin washers to ensure proper fitment. The bolts were installed using temporary nuts so i could check the rigging, then when i found it was correct, i added a locknut and torqued each to 38 in/lbs. Each one was marked with torque seal. I then tightened all the jam nuts, made sure the pushrods had proper movement, and marked the nuts with torque seal.
Left wing bellcrank jig held in the neutral position
Left wing bolt hole 2 & 17/32" from fuel tank skin
Left wing - chord wise flap / aileron alignment
Left wing - span wise flap / aileron alignment
Right wing - bellcrank jig in place
Right Wing - bellcrank 2 & 17/32" from flap rib skin
Right Wing - Chordwise flap / aileron alignment
Right Wing - span wise flap / aileron alignment
With all the rigging completed, there was nothing left to do other than make aeroplane noises:


No comments:
Post a Comment