Aileron Hinge Brackets
Page 15-02 has you riveting the inboard and outboard hinge brackets together. SB 16-03-28 dated Mar 11, 2018 was used to construct both inboard aileron brackets. I was able to use the pneumatic squeezer to set all rivets except the long -11 rivets which go through both angles at the bottom of the inboard aileron bracket - the pneumatic squeezer didn't have enough 'throat' to reach. So the hand squeezer was used for these.
 |
| These are the outer aileron brackets (end of the wing spars) |
 |
| The hand squeezer was used on these giants! |
 |
| These are the inner aileron brackets made as per the SB plans. |
Rear Spar Riveting
The rear spar prep started with the dimpling of the skin holes on the spar flanges. I was able to fit my pneumatic squeezer in here with no real issues; although, for the lower flanges which are bent more than 90deg i had to grind the top of the squeezer yoke down so that it would fit. Just a lot of holes!
 |
| Careful grinding on the belt sander to get the toke to fit. |
Once this was done, i carefully clecod all the components of the spar in place and taped off any holes which did not get riveted at this time. This includes a horizontal row of holes for the aileron and flap gap covers, as well as any place where there was a rib. I riveted the doublers on first, then did the inboard aileron brackets once the doublers were on.
All rivets on the rear spar were set using the pneumatic squeezer. Once i set it up for a particular rivet length, i set all rivets on both spars that were this length, starting with the shortest and moving to the longest. There were a few rivets on the aileron brackets i could not get the squeezer onto straight - so i tried using the gun and bar. These rivets were ok, but not as consistent as the others - so i bit the bullet and ground down the longeron yoke so that it would fit.
For all rivets set at this stage, i put the manufactured head on the aft of the spar - the parts were basically the same thickness and this worked out very well. No puckering was observed anywhere.
 |
| The forward side of the left aileron bracket. |
 |
| The aft side of the left inboard aileron bracket |
 |
| The forward side of the right aileron bracket |
 |
| I tried using the gun and bar on these rivets, but didn't like the lack of consistency. I think the spar was moving around a little. |
 |
| Did't have too many tipped over rivets! |
 |
| The longeron yoke was ground down to fit around the rivets on the aileron brackets and resulted in much more consistent rivet set. |
 |
| Rear spar riveting complete |
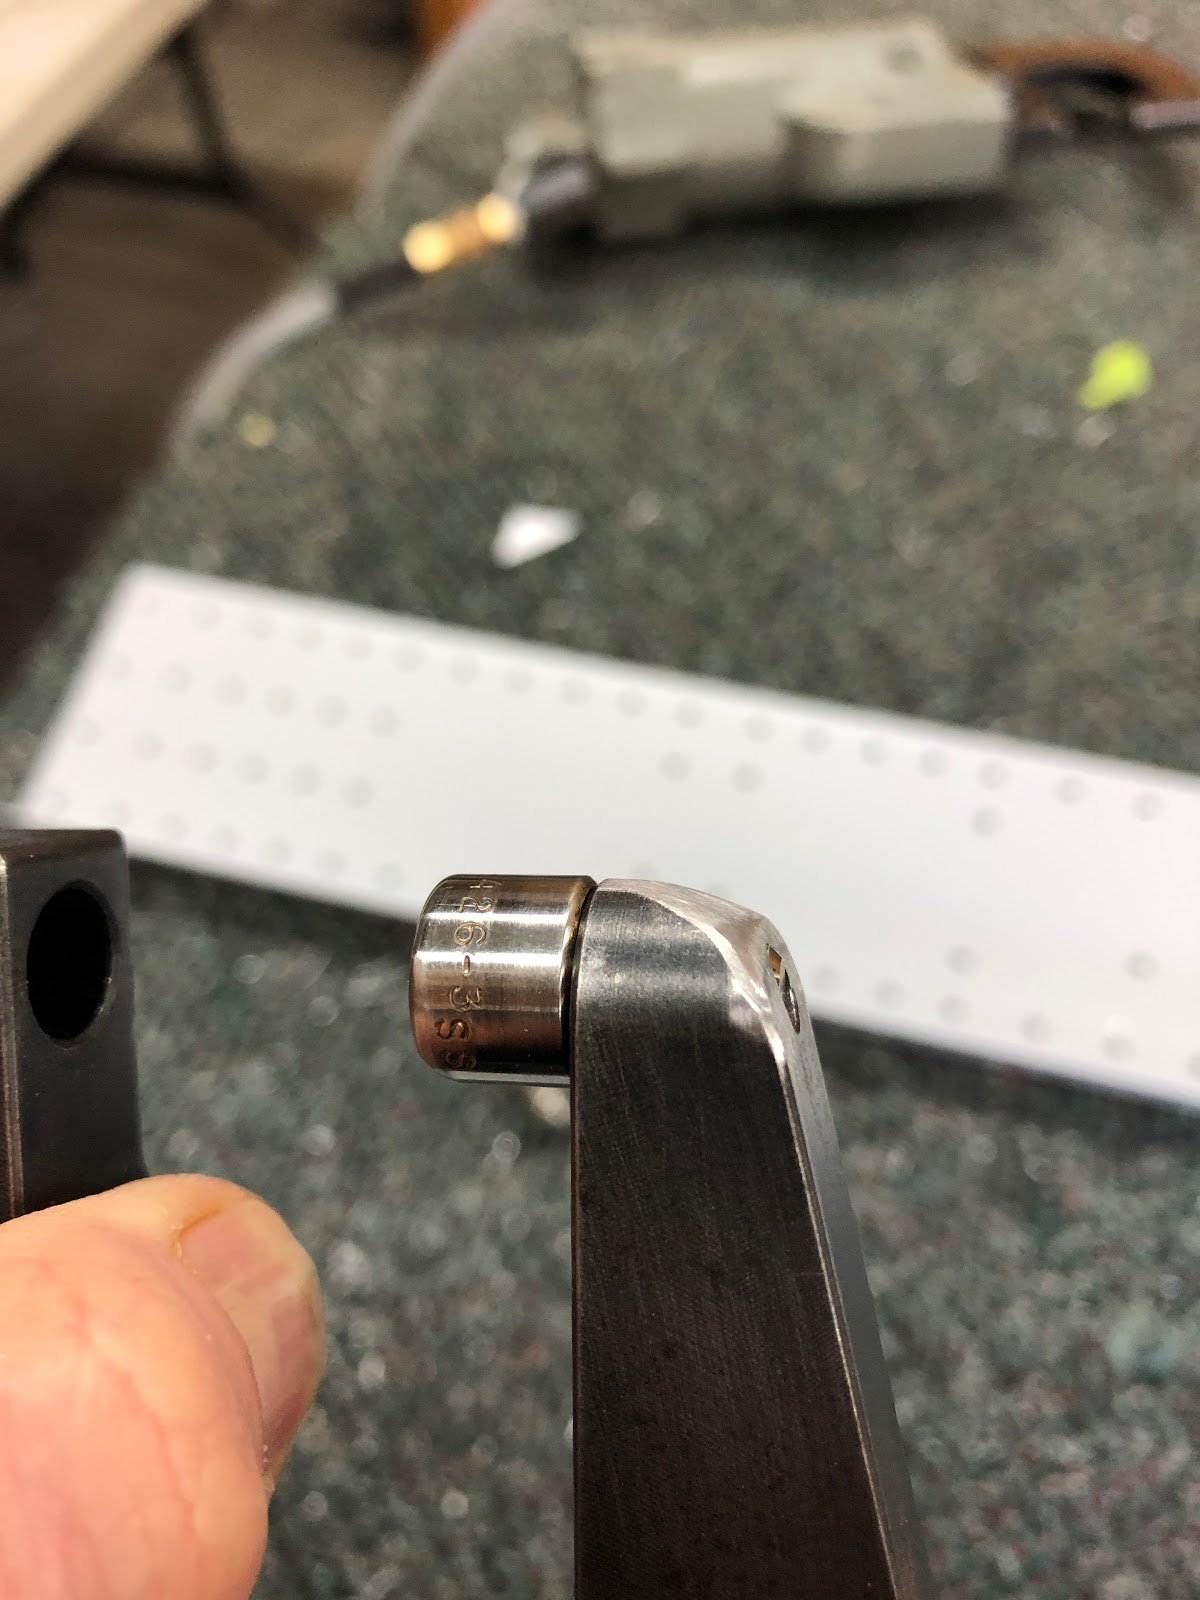
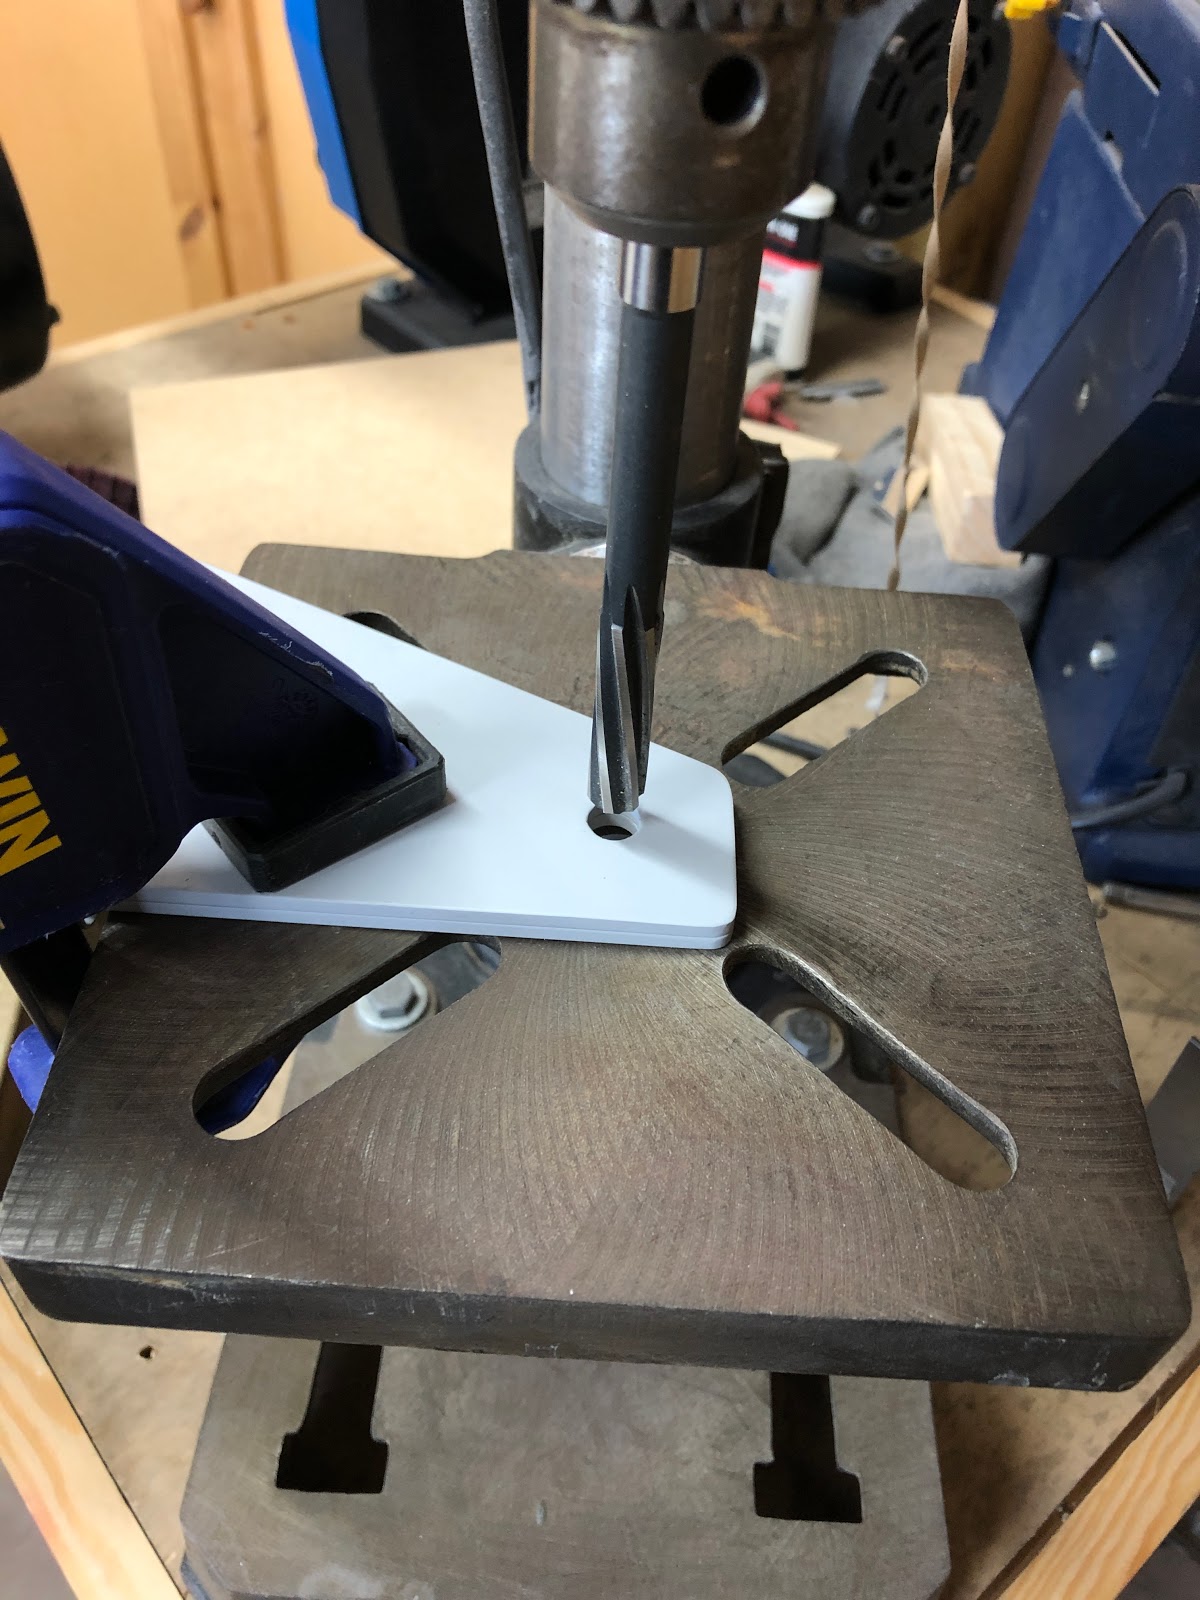
A "Critical Hole"
The bolt holes at the end of the rear spar where the wing bolts onto the fuselage are 11/32" and must be reamed to 3/8" (for AN6 bolts later). For this i set the rear spar up as level as i could, and triple checked that the reamer was 90deg in both planes to the table of the drill press. I then clamped the parts down, set the drill press to the slowest speed (900 rpm) and tried to ream the fist hole. The reamer was chattering a lot, so i stopped the drill and hand turned the chuck to get the reamer started, then it went nicely through the hole. The hole was checked with a caliper was was indeed 3/8". I deburred the edges of the holes, then added a little primer into the holes with a cotton bud.
Rear Spar Riveting
Next up was the actual riveting of the spars to the rear of the wing ribs. When clecoing the spar on, i noticed that i had forgotten to dimple the flanges of the small "flap hinge" ribs at each flap bracket location. Checking back on the plans, this was called out on page 14-02, Step 2 but i had missed it. Goes to show that trial fitting parts to see if they make sense is a good idea. I was able to dimple these in-situ with the hand squeezer.
 |
| Lucky i noticed these! |
I clecod the rear spars onto the wings one at a time. I placed the wing on the bench to make the riveting easier. Earlier i elected to put the manufactured head on the aft side of the spar (as the parts were the same thickness). However, for the wing ribs the flanges are much thinner than the spars and i didn't think it was a good idea to be placing the shop head on the thin flange. So for these rivets i placed the manufactured head on the rib flange - this allowed me to pull on the squeezer body to make sure the rib flange was flush to the spar. I think all these rivets turned out well.
I was able to get to all the spar to rib rivets using the squeezer except the lower rib attach rivet on the rib adjacent to each of the inboard aileron attach brackets - for these the aileron bracket got in the way of the squeezer body. I used a gun and a bucking bar for these and they turned out fine.
 |
| Left wing spar clecod in place ready for riveting |
 |
| The shop heads were placed on the rear of the spar. |
 |
| The manufactured heads were placed on the rib flanges |
 |
| The line of holes left open are where the flap gap fairing will be installed later. |
 |
| I was able to use the squeezer to get to all rivets except the lower rivet on the rib which is next to the inboard aileron bracket. |
 |
| Thankfully i only had to drill out one rivet - had to pull out the big bertha #40 drill bit to get this done! |
The only exception to the rivet direction was the rib attach rivets at the inboard end of the wing where there are 2 doublers. I decided that if i placed the shop head aft, these may interfere later with the setting of the skin rivets in this area, so i squeezed them with the shop head on the rib flange, and used a piece of plastic tubing to hold the rib flanges down. There was only a tiny bit of lifting of the rib flange.
 |
| The rivets on the far left and right of this doubler attach the ribs to the spar - i placed the manufactured head aft to ensure clearance when setting the skin rivets later. |
 |
| Where there was just a single doubler and clearance was not an issue, the shop head was placed aft like the rest of the ribs. |
 |
| Rear spars complete - starting to look like a pair of wings! |
Here's hoping i haven't just built 2 left wings!


No comments:
Post a Comment