Aft Deck Angle Brackets
Prior to priming, the aft deck was clecod and the angle brackets were installed. I had to drill these to match the HS mounting "ears" and they had to be drilled perpendicular in all axes, so i simply clamped a square to the assembly and used a long drill bit.
Assembly started by riveting the 1409 bulkhead to the aft deck (i forgot to dimple this, so it was dimpled after it was riveted to the aft deck). Some of the rivets for the 2 angle brackets and doubler on the aft deck were not common to the aft fuse (side rail and rib) assemblies, so these were riveted on before the aft deck was installed.
Assembly started by riveting the 1409 bulkhead to the aft deck (i forgot to dimple this, so it was dimpled after it was riveted to the aft deck). Some of the rivets for the 2 angle brackets and doubler on the aft deck were not common to the aft fuse (side rail and rib) assemblies, so these were riveted on before the aft deck was installed.
Elevator Trim
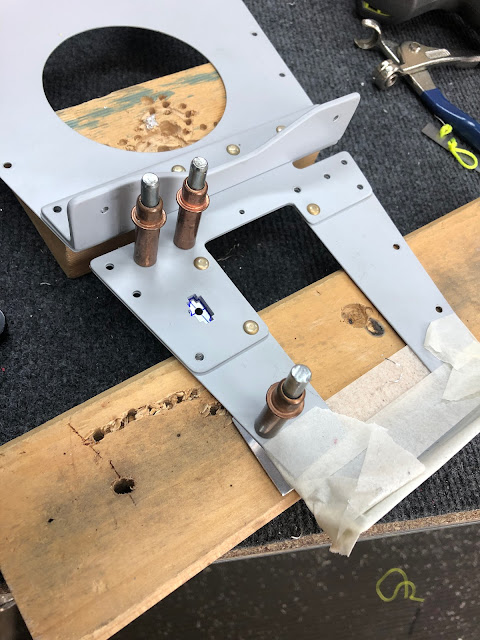
Since i decided not to use the mini-molex conenctor, i figured it would be better to drill the current square hole for a grommet, so then i can run the wires at a later date (once i finalise the connector). This involved mounting a blank piece of sheet under the square hole, with a small hole drilled so that it is in the centre of the square hole. I could then use a step drill to re-size the square hole. The drilled hole edges were primed.
 |
| The 2 large holes were to slip the sheet over the tails of the 2 AN470 rivets shown above. |
Aft Deck Assembly
The riveting of the aft deck was a fairly straight forward process. In most locations, i was able to use the pneumatic squeezer, and i changed the yokes to fit the situation. The hand squeezer fit into other locations which the pneumatic squeezer would not. There were a few rivets which i could not reach with the squeezer, and these were done with the offset cupped set, and a bucking bar on the inside.
I used AN470AD3 rivets instead of flush rivets across the line of rivets aft of the forward HS mounting bars (these were much easier to set than flush and meant i didn't have to dimple the aft decka and rib). According to VAF there is no clearance issues using these.
I found that the rivet lengths called out did not make much sense - in some places there was an extra doubler in place, but the rivet length was the same. In these cases, rather than a very short tail, i used a longer rivet and cut it with the rivet cutters.
 |
| A non-swivel mushroom set was carefully used here (and just barely fit on the outboard rivets), and a bar was used inside. |
Drilling the VS to the Aft Fuse Assembly
The VS was clamped to the aft fuse assembly as per the plans, and was drilled to the aft bulkhead and tailwheel casting. Again, a square was used to ensure the drilling was perpendicular. Each hole was stepped up in size, and a reamer was used for the final bolt hole size.
 |
| Temporary nuts were used to bolt the assembly together |
Major Visual Progress
Of course, once the VS was bolted on with temporary nuts i had to install the rudder so it looked like an aeroplane!


No comments:
Post a Comment