After priming the side skins, 1418 C Channel longerons and the aft fuse skin, i moved onto dimpling the side skins and the lower aft fuse skin - i used the DRDT2 with my dimpling tables, and where this could not access (like on the curved surfaces), i used the hand squeezer (and in some cases the reduced diameter die). I was careful to dimple only the #27 holes related to the access panel (not the top 2), and dimpled the #30 holes, except where the rudder stops are located.
Van's Assembly Order
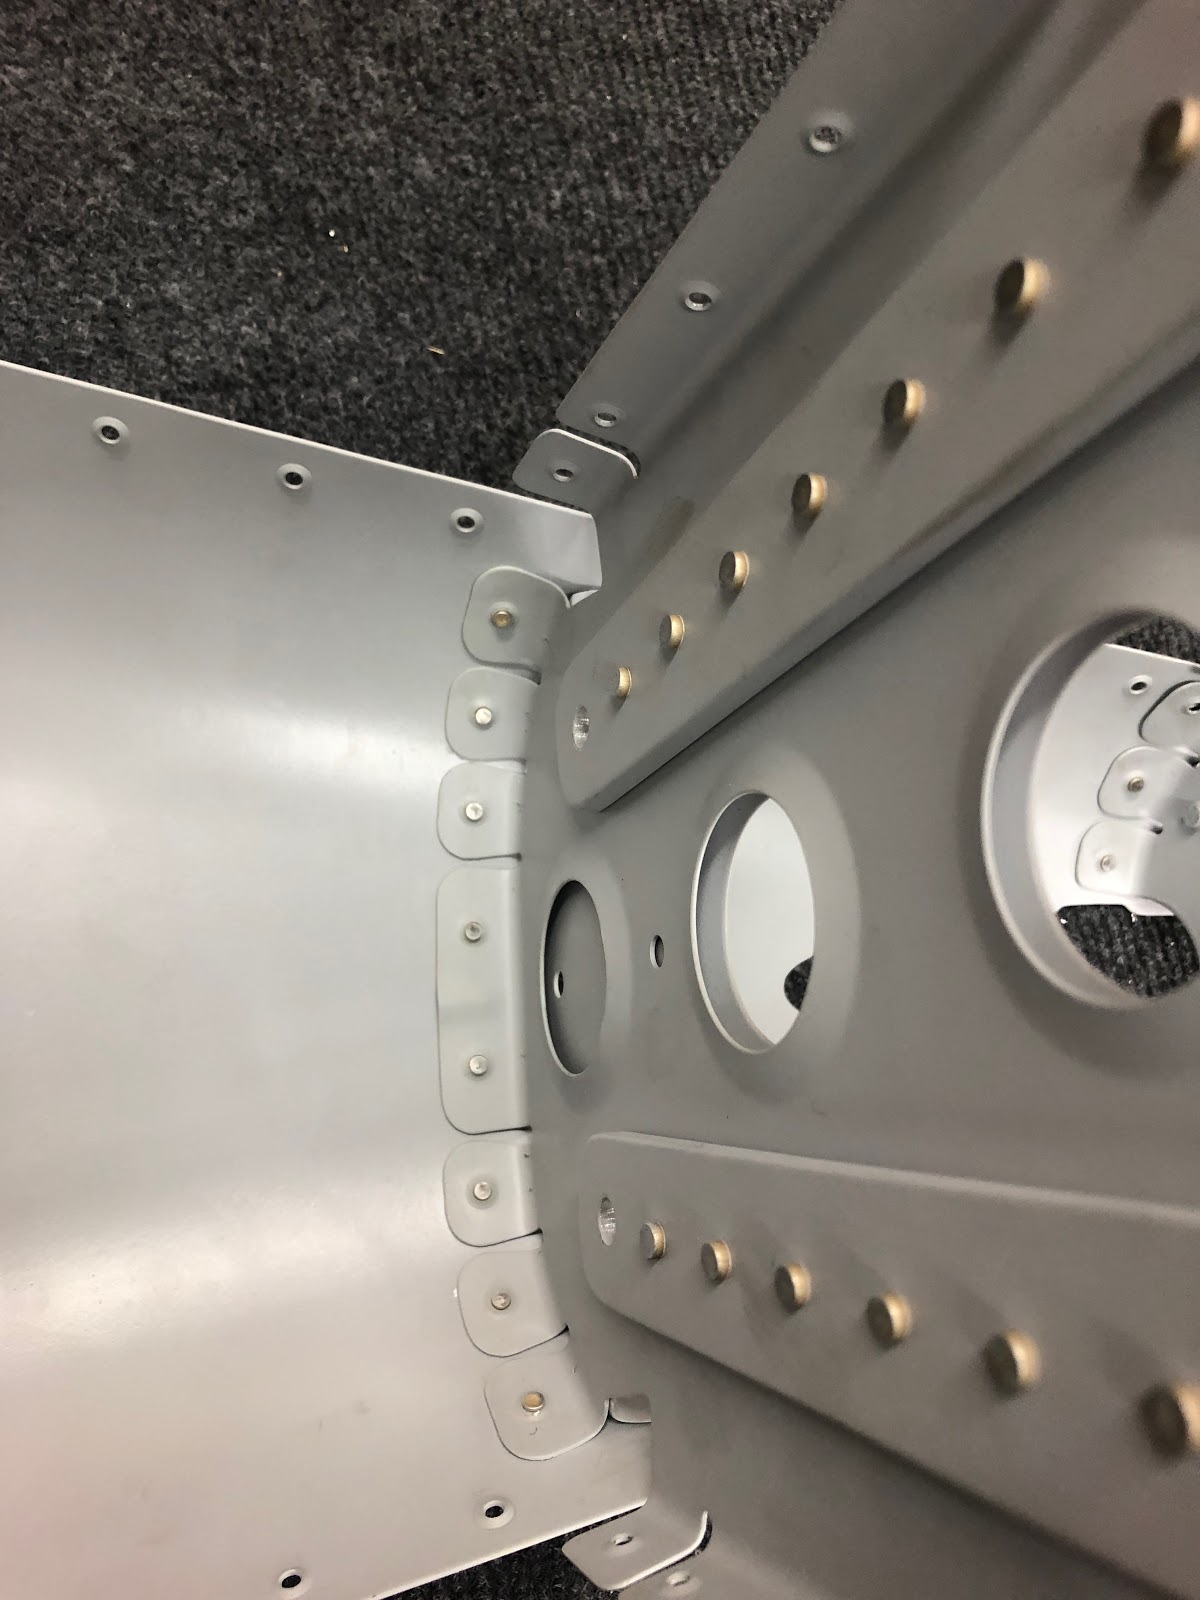
Page 10-14 of the plans has you begin clecoing a bunch of parts together. Basically, the assembly is still upside down at this point, and you begin on the left side to place the J stiffners in their slots, then place the 1418 C Channel longeron in place, then the left skin. Once this is done, you flip it upside down, then cleco in the 1410 and 1411 bulkheads, before adding the right hand side J Stiffners, C Channel longeron and skins.
You then rivet the aft most 1412 bulkhead to the aft lower skin, rivet the tail spring mount onto the aft bulkhead with the 2 "keeper rivets", and then add this whole assembly to the aft fuse. The issues i saw with this method were:
1. There are 2 rivets on the lower flange of the 1411 bulkhead, under where the tail spring mount attaches with AN4 bolts that would have been literally impossible to buck well - without some sort of foooted buking bar etc etc.
 |
| These 2 rivets would have been under the tail spring mount when bucking and been very difficult. |
 |
| Here you can see how the rivet is under the tail spring (or at least veryhard to get to). |
2. The second issue i saw, was that doing things in the order of the plans meant that there was no way to backrivet these rivets with the assembly in situ (you could not get a gun inside). In fact, getting a tungsten bucking bar inside would have been difficult!
Amended Assembly Order
To alleviate these problems, i decided to change the order of assembly. Firstly, i celcod the left hand side C Channel longeron and skin in place, but only clecod the right hand C Channel longeron in place so the assembly had soemthing to sit on the saw horses:
 |
| The left side components are installed, and only the right side C channel longeron is installed, so the assembly could sit on the 2 longerons on the saw horses. I then flipped it back upside down again. |
Note that the 1411 bulkhead is in place on the above photos, but i removed this to rivet it below.
Moving on, i riveted the 1412 aft rib assembly to the lower aft fuselage skin, using the backriveting set and my table mounted backrivet plate.
 |
| 1412 aft bulkhead backriveted to the lower skin. |
I then decided i would take a punt, and see if i could backrivet the 1411 bulkhead also to the lower skin, and then see if i could slide the tail spring mount into place. For backriveting these i had to pull out the Taj Mahal Big Mummy Offset BackRiveting Set (Deluxe Model).
 |
| Big mumma! |
 |
| I weighted down the assembly, and held it at the right angle so the rivet head was flush on the backrivet place, using lead shot bags. |
 |
| Both bulkheads riveted to the lower skin. Much easier than being upside down on the floor and trying to backrivet around the tail spring mount. |
 |
| 1411 bulkhead aft side rivets. |
 |
| 1411 bulkhead forward side rivets |
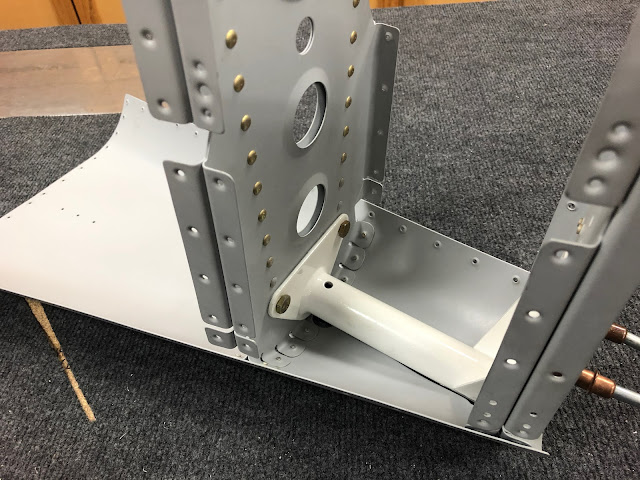
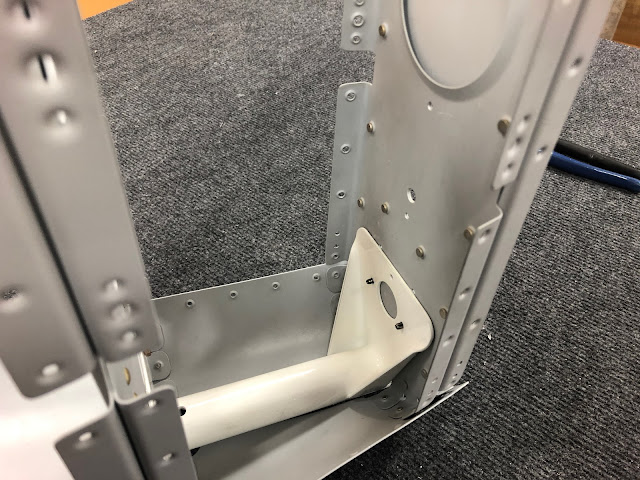
Next up came the big gamble - could i fit the tailspring in postion. I covered both bulkheads with tape, and was able to bend them both out of the way slightly. Once the open end of the spring mount popped into the hole at the bottom of the 1412 bulkhead, it popped right into place.
It then added the AN4 bolts, measured the running torque (25 in/lbs) and added this to the required torque (85 in/lbs), so set my torque wrench to 110 in/lbs. I used torque seal on the nuts to the bulkhead (and didn't put it on the threads, as this can gall the threads when the nut comes off apparently).
I then installed the keeper rivets.
Aft Skin Assembly Mating
Since i had left the right hand side skin off the major assembly, it was an easy task to slip the lower aft skin into position between the 1410 bulkhead and the lower belly skin, then place the right 1418 C Channel longeron back in place.
Once in this position, with the right skin off, it made it much much easier to complete the 6 rivets joining the 1410 bulkhead, lower aft skin and the belly skin. I used a mushroom set and a bucking bar for this.
 |
| The aft skin assembly in position - much easier to rivet the rear 2 bulkheads (1411 and 1412) via backriveting, then place it all in position here to rivet to the rest of the aft fuse. |
 |
| Left skin over the aft lower skin. Hopefully this pulls down tight when the sides are rivets from top down. |
 |
| Mushroom set and bukcing bar used to set the 6 rivets. |
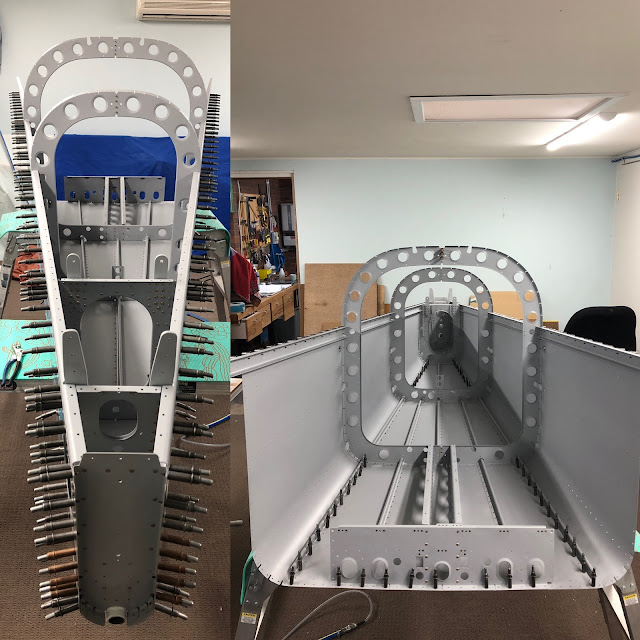
MVP (Major Visual Progress)
Once this was all done, I clecod the assembly together.
Housekeping
A couple of hosuekeeping items - astute readers will notice the J stiffners are not installed. This is because i ran out of primer. Once this was all clecod together, i checkd and the stiffners can be slid easily into position, so i may go ahead and begin the riveting of the side skins before these are ready, then slide then in later.
I pulled out the aft deck skins to see how they fit, and noticed that they didnt! There was a downward pointing flange and would not slide in... because i set 4 rivets across the top of the 1412 aft bulkhead assembly when i should have left it until later. These will have to come out, so i left myself a little note.


No comments:
Post a Comment