
Tip Ribs / Rear spar Riveting
Firstly, the gusset was riveted to the left root rib to attach this rib to the rear spar eventually, and the root ribs were riveted using flush rivets to the forward spars (flush because the elevator horns will be placed on this corner)


Counterbalance Ribs - changing the build sequence
The instructions have you rivet the 2 counterbalance ribs to each other which was easily done with the squeezer.

The instructions then have you rivet these 2 parts to the end of the spars, with the following warning:

I figured that with the counterbalance ribs riveted to the end of the spars, it could be potentially hard to check for twist when riveting - so i decided to rivet the counterbalance skins to the ribs, before i riveted the rib to the spars. I emailed Vans who said "I don’t see a problem with your proposed order of
operations. What we have in the plans is our recommended order of assembly, not
the only way. People take small deviations all the time, its personal choice
and one of the Joys of experimental aviation." - there wasn't much joy to come however.


This all went fine, except i missed dimpling a hole in one counterbalance skin - the hole in the underlying rib was dimpled so i just used the hand squeezer to gently dimple the 2 holes together. It turned out fine in the end.
 |
| The undimpled hole |
 |
| The underlying rib was dimpled |

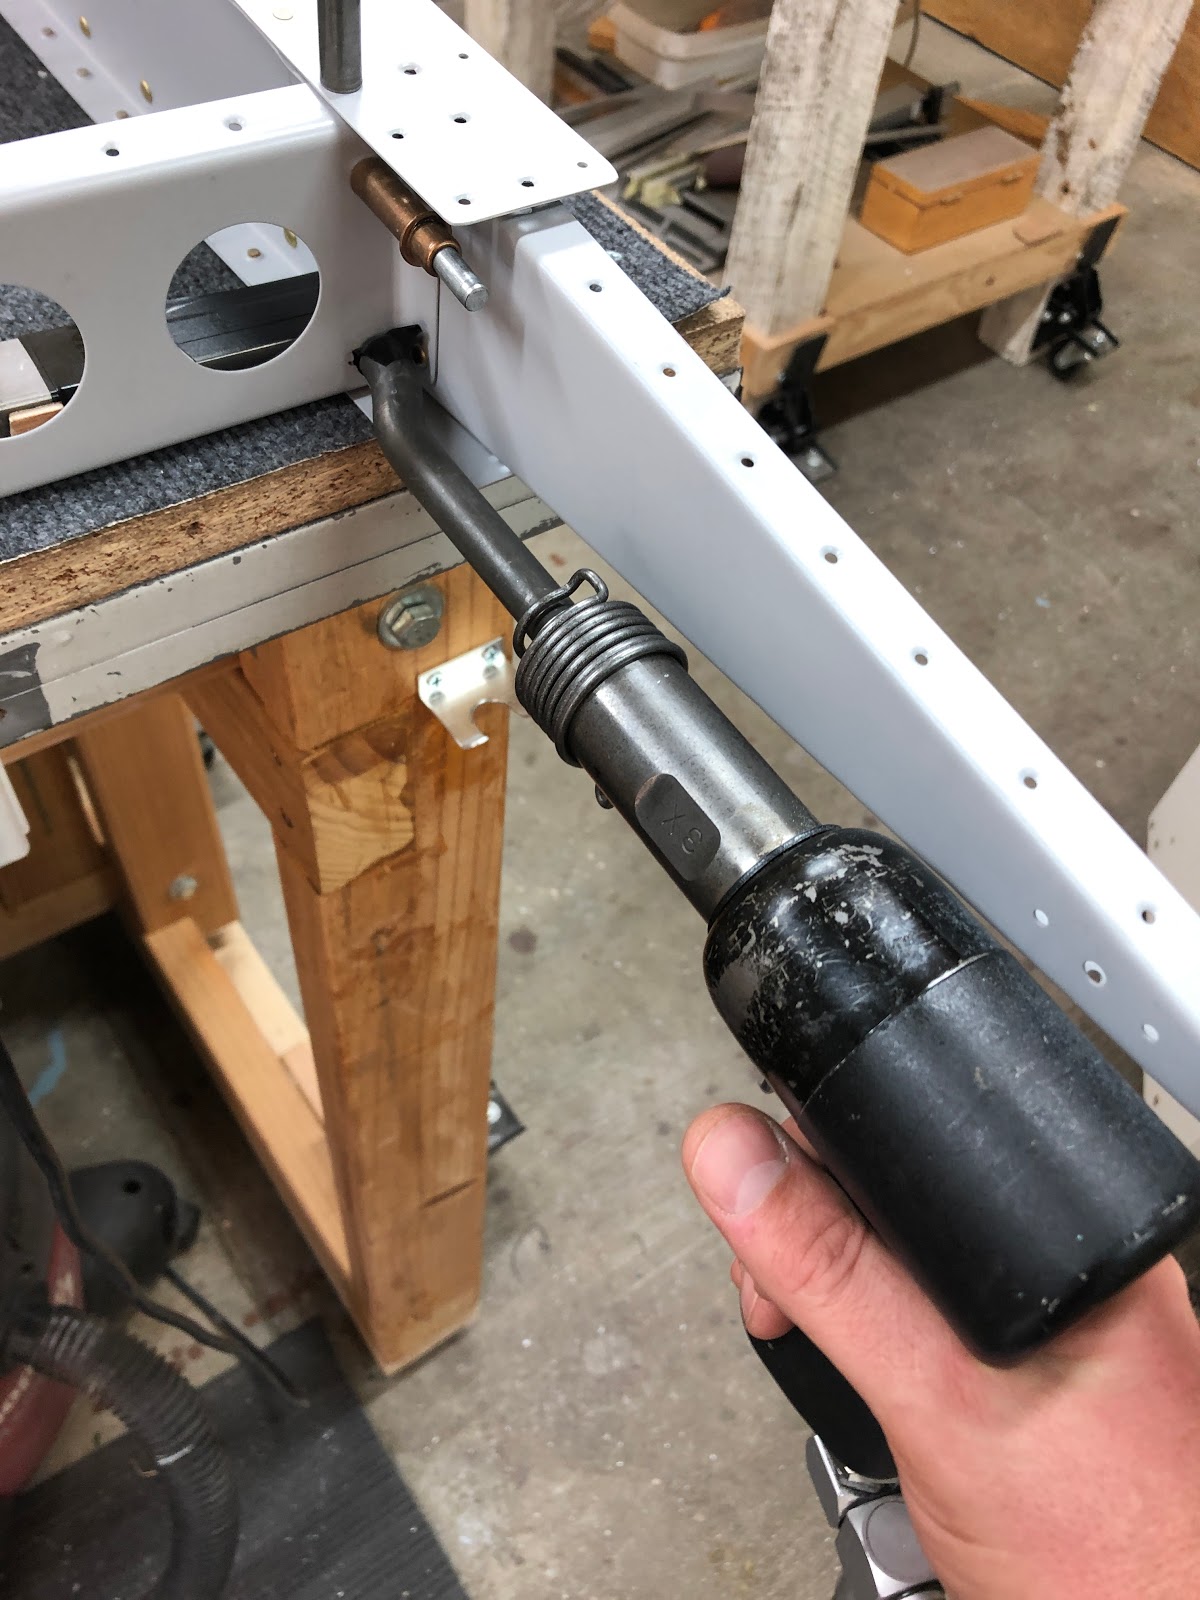
Once this was done, i moved onto riveting the assembly to the end of the spars. The rivets in end flange of the fwd spar were fine - i was able to get a squeezer on those, however the rivets between the aft flange of the inboard counterbalance rib and the web of the spar were a little more difficult.
It turns out there is a very good reason to follow Vans' order of proceedings - these rivets were now impossible to rivet with the squeezer, and i had to get fairly creative to get them set. I ended up using a long offset cupped set, and a bucking bar that was shimmed to maintain the correct orientation.

 |
| The shims were to help me keep the bar parallel to the web, since the flanges of the spar at not at 90 degrees to the web. |
Elevator Horns
Next up was to clean and prime the inside of the elevator horns, as the inside is not powder coated.

Once these were dry, they were then riveted to the forward spar / root rib assembly using the squeezer. I elected to place the manufactured head on the steel horn, rather than on the spar (which is the thinnest material and would be the conventional way to do it), as i thought it looked much better this way, and i was able to squeeze the rivets with no deformation of the spar web (as it was pretty thick anyway).


Rear Spar Assembly
Next up was the riveting of the various components to the rear spars - this included 2 shear clips on the left hand side, and one shear clip and a gusset on the right hand side. Again, convention dictates that the manufactured head of the rivet is placed on the thinner material, which in this case was the flange of the ribs. However, on the left hand elevator, you can see these rivets where the trim tab is located, plus i was worried about clearance with the trim tab, so i elected to place the manufactured head on the spar, and the shop head on the rib on the left spar. For the right i did it the conventional was as these are hidden inside the elevator.
 |
| Left hand rear spar assembly ready to be riveted. |
 |
| Left inboard shear clip - dimpled to accept the underlying top skin. The shop heads were on the rib flanges on this side. |
 |
| Right spar assembly. The gusset connects to the root rib on the right hand side. The shop heads were on the spar on this side. |
 |
| Shear clip at the end of the right spar |
 |
| Right spar done. |
Running out of parts!
As i move through this section, and the spars are getting complete, i am running out of bits on the elevator shelf!
 |
| Spars complete (sans the horns in this photo) |
 |
| Not many bits left |
Riveting the rear spars and ribs to the skins
Next up was the riveting of the LH rear spar / rib assembly to the left hand TOP skin, and the riveting of the RH rear spar / rib assembly to the RH bottom skin. The spar rivets were done by clamping the rear spar to the edge of the workbench (careful not to squash the dimples), and using a mushroom set (gun set on 20PSI) and the bucking bar. I taped a wide flat piece of plywood to the bar to help keep it parallel to the spar (the wood sits on the skin and really stops the bar from rolling).


 |
| The ply stops the bar from rolling when riveting |
For the left hand skin, were the trim tab will be located, i had to use the squeezer to get to those rivets, as the bar did not fit in between the hinge loops and the spar. I was very careful not to squash the hinge loops.

 |
| Left hand rear spar to skin rivets in the trim tab location. |
Once the spars had been riveted, the ribs were all backriveted to all 4 skins:
 |
| looking like parts of an aeroplane |
(Trim Access) DOUBLE(r) TROUBLE!
The left hand skin has the trim access doubler where the trim servo motor is located. This is backriveted to the skins, which i thought was an easy task, however for some reason i really had issues with this. As it turns out, the skin was pretty light and as i began to backrivet the AD3 rivets, the skin was slowly moving across the backrivet plate, meaning almost all the rivets bent over! Wish i had noticed this sooner, but it is a lesson for the future.
Frustrated, i drilled out 20 rivets and tried again. I had realised the issue at this point, and weighted the skin with lead shot bags, however i think because the dimples had been bent over and misshapen a little by the tipped over rivet tails, the second time did not set very well either. About 15 of them tipped over!!!!
So i bit the bullet, reamed them out to #30 and used some NAS1097 rivets in their place. This time they set nicely. OOPS indeed.


 |
| You can't tell from the outside that these are AD4 rivets - NAS1097 have an AD3 sized head |

The last task was to rivet the 2 nutplates to the flange of the doubler brace. I had previously countersunk the trim access doubler for AN426AD3 rivets, and placed these in their holes with the plan to backrivet these. However, due to the fact that they are located on the doubler brace, and not on the skin themselves, there is the thickness of the skin to contend with on the backriveting plate, making backriveting basically impossible!
Add to this the fact that i could not find a squeezer yoke that would fit 3 of the rivets in any possible orientation and i was well and truly stuck. Frustrated, i left it alone and decided to come back to it later.
Walking back into the shed to polish a second hand "special bucking bar" which i will need for the next section, it dawned on me that i could use the DRDT2 as the solution. I recall something about not using it to set rivets, but desperate times call for desperate measures!!!

 |
| These were set using the DRDT2 |
 |
| Couldn't resist getting the money shot. |

Next up is backriveting the last lot of ribs to the RH TOP skin, and then joining the elevator halves together. Mammoth day!
No comments:
Post a Comment