
In the practice kit, it requires you to countersink a piece of 0.060" angle to accept dimples in a 0.025" sheet. On my first go at this, i countersunk to flush then added 0.007" further depth (7 clicks on the countersink cage) as per Section 5 of the manual. This resulted in the dimple coupon sitting very high in the countersink, which i felt was not correct. So i kept countersinking. This resulted in a very deep countersink (almost knife edge in 0.060" material) and an elongated hole. This seemed like a bad outcome! So onto the forums, where i posed the question. I was advised to only ever go 0.007" deep - so i decided to have a practice of this and see how it came out:


What a fun exercise!
I used the vans practice project and deriveted the angle
from the 0.025" sheet. I drilled 6 x #30 and 6 x #40 holes, and dimpled
the skin.
I then (starting with the #30) countersunk in a few stages
so that a rivet sat flush:

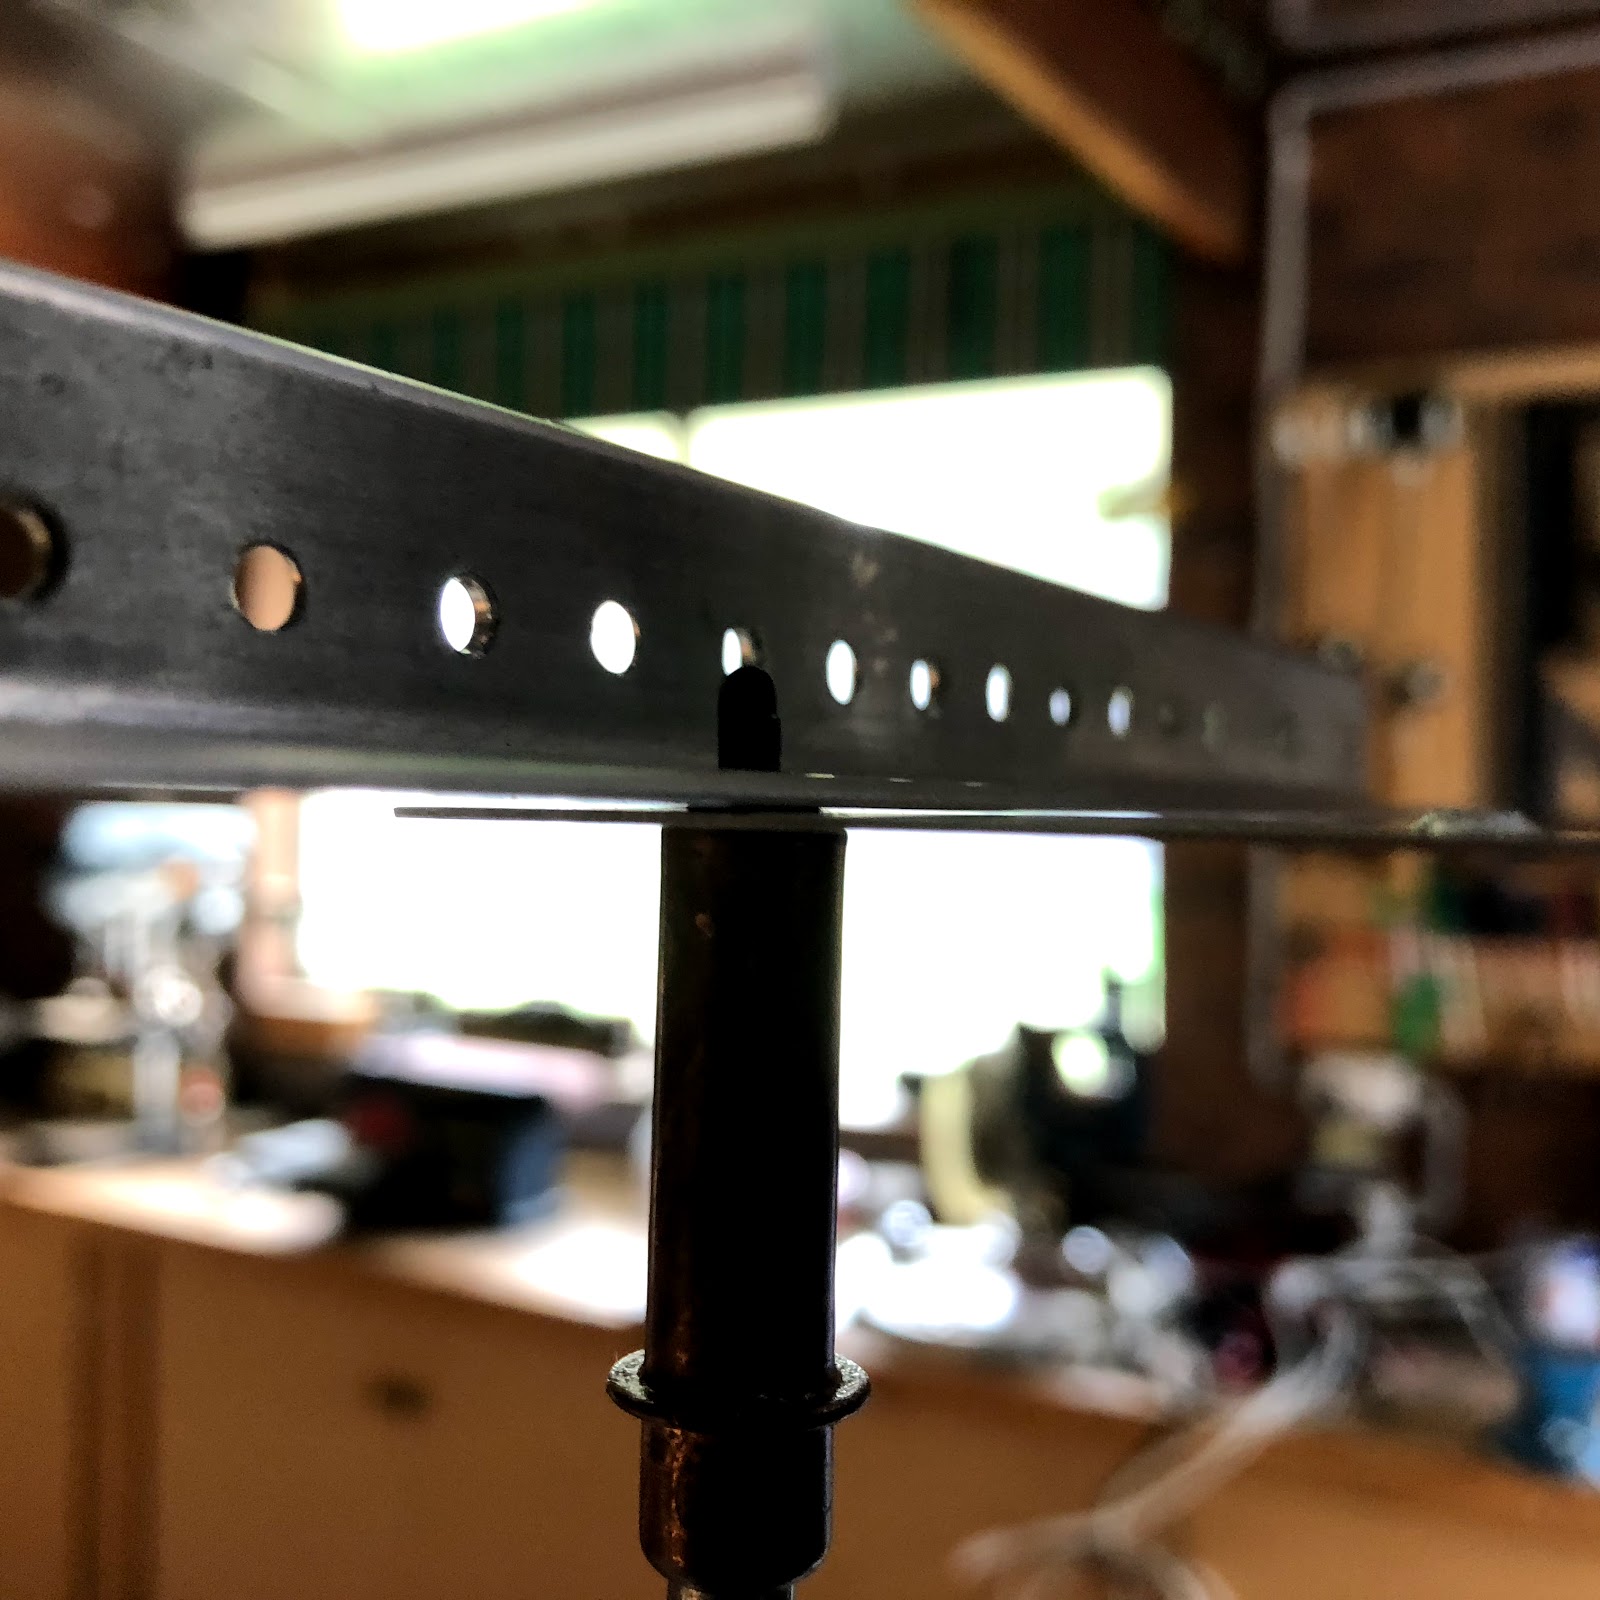
I then noted the position of the arrow on my countersink
cage, and moved it 7 "clicks" deeper.

I hit the hole again, and the rivet looks like this now:
 |
| Note the size of the "ring" around the rivet - this is what 0.007" looks like |
 |
| No knife edge. The slight elongation was due to multiple attempts at the countersink, with nothing backing it up underneath. |
I measured the depth of the rivet in the hole (it is a bit
hard to measure accurately), but it was 0.007" or thereabouts.
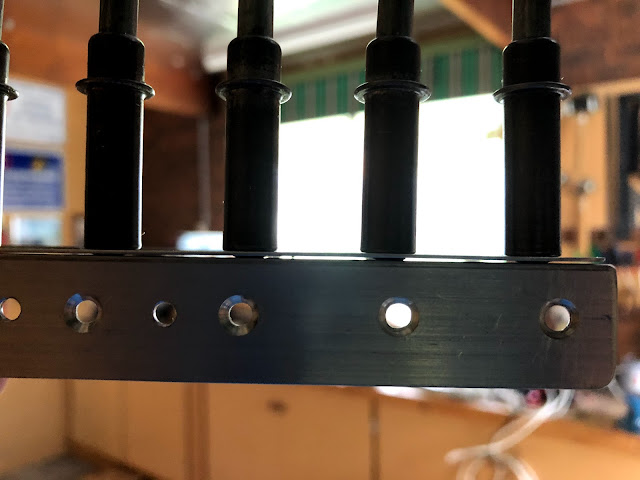
I then clecod the token to the hole. As you can see there is
a gap, and this is where i think i may have gone wrong (?) the first time. I
assumed this was not right, so kept countersinking until this gap was gone.
This resulted in almost knife edge in the angle.


I then countersunk all the other holes on the angle as
above, obviously resetting the cutter again to flush, then 7 clicks more when i
swapped to the #40 cutter. As you can see the gap is still there with all the
celcos in:


Thinking that the gap may go away when i riveted them
together, i got out the back rivet plate and finished the 12 rivets (gee i like
backriveting! - helps my counting skills!)

Alas, the gap is still there after riveting:


Outcome:
1. All advice on the forums was to just go 0.007" deeper, and accept the gap. A thread for the discussion can be found here.
2. This just didn't feel right, and you have to take what people say on the forums sometimes with a grain of salt.... however,
3. An email to vans yielded the following advice:
"Use the directions in Section 5 to avoid countersinking too deep.
There may well be a gap – the idea is to make sure the dimpled skin and countersunk part are locked together. A countersink that is to deep will prevent that, and though there is no gap between the parts, the joint is not so strong."Lessons Learned
- The countersink cage is a lot easier to use in the air drill, however it can spin way too fast resulting in a screetching sound, which is the cutter chattering, and you get bumpy marks in the countersink. Far better to use the electric drill, however this has it's own issues; the weight of the drill and battery can make it hard to keep the cage perpendicular to the piece.
Lesson: Use the electric drill but be really careful to keep it perpendicular OR set the stop on the cage 0.005" shallower and use the air drill very slowly. THEN set it to the final depth and redo also slowly. - The dimples will simply never sit flush in the countersink - this is NORMAL. It is vital that the hole not be elongated, or the countersink made knife edge or the integrity of the joint is at question. The whole point is to lock the dimples into the countersinks to that they can't move laterally - this is where the strength of the joint comes from.
Lesson:
- Countrsink to only 0.007" deep in all cases and accept any slight skin gap.
- Never make the countersink wider than the size of the female dimple size - this should be considered the absolute max size.
- Don't forget that if the edge is broken on the piece, it may not matter if the skin doesn't sit flush - you won't see it.
- A test piece of the same thickness needs to confirm that no knife edge will happen. (the trailing edge is the exception here, as it is likely to knife edge a little bit.
- It may be required to clamp a backup piece below the piece in question to ensure the cutter pilot does not elongate the hole.
- PRACTICE ON SCRAP FIRST AND WORK OUT A FINAL DEPTH SETTING / PROCEDURE.
- A drill press also helps to ensure no cutter pilot movement and you get a better hole.
What a fun exercise!
No comments:
Post a Comment